Free Crochet Scarecrow Amigurumi Pattern – Halloween & Fall Harvest Doll With Hat And Hair
Patchy hat, straw poking out everywhere, and somehow the most lovable thing you’ll stitch up this fall. This Crochet Scarecrow Amigurumi pattern brings all that cozy harvest energy into one beginner friendly project that works up in a single evening and looks absolutely perfect styled into any autumn corner of your home. Warm rusty oranges, faded denim blues, and a little bit of yarn scraps for that signature straw effect — this is the kind of pattern that makes your whole Halloween and harvest display finally feel complete.
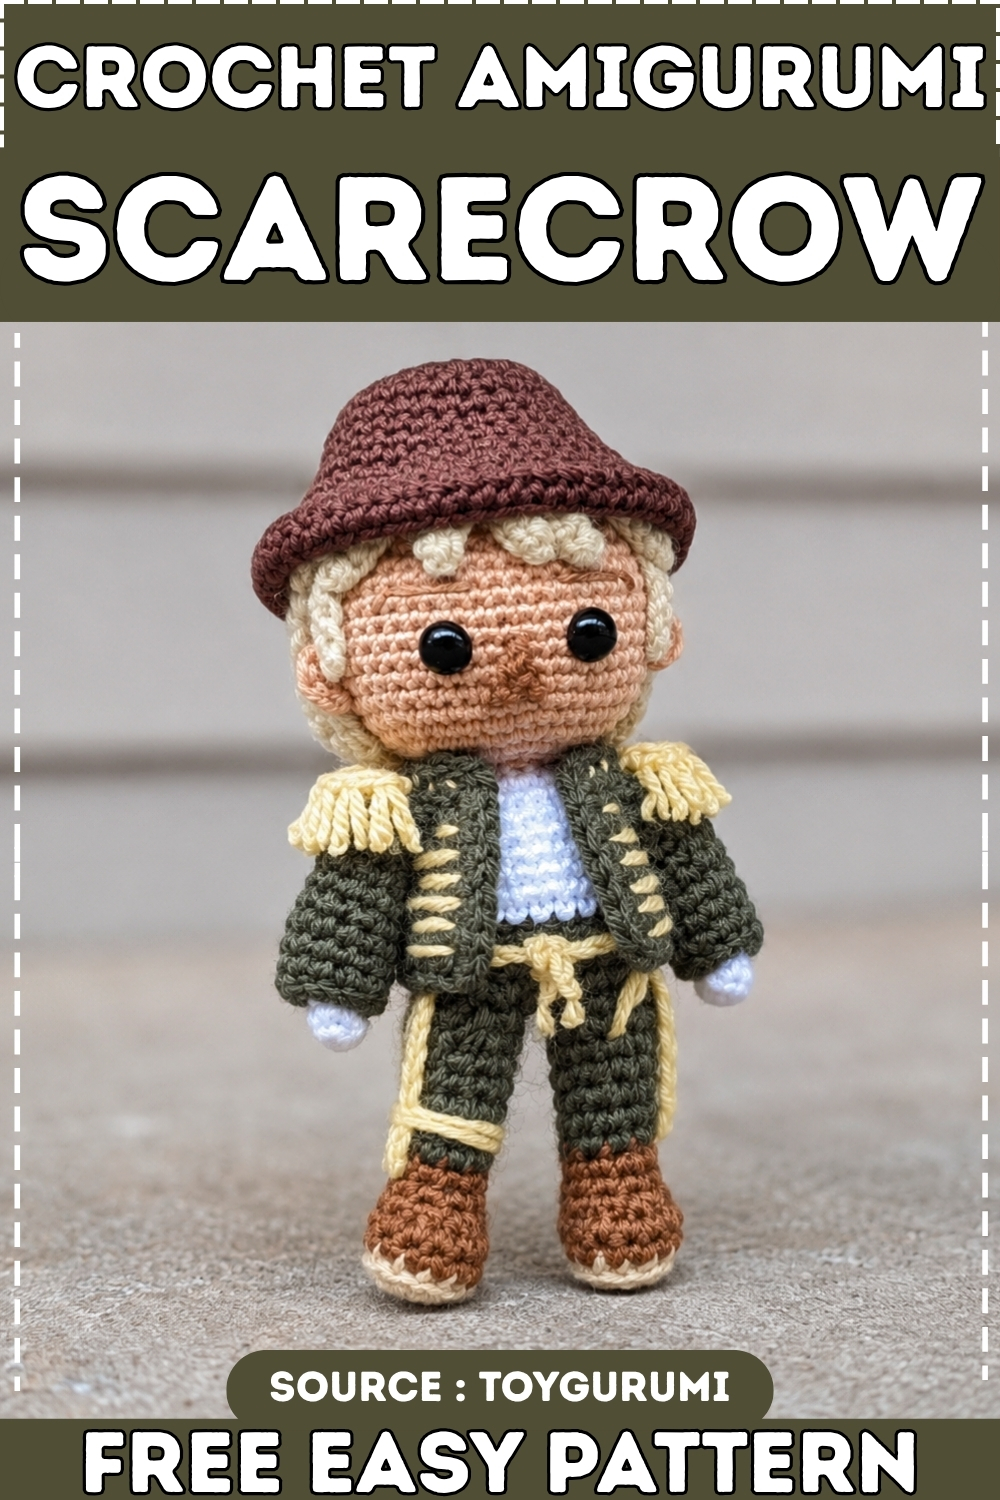
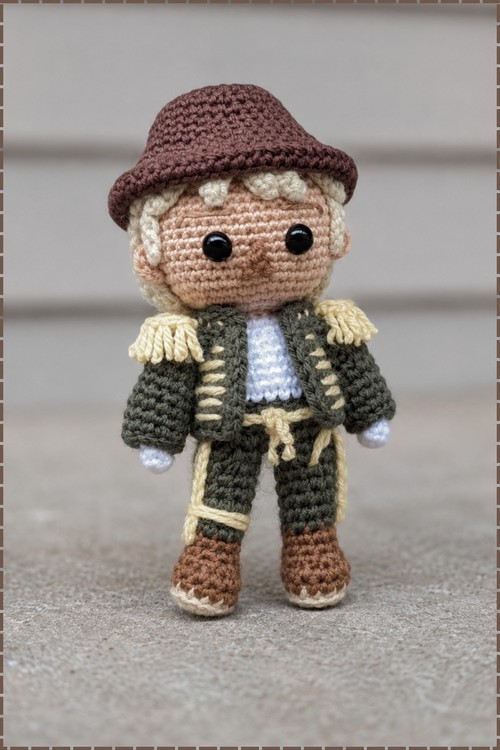
Fully dressed amigurumi figures take considerably more planning than single-piece designs, and this crochet scarecrow pattern delivers on every element, a tailored olive coat with yellow fringe epaulettes, brown boots, yarn hair peeking out from under a structured hat, and a stitched face that gives the character real personality. Each component of the costume is crocheted separately and assembled onto the body, which means the construction is more involved than a simple stuffed animal but the finished result looks like a proper collectible figure. The color palette of olive, cream, brown, and yellow reads as distinctly autumnal without leaning into the usual Halloween orange.
Crochet Scarecrow Amigurumi
This Pattern Is Worth the Effort
Nine separate pieces sounds like a lot. For a first multi-piece amigurumi, it actually works in your favor — each component is small and quick on its own, which means you get regular small finishes rather than one endless round-count marathon. The legs and body connect into a single piece mid-construction, which is a satisfying moment when it works out, and the hair strands are genuinely fast once you’ve worked a few of the chains. The hat’s brim edge uses half double crochet into front loops only to create the characteristic floppy brim — that single technique decision is what separates this from a hat that looks like a tube.
Something makers often notice with this design: the corn-colored shoulder pieces are small and easy to rush, but they do a lot of visual work on the finished figure. Take the time to position them symmetrically and the whole scarecrow reads as intentional.
Pieces List
- Legs — make 2
- Body — continued from the legs, make 1
- Head — make 1
- Arms — make 2
- Jacket sleeves — make 2
- Shoulder pieces — make 2
- Collar pieces — make 2
- Hair — make 1 (base circle with 24 strands)
- Hat — make 1
Materials
- Heather yarn (legs/shoes and hair)
- Light Brown yarn (shoe tops)
- Green yarn (pants and jacket)
- White yarn (shirt/body upper section and collar)
- Bisque yarn (head and arms/hands)
- Almond Brown yarn (hat)
- Corn yarn (shoulder accent pieces)
- Crochet hook: 2.75mm for all pieces except hair (use a larger hook or work loosely for hair strands to keep them relaxed)
- Safety eyes: 10mm black, 2 per scarecrow
- Polyfil stuffing
- Stitch markers
- Tapestry needle
- Pins
- Scissors
Stitch Abbreviations
- mc — magic circle (magic ring)
- ch — chain
- st — stitch
- sl st — slip stitch
- sc — single crochet
- hdc — half double crochet
- dc — double crochet
- tr — treble crochet
- inc — increase (2 sc in same stitch)
- dec — invisible decrease (through front loops of next 2 stitches)
- BLO — back loops only
- FLO — front loops only
Technique Notes for Beginners
- Magic ring: Make a loop with the yarn tail, hold the cross point, insert hook through the loop, pull up a working loop, chain 1. Work your starting stitches into the center of the ring, then pull the tail to close it snugly.
- Continuous spiral: Do not join rounds with a slip stitch. Keep working in a continuous circle, moving your stitch marker to the first stitch of each new round as you pass it.
- BLO (back loops only): When a round says BLO, insert your hook only through the back of each stitch rather than through both loops. This creates a visible ridge on the outside of the piece — in this pattern it marks the color change between the shoe and the trouser leg.
- Closing a sphere: After the final decrease round, cut the yarn leaving a long tail. Thread the tail onto a tapestry needle and weave through the remaining open stitches. Pull tight to close the hole, then pass the needle through the center of the piece and back out to lock it. Trim.
The Pattern
Part 1 — Legs (make 2)
Color: Heather yarn
- R1: 6 sc in magic ring (6)
- R2: (inc) x 6 (12)
Change to Light Brown yarn.
- R3: 1 sc in each stitch around — worked in BLO (12)
- R4: 1 sc in each stitch around (12)
- R5: 3sc, 3dec, 3sc (9)
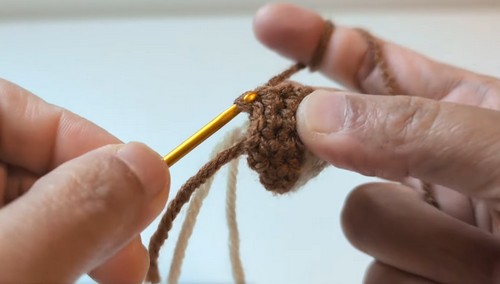
Change to Green yarn.
- R6–R13: 1 sc in each stitch around — 8 even rounds (9)
Do not fasten off the second leg. You will continue from here into the body.
Note on the second leg: Before joining, work 4 extra sc on the second leg to bring the working yarn to the correct position for joining at center. Check that both feet point in the same direction before you join.
Don’t let crochet patterns intimidate you! If you’re a beginner, the video tutorial below makes it super easy to follow along!
Shape checkpoints:
- After R2, the foot base is a small flat disc of 12 stitches.
- After R5, the toe end narrows — 9 stitches, with a clear difference between the rounded toe (R1–R2) and the straight ankle section beginning.
- After R13, the leg should look like a narrow green tube sitting on a small rounded shoe. Stand it upright — it should be stable enough to balance briefly on the shoe base.
Part 2 — Body (continued from legs)
Joining the legs — R14:
- On the second leg, chain 2. Insert hook into first leg and work: 9 sc on the first leg, 2 sc across the chain-2 bridge, 9 sc on the second leg, 2 sc across the opposite side of the chain-2 bridge (22)
Continue in Green yarn.
- R15–R17: 1 sc in each stitch around — 3 even rounds (22)
- R18: 5sc, 1dec, 9sc, 1dec, 4sc (20)
- R19: 1 sc in each stitch around (20)
- R20: 4sc, 1dec, 8sc, 1dec, 4sc (18)
Change to White yarn.
- R21: 1 sc in each stitch around (18)
- R22: 3sc, 1dec, 7sc, 1dec, 4sc (16)
- R23: 1 sc in each stitch around (16)
- R24: (6sc, 1dec) x 2 (14)
- R25: (5sc, 1dec) x 2 (12)
- R26: 1 sc in each stitch around (12)
Stuff the body firmly with polyfil. Fasten off, leaving a long tail for attaching the head.
Shape checkpoints:
- After the leg join at R14, you should have a single continuous oval of 22 stitches with a visible gap between the legs at front and back that will fill in as you work the body rounds.
- After R17, the lower body is a straight tube in green — trouser legs below, a small waist taking shape above.
- After R20, the green section is visibly narrowing toward the waist.
- After R26, the white shirt section tapers to 12 stitches at the neck opening. The body should hold its shape with stuffing and sit upright on the legs.
Part 3 — Head (make 1)
Color: Bisque yarn
- R1: 6 sc in magic ring (6)
- R2: (inc) x 6 (12)
- R3: (sc, inc) x 6 (18)
- R4: (2sc, inc) x 6 (24)
- R5: (3sc, inc) x 6 (30)
- R6: (4sc, inc) x 6 (36)
- R7: (5sc, inc) x 6 (42)
- R8: (6sc, inc) x 6 (48)
- R9–R17: 1 sc in each stitch around — 9 even rounds (48)
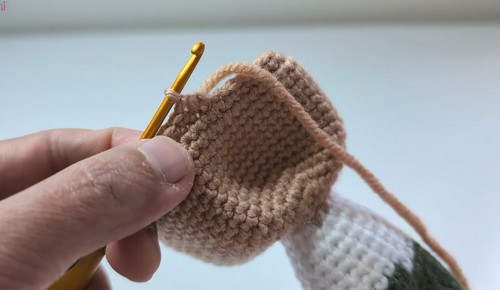
Safety eye timing — insert eyes now, before continuing.
Place the 10mm eyes between R14 and R15 (counting from the magic ring), spaced 6 stitches apart. See the Safety Eye Timing section below before proceeding. Embroider the face patches and any additional details after the eyes are in, while the head is still open.
- R18: (6sc, 1dec) x 6 (42)
- R19: (5sc, 1dec) x 6 (36)
- R20: (4sc, 1dec) x 6 (30)
- R21: (2sc, 1dec) x 6 (18) [CHECK — standard progression from 30 would be (3sc, 1dec) x 6 = 24; the source gives (2sc, 1dec) x 6 = 18, which skips a round. Verify against the video — it may be intentional to close faster, or there may be a missed round between R20 and R21]
- R22: (sc, 1dec) x 6 (12)
- R23: (dec) x 6 (6)
Stuff firmly with polyfil. Close and fasten off. Attach the nose.
Shape checkpoints:
- After R8, the head is a wide flat disc — 48 stitches across. It should lie completely flat.
- After R12 (mid-way through the straight section), the disc has deepened into a shallow bowl. This is where the head starts to look like a sphere rather than a plate.
- After R17 with eyes inserted, the round is still wide open and the shape is a hemisphere — you can see clearly inside. Get the eyes in now.
- After R23 and closing, the head is a full round sphere. It should feel firm, not squishy — add more stuffing through the closing if needed before you pull the final stitches tight.
Part 4 — Arms (make 2)
Color: Bisque yarn
- R1: 6 sc in magic ring (6)
- R2–R3: 1 sc in each stitch around — 2 even rounds (6)
- R4–R8: 1 sc in each stitch around — 5 even rounds (6)
Change to White yarn.
- Continue working 1 sc in each stitch around for several more rounds until the arm reaches the desired length for your figure. Slip stitch to join. Fasten off, leaving a long tail for sewing.
- Note: The source does not give a specific round count for the white section of the arm. Work until the arm length looks proportional to the body — roughly the same height as the body from shoulder to waist. [CHECK — verify arm length against the video]
Shape checkpoint: The arm is a narrow tube throughout. It should not be stuffed — leaving it flat gives the scarecrow its characteristic floppy-armed posture.
Part 5 — Jacket Sleeves (make 2)
Color: Green yarn
This piece is worked flat (back and forth in rows with turning chains), unlike the pieces above which are worked in the round.
- R1: Ch 4. Work 4 sc along the chain, 1 sc on the side, 4 sc along the opposite side of the starting chain, 1 sc on the side (10)
- R2: Continue around all sides working 1 sc in each stitch (10)
- R3: Ch 1, turn. 3sc, 4sc into the corner chain-4 space, 8sc, 4sc into the opposite chain-4 corner, 3sc (22) [CHECK — count and construction of corner increases; verify against the video]
- R4: Ch 1, turn. 6sc, 1inc, 8sc, 1inc, 6sc (24)
- R5–R8: Ch 1, turn. 1 sc in each stitch — 4 even rows (24)
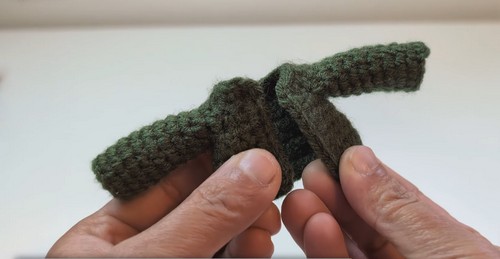
Slip stitch to join the edges. Fasten off and weave in the tail ends. Repeat for the second sleeve.
Note: Attach yarn at the back loops after completing the sleeve to add surface detail lines — the source describes this as a jacket stitching effect.
Part 6 — Shoulder Pieces (make 2)
Color: Corn yarn
- R1: 6 sc in magic ring (6)
Fasten off, leaving a long tail for sewing. Make 2.
These are small flat circles that attach to the jacket at each shoulder point.
Part 7 — Collar Pieces (make 2)
Color: White yarn
- Ch 2
- 3 sc in the 2nd chain from hook, sl st in the same stitch
- Ch 3, 1 sl st in the 2nd chain from hook, 1 sc in the next chain
- Sl st to join. Fasten off, leaving a long tail for sewing.
Make 2. These are small pointed collar shapes.
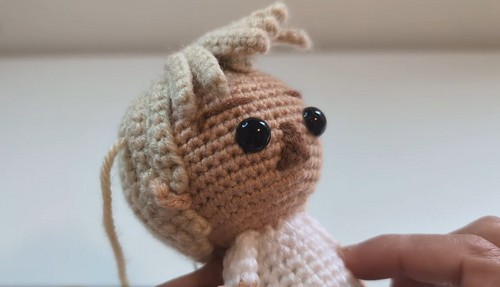
Part 8 — Hair (make 1)
Color: Heather yarn — use a larger hook or work very loosely for this piece
Hair base:
- R1: 6 sc in magic ring (6)
- R2: (inc) x 6 (12)
- R3: (sc, inc) x 6 (18)
- R4: (2sc, inc) x 6 (24)
Hair strands (worked from the base circle):
- S1–S15: Ch 16, 1 sc in the 2nd chain from hook, 1 sc in each remaining chain (15 sc), sl st into the base circle
- S16: Ch 11, 1 sc in the 2nd chain from hook, 1 sc in each remaining chain (10 sc), sl st into the base circle
- S17–S23: Ch 9, 1 sc in the 2nd chain from hook, 1 sc in each remaining chain (8 sc), sl st into the base circle
- S24: Ch 11, 1 sc in the 2nd chain from hook, 1 sc in each remaining chain (10 sc), sl st into the base circle
Fasten off, leaving a long tail for sewing. S1–S15 attach at the back of the head. S16 and S24 attach near the ears. The shorter strands (S17–S23) fill in the sides.
Shape checkpoint: Work the hair strands loosely — pulling them tight creates stiff spikes rather than floppy straw-like strands. If your strands are coming out too rigid, go up another hook size or consciously loosen each chain as you work it.
Part 9 — Hat (make 1)
Color: Almond Brown yarn
- R1: 6 sc in magic ring (6)
- R2: (inc) x 6 (12)
- R3: (sc, inc) x 6 (18)
- R4: (2sc, inc) x 6 (24)
- R5: (3sc, inc) x 6 (30)
- R6: 1 sc in each stitch around (30)
- R7: (2sc, inc, 2sc) x 6 (36)
- R8: 1 sc in each stitch around (36)
- R9–R10: 1 sc in each stitch around — 2 even rounds (36)
- R11: (3sc, inc, 3sc) x 6 (48)
- R12: 1 sc in each stitch around (48)
- R13: (7sc, inc) x 6 (54)
Brim edge:
- Sl st to join. Ch 2. Work 1 hdc in the front loop of each of the next 25 stitches. Ch 2. Sl st into the next stitch.
- Fasten off, leaving a long tail for sewing.
Shape checkpoints:
- After R5, the crown is a flat disc of 30 stitches — the beginning of the hat top.
- After R10, the hat crown is a short, straight-sided tube sitting above a widening base.
- After R13, the full brim is established at 54 stitches. The brim edge in front loops only creates the characteristic drooping brim shape — if it’s sitting flat and stiff, check that you worked into front loops only rather than both loops.
Safety Eye Timing
- Insert the 10mm safety eyes during the head, after R17 and before starting R18. The positioning given in the source is between R14 and R15, spaced 6 stitches apart. Count carefully from the magic ring rather than from the open end — it’s easy to get the direction backwards when the head is still open. Click the backing on firmly from the inside once positioned. Eyes cannot be moved once the backing is on.
- Important note on the source’s eye placement: The transcript mentions attaching eyes “between R34 & R35” which cannot be correct for a head that only goes to R23. This appears to be a transcript error. Based on the head construction, a placement between R14–R15 (the middle of the straight section) is the logical position. [CHECK — verify eye row placement against the video]
- For any scarecrow going to a child under three, skip safety eyes entirely. Use satin stitch in black yarn for the eyes and embroider a small white highlight dot in a single strand. The result looks intentional and removes the only component that poses a risk.
Assembly
Pin every piece before sewing any of it. Stand the whole figure back and look at it from a distance. Adjustments at the pinning stage take thirty seconds; unpicking sewn amigurumi takes considerably longer.
- Step 1: Sew the head onto the top of the body, centered over the neck opening.
- Step 2: Attach both arms to the sides of the body at shoulder height. The arms should be unstufffed so they hang loosely.
- Step 3: Place the jacket sleeves over the body and sew them in position, covering the arm attachment points.
- Step 4: Attach the corn-colored shoulder circles at each shoulder point on the jacket.
- Step 5: Sew the collar pieces at the neckline, one on each side.
- Step 6: Sew the hair piece onto the head — strands S1–S15 at the back, S16 and S24 near the ears, shorter strands filling in the sides.
- Step 7: Position and sew the hat on top of the hair.
- Step 8: Attach the nose to the face.
- Step 9: Embroider the mouth and cheek patch details using corn or almond brown yarn.
- Step 10: Weave in all remaining ends.
Stuffing
The body and head stuff firmly — both should hold their shape unaided when set down. The arms do not get stuffed; flat arms give the scarecrow its floppy, straw-stuffed character. The legs are narrow enough that you may need to use a pencil or chopstick to push small amounts of stuffing down into the foot before the leg tube closes. Don’t overstuff the neck area of the body — too much bulk there makes it harder to sew the head on at a natural angle.
The Character Dial — Friendly vs Field-Worn
The scarecrow sits naturally in warm autumn territory, which means both directions from center are interesting.
Friendlier: Switch the bisque head yarn to a soft peach or pale cream. Make the cheek patches in pink rather than corn yellow. Use a pastel heather for the hair strands — dusty rose or soft sage reads as a garden scarecrow rather than a Halloween one. Add small embroidered flowers to the hat brim in the collar yarn. This version lives well on a fall mantel alongside pumpkins and dried flowers well into November.
More weather-beaten: Use a darker, grayer bisque for the face and hands. Substitute the clean almond brown hat with a darker charcoal brown. Deliberately uneven the hair strands — some long, some short, as though the wind has been at it for a season. Use a muted, slightly muddy green for the jacket rather than a bright one. Embroider the face features asymmetrically: one eye stitch slightly higher, the mouth slightly crooked. The overall effect is a scarecrow that has actually been standing in a field.
Colourways
- Classic Field: The pattern’s original palette — heather, light brown, green, white, bisque. Works because it was designed as a unit.
- Autumn Harvest: Swap the green for a warm rust or pumpkin orange. Use a deep cream instead of white for the shirt. The corn yellow shoulders pop harder against orange than against green.
- Midnight Garden: Dark charcoal for the jacket, near-black almond for the hat, pale gray-green for the trouser legs. Cooler and slightly eerie — still recognizably a scarecrow.
- Countryside Linen: Oatmeal for the body, tan for the shoe tops, sage green for the jacket. Muted and naturalistic. Looks at home on a bookshelf year-round, not just in October.
Display Ideas
This is a figure that earns a proper display spot rather than sitting in a bowl. Stand it on a small wooden spool or a wrapped gift box to give it height on a tiered tray. On a mantel, it reads best flanked by something low — a flat pumpkin or a spread of autumn leaves — rather than placed between tall candles where it disappears. A porch shelf with a covered overhang works well if the piece is away from direct rain. It also makes a strong gift topper tied with raffia or twine, particularly for a fall birthday.
After the Season
Store the scarecrow in a fabric bag or a small box with a loose lid, not a sealed plastic bag. The hair strands can get compressed in tight storage and lose their floppy shape — if that happens, hold them briefly over steam and gently reshape while warm. The hat brim is the most fragile structural element; pack something soft underneath it in the box to prevent it being crushed flat. Brought out in September, it will look right through to Thanksgiving.