
Free Crochet Ball Ornament Christmas Baubles Pattern
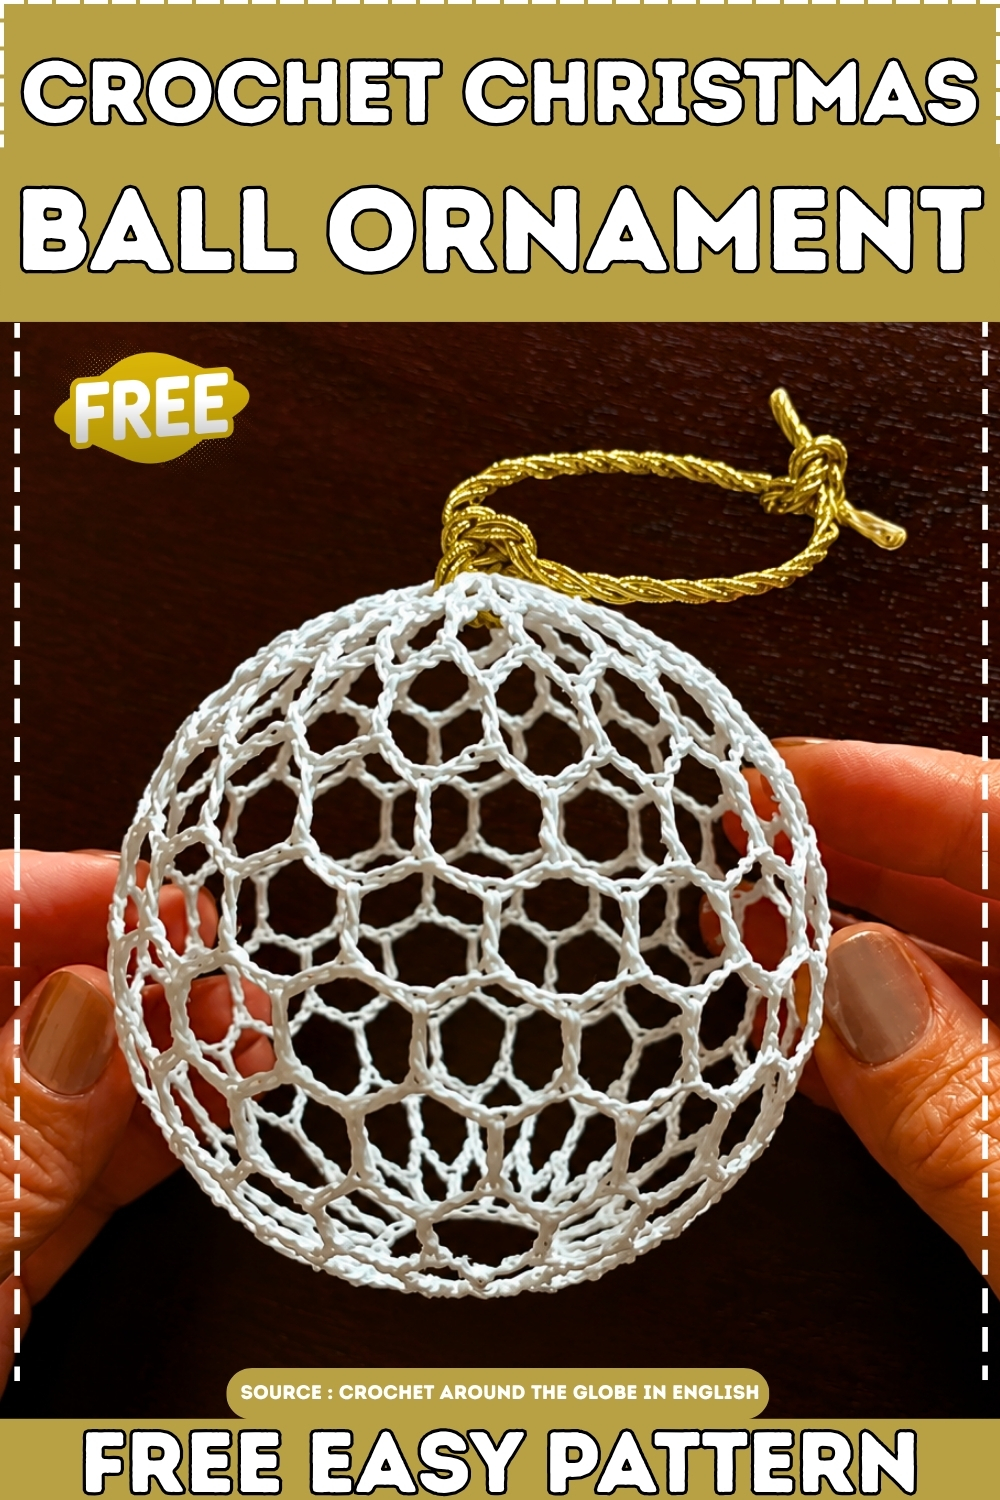
Cover a plastic bauble you already own or stuff the crochet ball ornaments free pattern on its own, whichever you prefer. Both routes use the same rounds. Work a set in three colours and the tree reads as intentional rather than mismatched.
A sphere that comes out lopsided almost always means the decrease rounds did not mirror the increase rounds, so this free crochet ball ornament christmas baubles pattern gives you both halves counted out to match. The whole thing works in continuous rounds from a magic ring, closing at the top where the hanging loop goes. Stuff it firmly or the ball flattens on the tree. One small ball takes a few metres of yarn, which makes a set of twelve cheap to produce.
Crochet Ball Ornament
Countdown Block
One ball takes about 45 to 60 minutes of actual hook time. Then it stops being your problem and becomes the balloon’s, because the starch needs a full 24 hours to set hard. A batch of six runs roughly five hours of crocheting, spread over an evening or two, and they all dry together on the same windowsill overnight. Which means the real deadline is not the crochet. Start four days before you need them hanging and you are comfortable. Start two days before and you will make it, tightly. Anything under 36 hours and you will be hanging damp ornaments, which sag and never fully recover their shape.
Where It Lives in the Room
This is a hanging piece first and a shelf piece second. On a tree it reads best on the outer third of a branch where light passes straight through the open lattice, so the shadow of the stitchwork falls on the branch behind it. Away from the tree it wants a bowl, a hook, or a bare wall. The one thing it cannot do is sit flat on a surface next to solid objects, because the open mesh disappears against clutter. Give it either backlight or empty space. It needs one of the two to be visible at all.
Display Ideas
On the tree
Hang them at mid-depth rather than at the tips, with a warm bulb sitting behind. The starched thread throws a faint grid shadow that solid baubles cannot do.
Garland and swag
Thread six or eight onto a length of jute at uneven intervals along a mantel garland. Uneven spacing matters here more than it does with matched glass balls.
Bowl and tiered tray
A shallow wooden bowl of nine or ten, no filler underneath. They stack loosely because they are hollow and light, and the pile keeps its air.
Window
Fishing line, a suction hook, three balls at staggered heights. Daylight through white thread is the strongest version of this ornament and costs nothing to set up.
Gift topper
One tied onto a parcel with narrow ribbon, threaded through the mesh rather than glued. It survives the post better than you would expect and the recipient keeps it.
Wreath
Cluster three in one quadrant, tucked into greenery so the branches show through the openings from behind.
Materials
- Size 10 cotton crochet thread, white or your chosen colour
- 2.0 mm hook, or thereabouts; the tutorial uses 1.95 mm
- Strong starch solution
- One small balloon per ball
- Fine ribbon or thread for the hanger
- Blunt needle for weaving ends
Pieces List
- Ball body, worked in the round, one per ornament. That is the whole make. No separate pieces, no seaming, no joining.
The Pattern
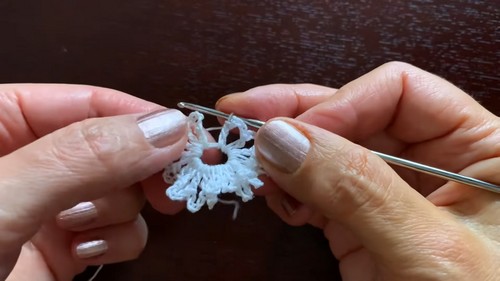
Round 1
- Make a magic ring.
- Ch 3, which counts as the first dc, then ch 5.
- Work 1 dc into the ring, ch 5. Repeat around.
- Continue until you have 20 dc in the ring, counting the beginning ch 3 as one of them.
- To join, do not work the last ch 5. Instead ch 2, then work 1 dc into the 3rd ch of the beginning ch 3. This lands your hook in the middle of a chain space rather than at its end, which is where every following round begins. [20 dc, 20 ch-5 spaces] Shape checkpoint: this round lies flat as a spoked wheel and looks far too open to become a sphere. That is correct. Do not tighten the ring to close the gap, because the balloon needs that opening later.
Rounds 2 to 9
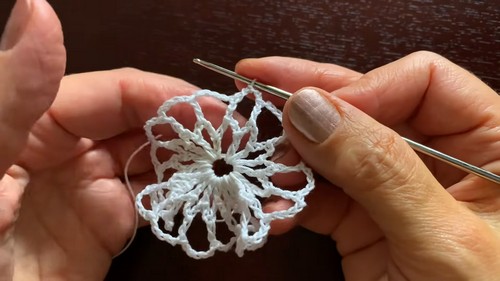
- Ch 3, which counts as the first dc, then ch 5.
- Work 1 dc into the middle of the next ch-5 space, then ch 5.
- Repeat around, always placing the dc into the centre of the space rather than into a stitch.
- To join, ch 2 instead of the final ch 5, then work 1 dc into the 3rd ch of the beginning ch 3.
- Repeat this identical round until nine rounds are complete in total. [20 dc, 20 ch-5 spaces each round] Shape checkpoint: by round 4 the mesh should be cupping into a shallow dome, not lying flat.
- By round 7 it wants to be a slack bag that holds a rough ball shape when you push a fist inside.
- If it is still flat at round 6 your chain spaces are pulling tight and the finished ball will be small and stiff.
Weaving in the tail
- Before the final round, weave the starting tail in around the magic ring opening and secure it.
- Do this now rather than later. Once the piece is wet with starch the tail is almost impossible to hide neatly. [no stitch count]
Round 10, final round
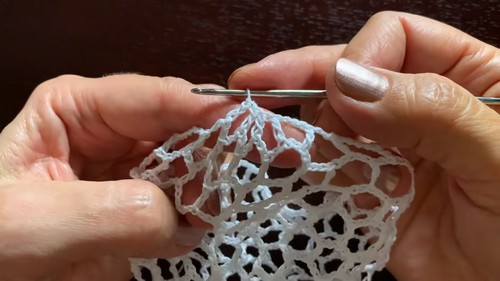
- Ch 3, which counts as the first dc.
- Work 1 dc directly into the middle of the next ch-5 space, with no separating chains.
- Repeat into every ch-5 space around.
- Join with a sl st into the 3rd ch of the beginning ch 3, then fasten off. [CHECK — count unclear in source. The transcript gives 20 dc for this round, but with 20 chain spaces plus the beginning ch 3 you would expect 21. Work one dc per space and let the count fall where it falls; the round closes correctly either way.] Shape checkpoint: this round cinches hard and pulls the top into a tight collar. The ball should now look like a small string bag with a drawstring neck. That neck is the balloon opening.
Starching and Shaping
- Soak the finished ball in a strong starch solution for a few minutes until the thread is fully saturated.
- Wring it out well. Wetter is not better; excess starch dries into cloudy flakes in the chain spaces.
- Push a deflated balloon through the wider magic ring opening at the base.
- Inflate it inside the ball, stretching the mesh out to roughly 3.5 inches across, then tie the balloon off.
- Adjust the chain spaces with your fingertips while the thread is still soft. This is the only window you get.
- Hang or stand it to dry for about 24 hours, turning it once if one side is against a surface.
- Untie or pop the balloon and pull it gently out through the opening.
- Attach ribbon or thread through the top for hanging.
The oddest part of this make, and nobody warns you: a starched ball goes through a stage at around hour six of drying where it feels finished and is not. Squeeze it then and you leave permanent thumb dents in the mesh. Leave it alone until the thread sounds faintly papery when you flick it.
The Character Dial: Rustic Versus Bright
- Rustic pulls this ornament toward something that looks salvaged from a box in an attic. Use ecru or unbleached cotton rather than optic white. Starch a shade heavier so the mesh sits stiff and slightly irregular, and skip the perfectly even inflation, letting one ball come out marginally egg-shaped. Hang on jute twine or torn linen strip instead of ribbon. A very light tea soak before starching knocks the brightness back by two or three shades and reads as age rather than dirt. Cluster these in odd numbers on bare branches and let them look like they have been used before.
- Bright goes the opposite way and treats the ball as a light-catcher. Optic white or a saturated single colour, inflated to the full 3.5 inches so every chain space opens wide. Add a dusting of fine glitter to the wet starch and it embeds rather than sheds, which is the only glitter method here that survives a season. Metallic blending thread held with the cotton on rounds 9 and 10 alone gives a rim of shine at the top without making the whole ball busy. Narrow satin ribbon, a small bell inside before you remove the balloon, sharp edges everywhere.
- The middle setting is the one most people actually want: white thread, standard starch, matte cotton ribbon. Boring on paper, best on a tree with warm lights.
Safety Eyes and Under-Threes
This ornament has no eyes and no safety eyes are used anywhere in the pattern. If you are adding a face to turn it into a hanging character, insert the posts between rounds 6 and 7, before the piece is starched and before the balloon goes in. Once starch has set, the mesh will crack around a post pushed through it.
Two hard limits. For anyone under three, embroider the features in matching thread instead and skip hardware entirely, because an open lattice gives small fingers direct access to the back of a post. And for anything heading into a party bag, a classroom, or a school fair, embroider regardless of the child’s age, since you will never know who ends up holding it. Starched thread is also brittle enough to snap into a stiff fragment if a toddler crushes it, which is a separate reason to keep these hanging and out of reach rather than in a toy basket.
Assembly
There is nothing to sew together. Assembly here is the hanger and the hanging. Thread ribbon through two adjacent chain spaces at the closed end rather than a single one, so the weight pulls on two points and the ball hangs level instead of tipping. Knot on the inside where it disappears. If you are adding a bell or a small bauble inside, drop it in before the balloon comes out, because the neck opening closes up as it dries and gets tighter than it looks. Pin nothing, sew nothing, but do check the hang before you commit the knot.
Stuffing
Nothing goes inside this one. The balloon is the temporary stuffing and it leaves entirely. The mistake worth naming is over-inflating: push past about 3.5 inches and the chain spaces stretch into long slack loops that never firm up, giving you a saggy ball with a hard shell. Under-inflate and the mesh stays crowded and the pattern is lost. If you want a genuinely rigid ornament, the answer is a second starch dip after the first has dried and the balloon has been removed, not a harder blow. Hang it to dry the second time and do not touch it.

Colourways
Frostbite
Optic white body, silver blending thread on the last two rounds, clear fishing line hanger. Best in a window.
Old Post Office
Unbleached ecru with jute twine and a single narrow band of faded red ribbon. Reads warm against green branches.
Nordic Slate
Pale grey thread, white hanger, no metallic anything. Looks expensive for what it costs and pairs with plain wood.
Glasshouse
Soft mint, pale amber, and dusty rose across a set of nine, all starched to the same firmness. Reads as spring, which is exactly why these keep working after the tree comes down.
Quick Answers
- Can I use a bigger hook and worsted yarn instead? You can, but you will get a floppy net rather than an ornament. Thick yarn holds far less starch relative to its bulk, so the structure never sets hard. If you want a larger ball, keep the thread and use a bigger balloon plus two or three extra repeats of the round 2 sequence.
- What if I do not have starch? A thick sugar and water solution works and dries rock hard, but it attracts insects in storage and goes tacky in humidity. White glue thinned about one part glue to one part water is the better substitute and survives packing away. Commercial starch is still the cleanest result.
- Why does my ball come out lopsided? Almost always the balloon rather than the crochet. Balloons inflate unevenly, fatter at the far end, and the wet mesh just follows. Inflate slowly, stop, roll it in your hands to redistribute the mesh, then add a little more air. Two or three small adjustments beat one big breath.
After the Season
Starched thread survives storage well as long as nothing sits on it. Crushing is the only real enemy, and a squashed ball does not spring back the way a stuffed toy does. Store them loose in a rigid box with tissue between layers, or better, keep them threaded on their hangers and hang the whole string inside a lidded container. Keep them out of the attic if your attic gets damp, because humidity softens starch and a soft ball slowly deflates over a summer. If one does go limp, a second dip and a fresh balloon brings it back completely.


