Crochet Christmas Angel Free Pattern
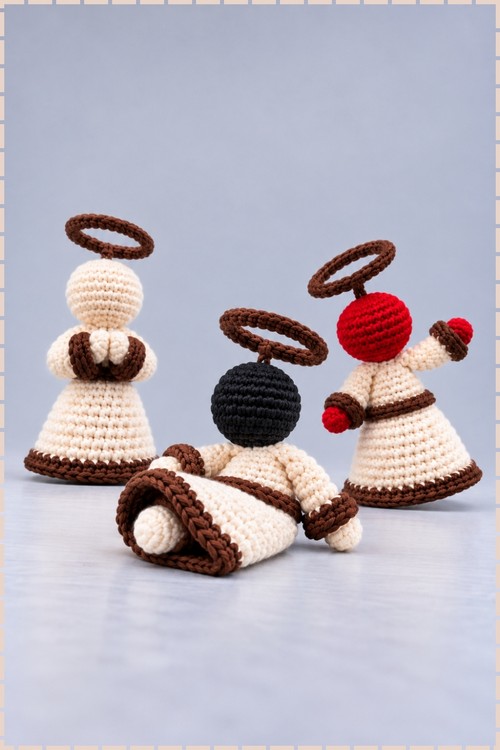
Church fairs sell out of crochet Christmas angel faster than almost anything else on the table. Cream and brown yarn covers the whole set, and swapping what the hands hold turns one pattern into a row of different angels.
Crochet Christmas Angel
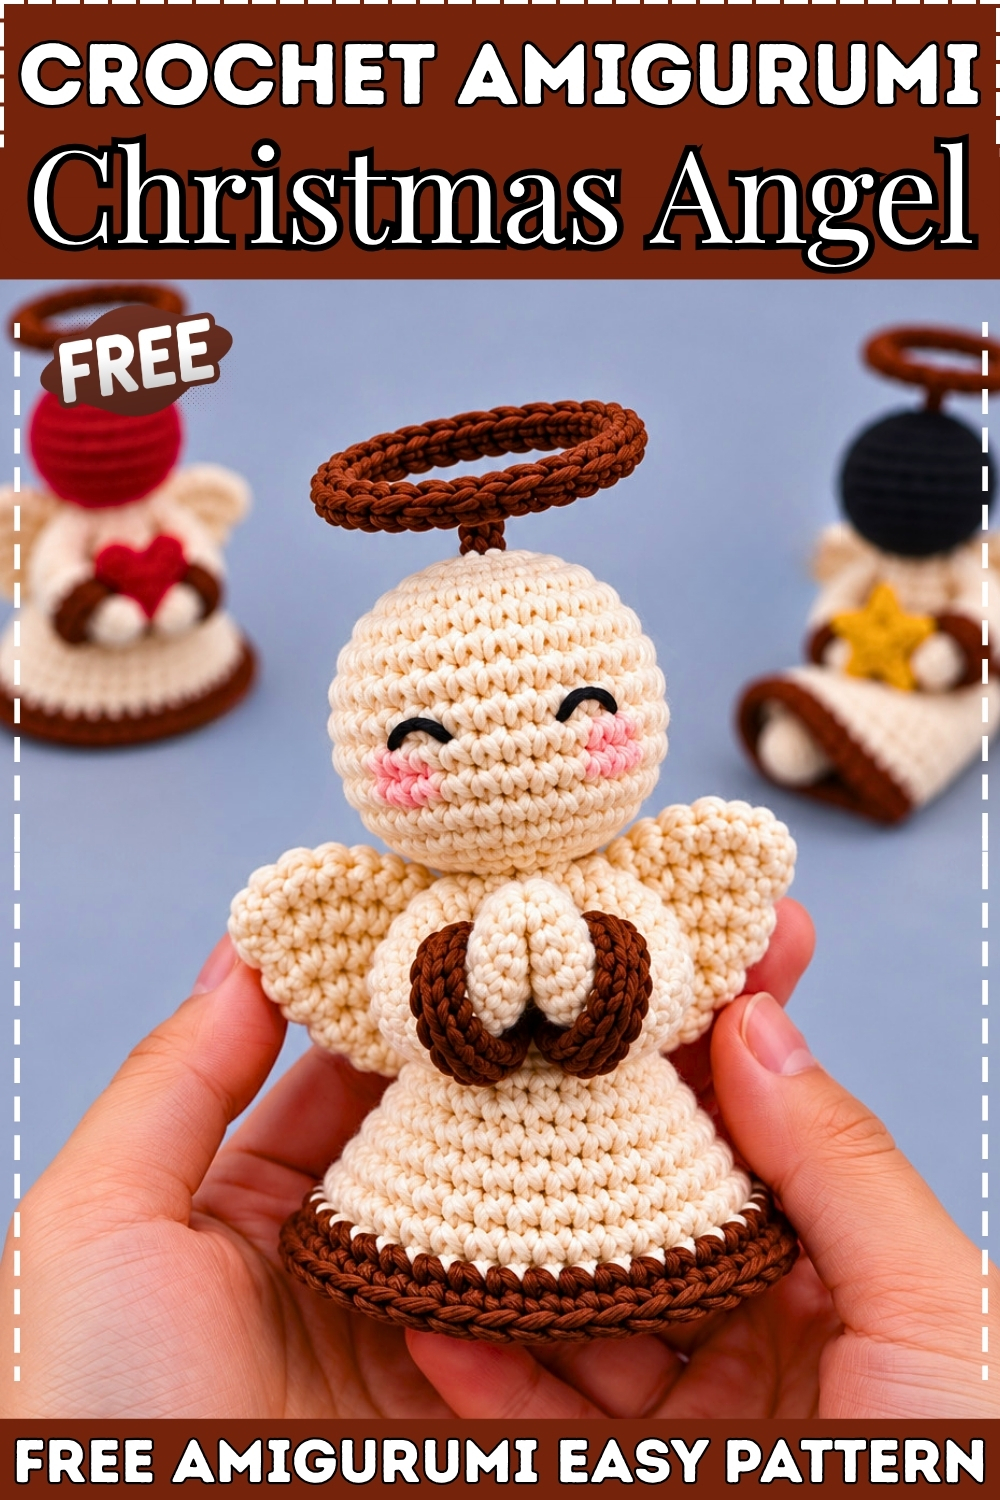
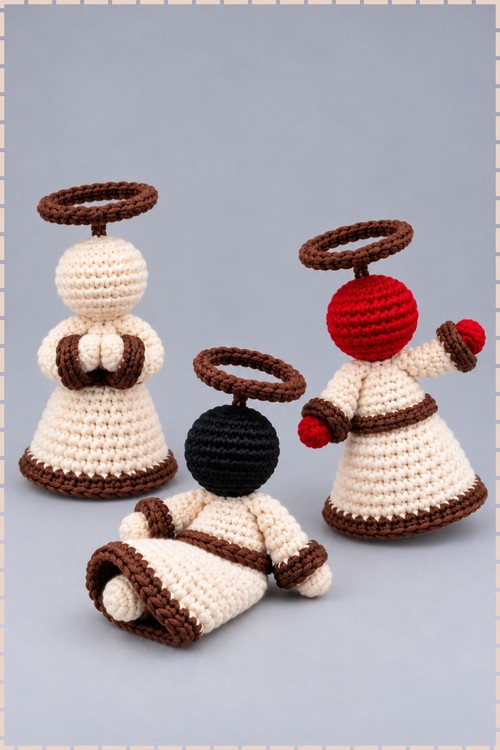
Color is switched mid-round at Round 8 of the head on this crochet Christmas angel so the gown grows directly from the head without any seam or sewing between the two sections. Gold trim works into the front loops of specific rounds while the back loops carry the body structure forward, which is what creates the distinct chest and hem bands without interrupting the stitch count. My three versions use cream for the gown and dark brown for the trim and halos, with head colors in cream, dark charcoal, and red. All three stand flat on their gathered bases without any internal support.
Materials and Tools
- DK or worsted weight yarn in cream for the gown and body.
- DK or worsted weight yarn in dark brown for the trim bands, halo covering, and arms. I used dark brown where the pattern calls for gold, which gives the figures a warmer, more natural look.
- DK or worsted weight yarn in your chosen head color. My three versions use cream, dark charcoal, and red respectively.
- 3.25 mm crochet hook.
- A 7 to 8 inch length of plumbing or armature wire per figure for the halo.
- Polyester fiberfill stuffing.
- Tapestry needle and scissors.
Difficulty and Time
- Intermediate. The front loop and back loop splits on the same round require attention and are easy to misread. Every other step is straightforward single crochet.
- Around two to three hours per figure in my experience. The trim rounds slow things down the first time but go faster once you understand the split.
THE PATTERN
Head in Your Chosen Color
- Round 1: Chain 2 and work 6 single crochet (sc) into the 2nd chain from the hook, or work 6 sc into a magic ring. Slip stitch (sl st) to the first sc, chain 1. [6 stitches]
- Round 2: Work 1 increase (inc, meaning 2 sc in the same stitch) in each stitch around. Sl st to the first sc, chain 1. [12 stitches]
- Round 3: Work 1 sc then 1 inc, repeated 6 times. Sl st to the first sc, chain 1. [18 stitches]
- Rounds 4 to 6: Single crochet in each stitch around for 3 rounds. Sl st to the first sc, chain 1 at the end of each round. [18 stitches per round]
- Round 7: Work 1 sc then 1 decrease (dec, meaning sc 2 stitches together), repeated 6 times. Sl st to the first sc, chain 1. [12 stitches] Stuff the head firmly with polyfill at this point.
- Round 8: Work 6 dec. On the final step of the 6th decrease, pull cream yarn through the loops to switch to the gown color. Sl st to the first stitch with cream, chain 1. [6 stitches] The color join should land at the back of the head so it sits against the figure’s back rather than the face.
Gown in Cream With Dark Brown Trim
- Gown Round 1: With cream, single crochet in each stitch around. Sl st to the first sc, chain 1. [6 stitches] Cut the head color yarn, tie off, and push the tail inside.
- Gown Round 2: Work 1 inc in each stitch around. Sl st to the first sc, chain 1. [12 stitches]
- Gown Rounds 3 to 4: Single crochet in each stitch around for 2 rounds. Sl st, chain 1 each round. [12 stitches per round]
- Gown Round 5: Work 2 sc then 1 inc, repeated 4 times. Sl st, chain 1. [16 stitches]
- Gown Round 6 Part 1 body: Working in back loops only (BLO), single crochet in each stitch around. Sl st to the first stitch, chain 1. [16 stitches] The back loops carry the body forward while the front loops are left available for the trim.
- Gown Round 6 Part 2 chest trim: Join dark brown yarn in the front loops only (FLO) of Round 6. Work 1 sc, 1 sc, chain 1 repeated around the front loops. Sl st to the first stitch, tie off, and weave the tail inside. This creates the chest band visible on all three of my figures.
- Gown Round 7: Reattach cream yarn in the back loops of Round 6. Single crochet in each stitch around. Sl st, chain 1. [16 stitches]
- Gown Round 8: Work 3 sc then 1 inc, repeated 4 times. Sl st, chain 1. [20 stitches]
- Gown Round 9: Work 2 sc, 1 inc, then (4 sc, 1 inc) 3 times, ending with 2 sc in the last 2 stitches. Sl st, chain 1. [24 stitches] Add more stuffing into the body at this point, filling the gown section below the neck.
- Gown Round 10: Single crochet in each stitch around. Sl st, chain 1. [24 stitches]
- Gown Round 11: Work 7 sc then 1 inc, repeated 3 times. Sl st, chain 1. [27 stitches]
- Gown Round 12: Single crochet in each stitch around. Sl st, chain 1. [27 stitches]
- Gown Round 13: Work 4 sc, 1 inc, then (8 sc, 1 inc) 2 times, ending with 4 sc in the last 4 stitches. Sl st, chain 1. [30 stitches]
- Gown Round 14 Part 1 body: Working in BLO, work 3 sc then 1 dec, repeated 6 times. Sl st, chain 1. [24 stitches]
- Gown Round 14 Part 2 hem trim: Join dark brown yarn in the FLO of Round 14. Work 3 sc then (1 sc, chain 1, 1 sc) all in the same stitch, repeated 6 times around. Sl st, cut yarn, and weave the tail inside. This is the hem band that creates the dark border visible at the base of each figure’s skirt.
- Gown Round 15: Working in BLO with cream, work 1 sc, dec, then (2 sc, dec) 5 times, ending with 1 sc in the last stitch. Sl st, chain 1. [18 stitches]
- Gown Round 16: Working in BLO, work 1 sc then 1 dec, repeated 6 times. Sl st, chain 1. [12 stitches]
- Gown Round 17: Working in BLO, work 6 dec. Sl st to the first stitch. [6 stitches] Leave an 8-inch tail for closing. Thread the tail through every other back loop with the tapestry needle, then gather and flatten the bottom base so the angel sits upright on a flat surface.
Arms in Cream and Dark Brown, Make Two
- Arm Round 1: Chain 2 and work 6 sc into the 2nd chain from the hook, or use a magic ring. [6 stitches]
- Arm Round 2: Work 1 sc then 1 inc, repeated 3 times. [9 stitches]
- Arm Round 3: Single crochet in each stitch around. [9 stitches]
- Arm Round 4: Work 1 dec then 1 sc, repeated 3 times. On the last stitch, change to cream yarn. [6 stitches]
- Arm Round 5 Part 1 sleeve: Working in BLO with cream, single crochet in each stitch around. [6 stitches]
- Arm Round 5 Part 2 cuff trim: Attach dark brown yarn in the FLO of Round 5. Work 1 sc then chain 1 in each loop around. Sl st and weave the ends inside. The dark brown cuff band matches the chest and hem trim on the gown.
- Arm Rounds 6 to 8: Working through both loops with cream, single crochet in each stitch around for 3 rounds. [6 stitches per round]
- Arm Round 9: Flatten the arm opening by pressing both sides together and work 2 sc through both layers to seal the top. Chain 1 and leave a long tail for sewing.
- Sew each arm to the upper gown approximately 2 rounds below the neck seam. On my standing figures the arms sit flat against the body sides at about chest height. The tipped-over figure in my photo shows the arms extending outward from the body at the same position.
Wire Halo in Dark Brown
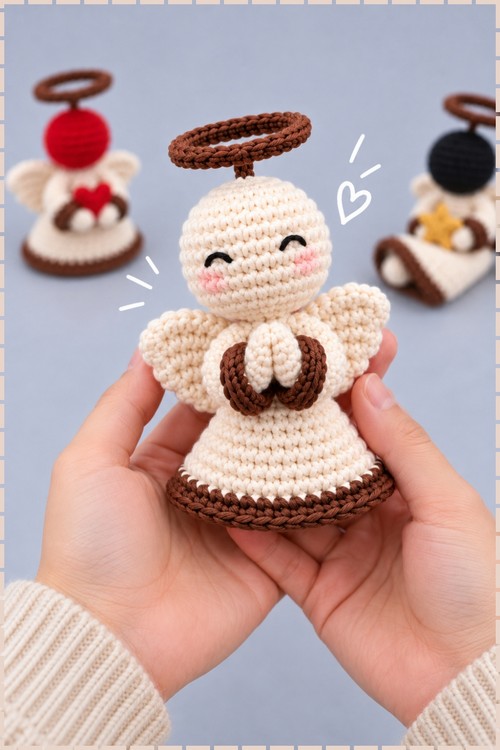
- Cut a 7 to 8 inch length of armature or plumbing wire and fold it in half. Loop one end around your finger to form the halo ring, leaving a straight double-wire stem at the bottom.
- Join dark brown yarn around the wire ring and work sc densely over the ring until the wire is completely covered. Sl st to finish and leave a 6-inch tail to wrap and secure the end.
- Push the wire stem straight down into the top center of the angel’s head until the ring sits above the head at halo height. The dark brown covering on all three of my halos matches the trim on the gown so the figures read as a coordinated set.
Tips and Troubleshooting
- The front loop and back loop split in Round 6 and Round 14 confuses most makers the first time. Finish the BLO body round completely and sl st closed before touching the front loops. Going back into the front loops of a round you have already moved past is easier than trying to work both at once.
- Switch the head color to cream yarn right at the last pull-through of the 6th decrease in Round 8, not before. Switching a stitch early leaves the new color visible from the front of the neck.
- Gather the base evenly when closing Round 17. Pulling only one side tighter than the other makes the figure lean rather than stand flat.
- Check arm placement on both sides before sewing more than a few stitches. Looking at the figure straight on tells you whether the arms sit at the same height.
Customization Ideas
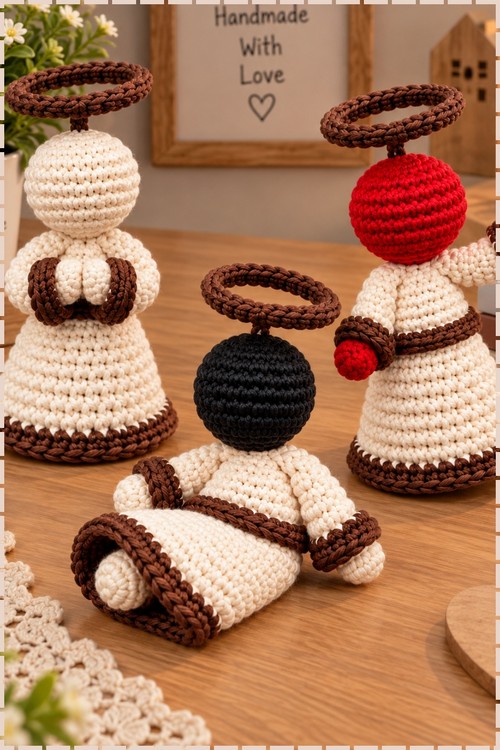
- Make a set of three in different head colors as I did, cream, dark charcoal, and red, for a display that reads as a group.
- Work the trim in cream instead of dark brown for an all-white version.
- Add a hanging loop of chain at the top of the halo wire before covering it if you want a tree ornament version.
- Embroider a simple face with closed eyes and a small smile for a more finished look.
FAQ
- Why does the pattern work the gown from the neck down instead of as a separate piece? Working head and body in one continuous piece means the neck never needs sewing and the join is invisible. The color change at Round 8 is what creates the visual division between the head and the gown.
- My figure is leaning to one side. How do I fix it? The base gather in Round 17 controls whether the figure sits flat. If one side pulled tighter than the other, the figure tilts that way. Pull the yarn tail through additional back loops on the high side to level it out before the tail is knotted off.
- Can I skip the wire halo and use a crocheted ring instead? Yes. Chain around 12 stitches and sl st to close the ring, then work sc into the loop until it is covered. Attach it to the top of the head with a few stitches rather than inserting a stem.