Crochet Bat Keychain Free Pattern in Purple
Bright purple yarn, golden yellow wing panels, and black scalloped edging give this crochet bat a bold Halloween look. Work its head and body as one piece, embroider the wing veins, then add ears and a key ring; finish your seasonal gift set with a cozy crochet bear.
October brings out every reason to hook a Crochet Bat Keychain before the decorations go up. Purple and yellow read as Halloween without going full costume, so it stays on your bag through November. Party favours, trick or treat baskets and classroom gifts all take a Crochet Bat Keychain well. Make several while the season holds.
Crochet Bat Keychain
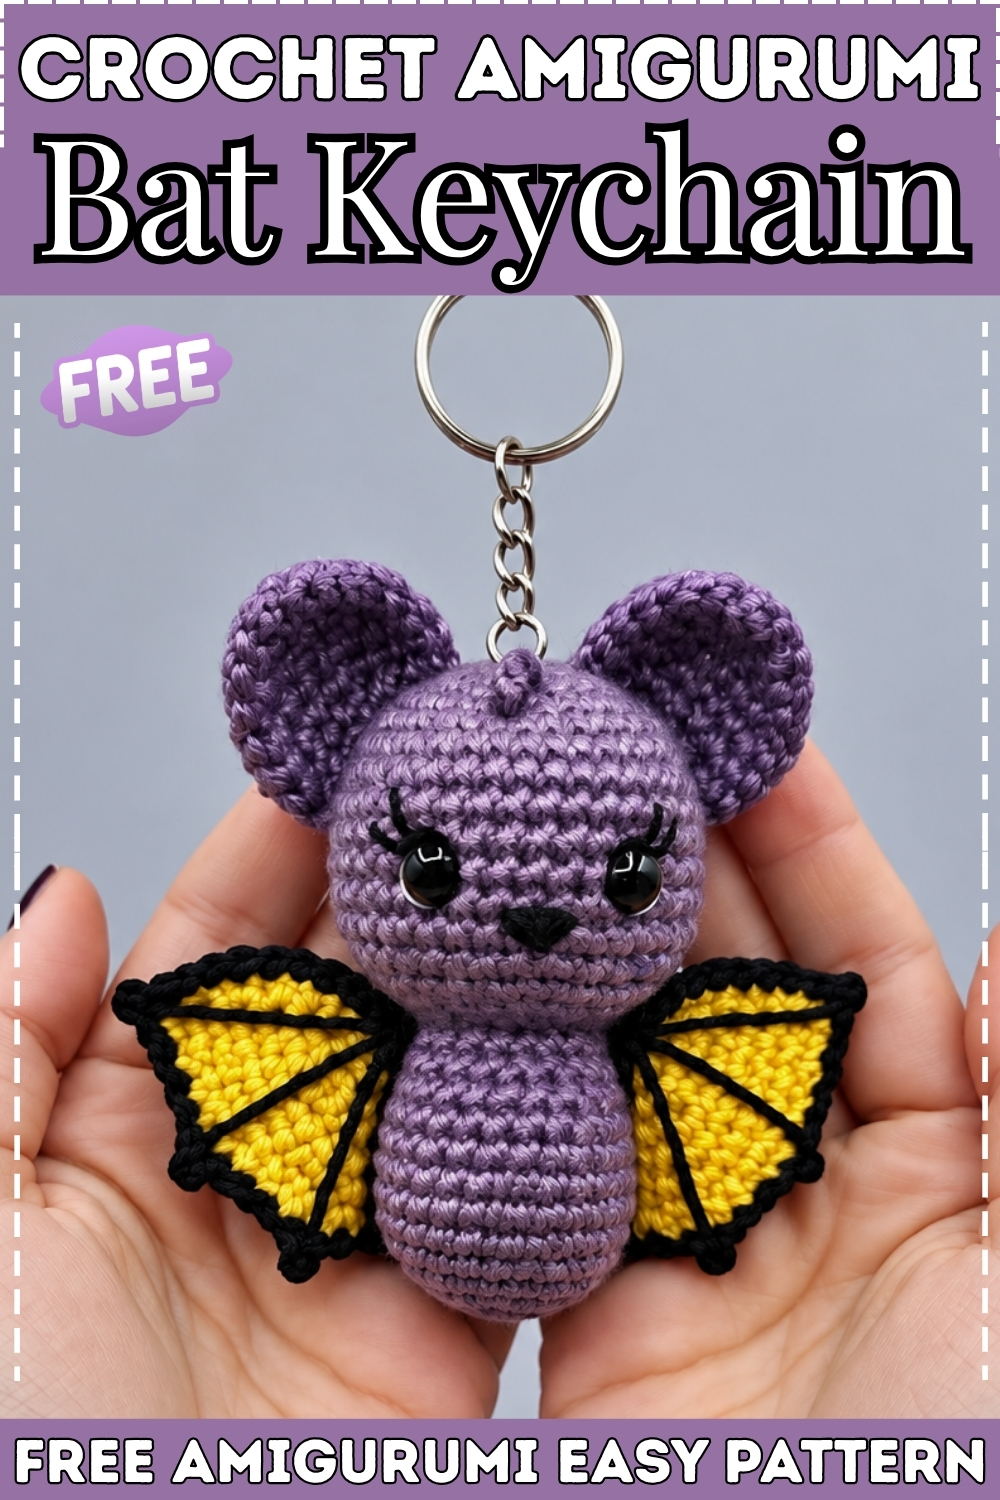
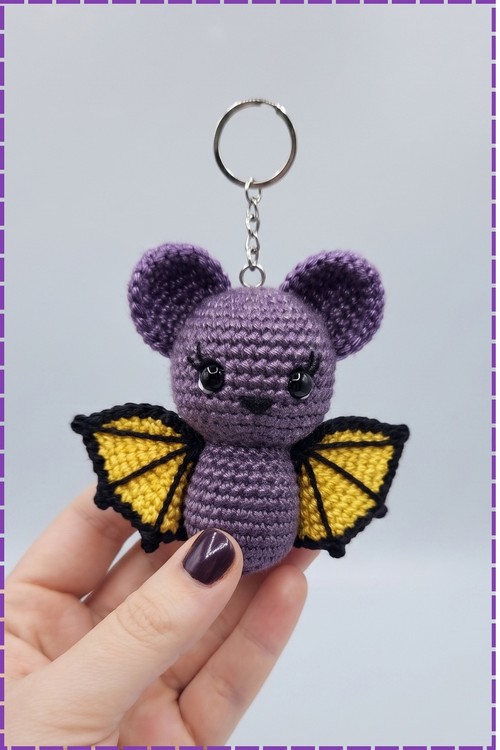
Somewhere between a spooky Halloween make and an everyday bag charm, this crochet bat keychain sits in both worlds without trying too hard. Body and head work up in one continuous piece from the bottom, so the shape stays round and smooth with no visible seam to fight. My version lands in soft purple with golden yellow wings outlined in black and three raised scalloped tips that actually look like bat anatomy. Safety eyes with embroidered eyelashes give the face its knowing little expression. A silver jump ring and keychain clasp go on last, and then it travels wherever you do.
Why I love this one: the wing construction is genuinely clever. Two layers of golden yellow single crochet go together back to back, the black border stitches through both at once, and the scalloped tips appear one chain at a time. You end up with wings that feel structured and flat, which is exactly what a bat needs to look right hanging from a key ring.
Materials and Tools
- Light worsted or DK weight yarn in soft purple for the body, head and ears.
- Light worsted or DK weight yarn in golden yellow for the main wing panels.
- Black yarn for the wing border, scalloped tips and embroidered wing veins.
- A 3.0 mm crochet hook.
- One pair of black safety eyes.
- Polyester fiberfill.
- A stitch marker.
- A yarn needle.
- Black embroidery thread for the eyelashes and mouth.
- White embroidery thread for the eye accent lines.
- A keychain jump ring and clasp, plus pliers to open and close the ring.
Abbreviations
- MR means magic ring.
- ch means chain.
- sc means single crochet.
- inc means increase, which is 2 sc worked into the same stitch.
- dec means invisible decrease, which is 2 stitches crocheted together.
- sl st means slip stitch.
- st and sts mean stitch and stitches.
- R means round or row depending on the section.
- A number in parentheses is the total stitch count at the end of that round.
The Pattern
Body and Head Worked in One Continuous Piece
- R.1: Work 8 sc into a MR. (8)
- R.2: [inc] x 8. (16)
- R.3: [sc, inc] x 8. (24)
- R.4: [3 sc, inc] x 6. (30)
- R.5 to R.8: 30 sc around for all 4 rounds. (30) The body is a short solid barrel at this point.
- Keep your tension even across these straight rounds or one side will pull tighter than the other.
- R.9: [3 sc, dec] x 6. (24)
- R.10 to R.11: 24 sc around for both rounds. (24)
- R.12: [2 sc, dec] x 6. (18) The body narrows here into a waist before the head begins.
- R.13: 13 sc. (13) This partial round repositions the start of round so the head shaping sits centered on the front of the piece.
- R.14: 1 sc, inc, [2 sc, inc] x 5, 1 sc. (24)
- R.15: [3 sc, inc] x 6. (30)
- R.16: 2 sc, inc, [4 sc, inc] x 5, 2 sc. (36)
- R.17: [5 sc, inc] x 6. (42)
- R.18: 3 sc, inc, [6 sc, inc] x 5, 3 sc. (48)
- R.19 to R.25: 48 sc around for all 7 rounds. (48) The head is now a large round ball on top of the narrow body.
- Seven straight rounds sounds like a lot, but this section is what gives the bat its big round face.
- R.26: 3 sc, dec, [6 sc, dec] x 5, 3 sc. (42)
- R.27: 42 sc around. (42)
- Stuff the body and head firmly with fiberfill before you close any further.
- The waist section is narrow and harder to pack once the opening shrinks below round 28.
- Insert safety eyes between rounds 21 and 22, spacing them 5 stitches apart.
- Position them toward the lower half of the head so the face reads with plenty of forehead above them, which is what gives the bat its big headed look.
- R.28: [5 sc, dec] x 6. (36)
- R.29: 36 sc around. (36)
- R.30: 2 sc, dec, [4 sc, dec] x 5, 2 sc. (30)
- R.31: [3 sc, dec] x 6. (24)
- R.32: [1 sc, dec] x 8. (16)
- R.33: [dec] x 8. (8)
- R.34: [dec] x 3. (4) Push any remaining gap closed by weaving the yarn tail through the front loops of the last 4 stitches and pulling tight, then hide the tail inside the head.
Ears, Make 2
- R.1: ch 3, ch 1, turn.
- R.2: Starting from the second chain from the hook, work inc, sc, inc, ch 1, turn. (5)
- R.3: inc, 3 sc, inc, ch 1, turn. (7)
- R.4: inc, 5 sc, inc, ch 1, turn. (9)
- R.5: 9 sc, ch 1, turn. (9)
- R.6: inc, 7 sc, inc, ch 1, turn. (11)
- R.7 to R.10: 11 sc, ch 1, turn for all 4 rows. (11)
- Work a row of single crochet along both curved side edges of the ear to give it a clean border and a slightly stiffened edge.
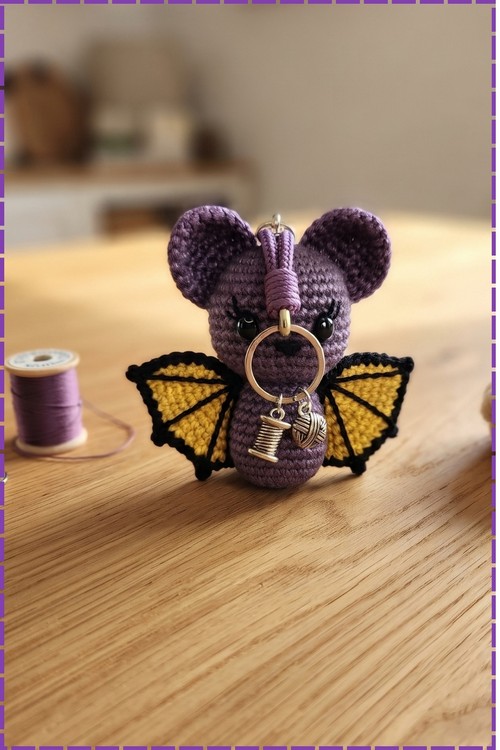
- Pin both ears to the top of the head before sewing. My ears sit wide apart and angle outward slightly, which is consistent with the rounded ear placement you can see in the photo.
- Sew each ear in place using purple yarn, keeping the stitches invisible by going through the back loops only.
Wings, Make 2
Main Wing Panel in Golden Yellow
- R.1: ch 6, then starting from the second chain from the hook work 5 sc, ch 1, turn. (5)
- R.2: 2 inc, 1 sc, 2 inc, ch 1, turn. (9)
- R.3: 2 inc, 5 sc, 2 inc, ch 1, turn. (13)
- R.4: inc, 11 sc, inc, ch 1, turn. (15)
- R.5 to R.8: 15 sc, ch 1, turn for all 4 rows. (15)
- Work a row of single crochet along the outer curved edge of the golden yellow panel to neaten the border and give the black edging a clean surface to join into.
- Make 2 identical golden yellow panels.
Wing Border and Scalloped Tips in Black
- Place both golden yellow wing panels back to back with wrong sides facing each other.
- Join black yarn and work single crochet through both layers along the upper curved edge to join them into one double layered wing. This is what gives the wing its structured flat feel rather than a floppy single layer.
- Scalloped tip section: work 5 sc along the outer edge, then ch 3 and work 1 sc back down the chain starting from the second chain from the hook to form one raised pointed tip.
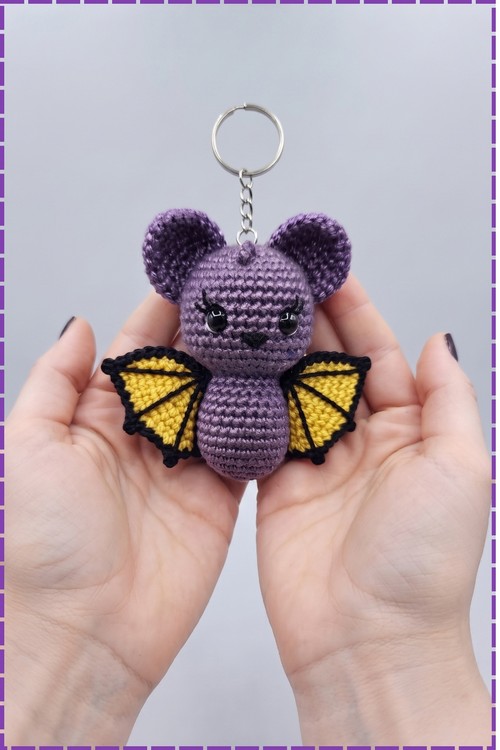
- Repeat that sequence across the outer wing edge to build 3 scalloped tips in total. My photo shows three clear yellow tipped points outlined in black on each wing, and the scallops sit evenly spaced.
- Fasten off and weave in the black ends.
Wing Vein Embroidery
- Thread a length of black yarn onto your needle.
- Embroider straight radiating lines from the base of the wing out to each scalloped tip, mimicking the bone structure of a real bat wing.
- Keep the lines on the front surface of the wing only so they show when the bat faces forward.
Facial Details and Assembly
- Embroider a short white accent line on the outer edge of each safety eye to add a soft highlight.
- Stitch small eyelashes above each eye using black embroidery thread. My bat has 3 short eyelashes per eye angled upward, which gives the face its sleepy expression as seen in the photo.
- Embroider a small V shaped smile between and below the eyes using black thread.
- Sew both wings onto the back sides of the body, one on each side, with the scalloped tips pointing outward and slightly downward as in the photo.
- Attach the keychain jump ring to the top center of the head between the ears using pliers to open and close the ring securely.
Customization Ideas
- Work the body in dark charcoal or black and keep the golden yellow wings for a more classic bat colourway.
- Use orange for the wing panels instead of yellow to lean into a Halloween palette.
- Leave off the keychain ring and sew a loop of yarn to the head for a hanging ornament version.
- Add a tiny white felt moon behind the bat before attaching the keychain ring, secured with a few stitches.
- Make the ears in a contrasting colour for a two tone look.
- Embroider small fangs below the smile using white thread for a spookier expression.
Tips and Troubleshooting
- The invisible decrease matters more here than in most amigurumi because the head is worked over so many rounds. Standard decreases will leave visible bumps across that large smooth surface. If you only know the standard decrease, practice the invisible method on a test swatch before you start round 9.
- The partial round 13 trips people up on a first read. You are not skipping stitches or making any shaping change. You are simply working 13 single crochet and then beginning the head increases as though that is the new start of round. Move your stitch marker at the end of round 13 and carry on.
- Getting the wing layers to sit flat while you join them depends on how well you matched the two panels. Lay them out before you put them back to back and check that the stitch counts are identical. A panel with one extra row will buckle no matter how carefully you join it.
- The scalloped tips go faster than they look. Once you have made the first one and understand the ch 3 and turn back sequence, the second and third fall into place on their own.

Frequently Asked Questions
Can I make this without safety eyes? Yes. Embroider two small oval shapes using black floss, then add the white accent lines and lashes over the top. The face will look slightly softer but still reads well at this scale.
My wing panels came out different sizes. What went wrong? Most likely a tension shift between pieces. Work both panels in the same sitting if you can, and count every row before you fasten off. A single extra row on one panel is enough to make them mismatch visibly once they are joined.
The keychain ring pulls the head sideways. How do I fix it? The ring needs to sit directly over the center seam between the ears, not off to one side. Close it around a small loop of thread or chain stitched from the same yarn first, then attach the keychain clasp to that loop rather than directly into the crochet fabric.
Can I make this larger? Yes. Go up one yarn weight and one hook size and work the same rounds. The proportions hold because every part scales together. Expect the finished bat to roughly double in size.