
Crochet Articulated Doll Pattern With Jointed Legs
Joints that bend at the hip and shoulder are why this crochet articulated doll body keeps coming up in every doll maker group. Most patterns give you a doll that sits one way forever. This one poses. That single difference is what people are chasing when they ask for the link.
Crochet Articulated Doll Body
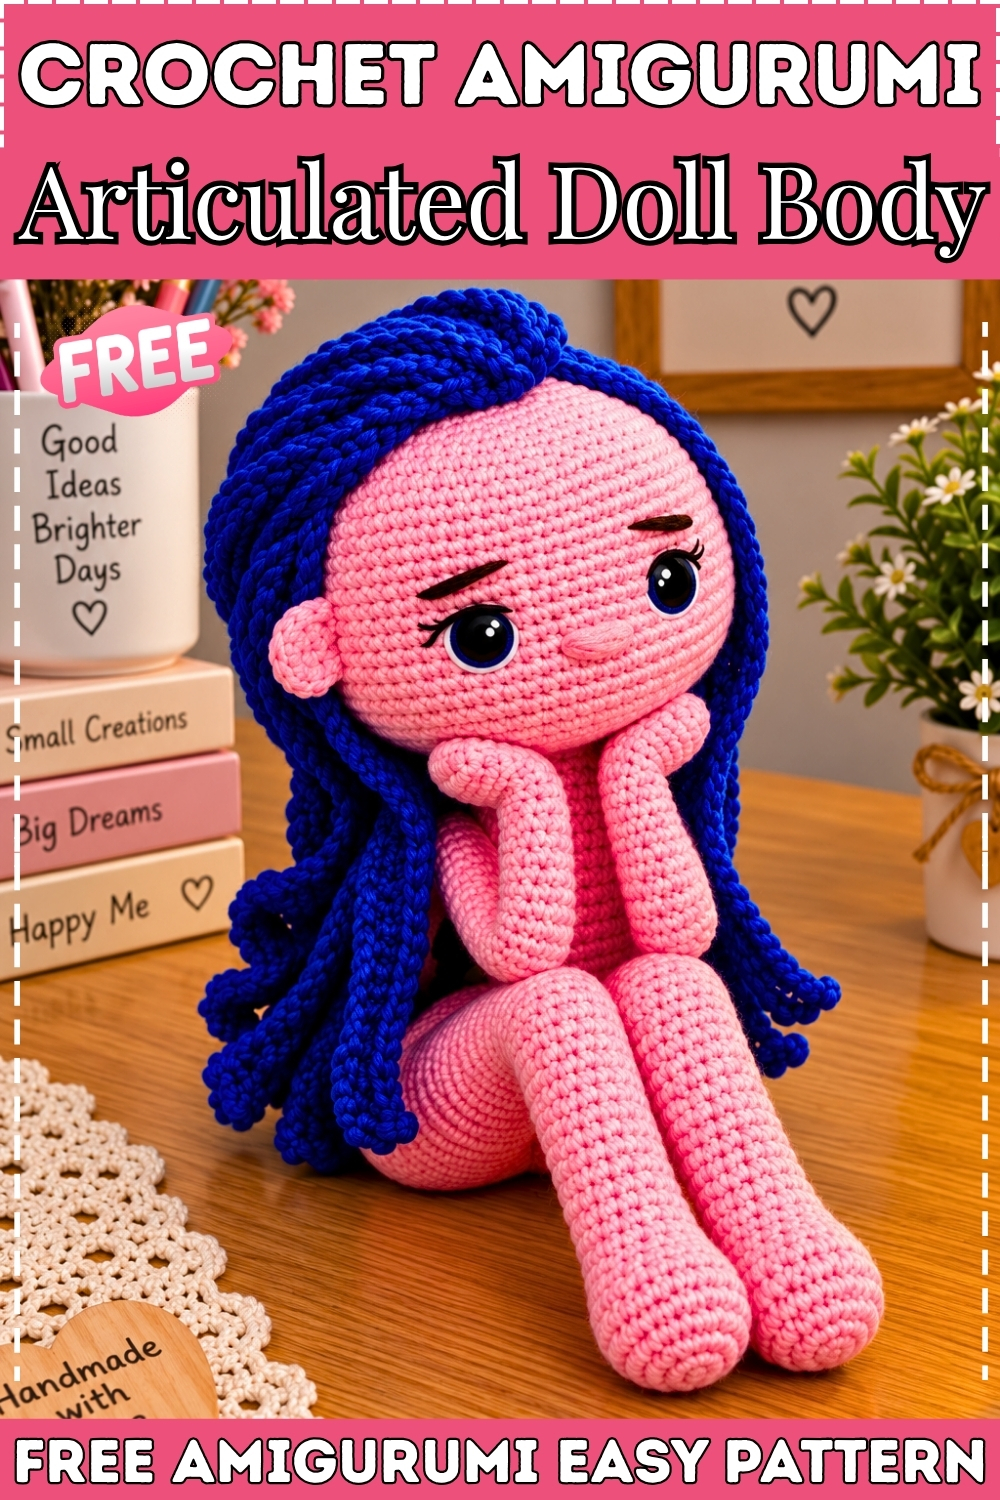
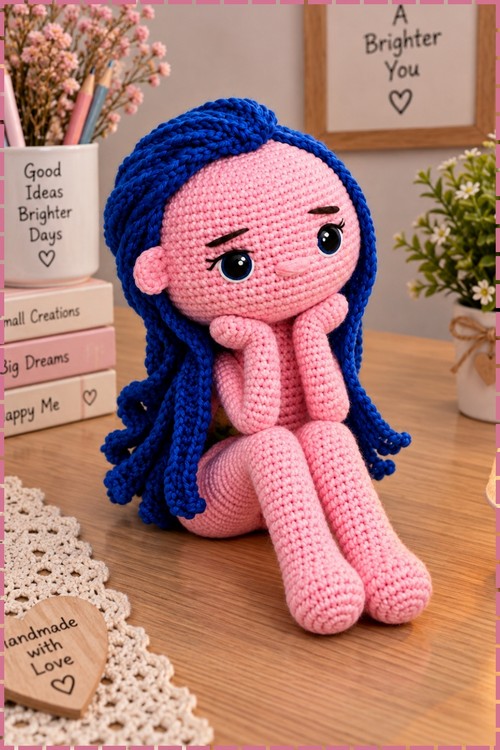
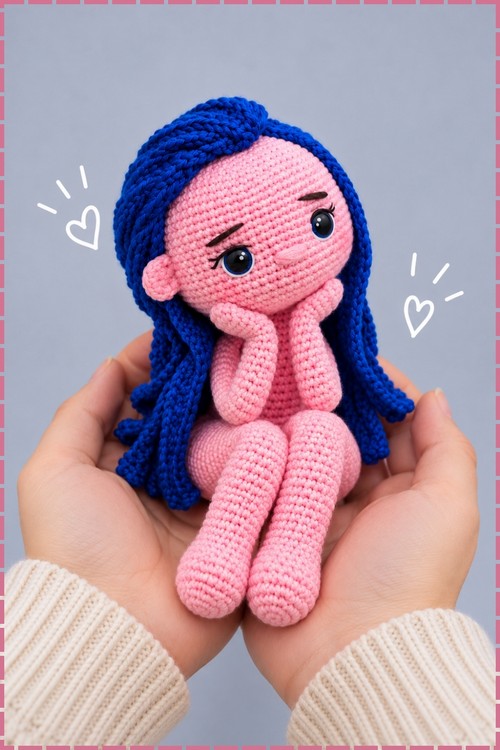
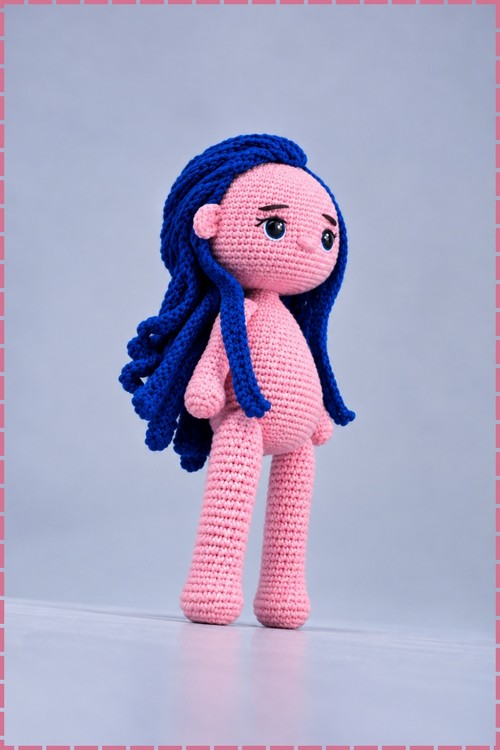
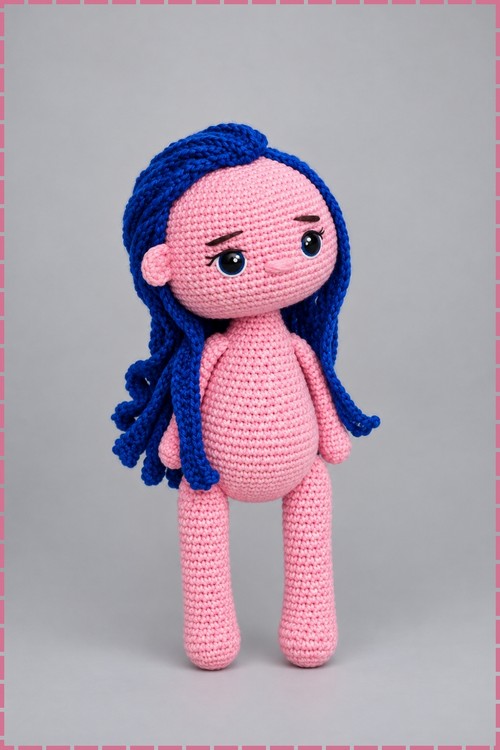
Jointed safety screws set into the hips and shoulders let the legs and arms of this crochet articulated doll body move and hold their position the way a real poseable doll does. Head, body, arms, and legs are all worked separately in continuous spiral rounds, then connected at the end so each part can be finished and checked before anything is assembled. My doll is worked entirely in soft pink yarn with bold blue hair strands that fall past the shoulders. Standing on her own feet at around 25 centimetres, she holds the pose you set her in without flopping.
Beginner Technique Notes
- Continuous spiral rounds mean you never join or chain at the end of a round. You just keep crocheting in a circle. Use a stitch marker in the first stitch of each round and move it up every time you pass it, or you will lose your place and the counts will drift.
- Magic ring (MR) means wrapping the yarn into an adjustable loop and working the first round into it. Pull the tail firmly once the first round is done to close the hole. A loose center on the head will show even after stuffing.
- Invisible decrease means inserting the hook through the front loops only of two stitches, then pulling through and completing the stitch normally. It gives a smoother surface than a standard decrease, which matters most on the head and body where the fabric is on show.
- Back loop only (BLO) means inserting the hook under just the loop furthest from you. Working one round in BLO creates a visible ridge that marks a structural fold point, used here at the base of the neck socket and at the ankle.
- Puff stitch here means 4 unfinished double crochet stitches worked into the same stitch and joined together at the end. The bump pushes outward to form the thumb.
- Safety eyes come with two parts: a printed eye and a backing washer. Push the post through the fabric from outside, place the backing on the inside, and press firmly. Once the backing is on it cannot come off without cutting, so place eyes carefully before fastening.
- Doll joint buttons or safety screws work the same way. The screw post goes through both the limb and the body, then a washer locks it on the inside. This is what makes the limb poseable rather than sewn solid.
Materials and Tools
- Sport or DK weight yarn in soft pink for the entire doll body, head, arms, and legs.
- Bold blue yarn for the hair wig base and hair strands.
- Appropriate crochet hook for your yarn weight (the original pattern uses a hook sized to create tight stitches that keep stuffing enclosed; check your yarn label and go one size down from the recommended hook).
- Two safety eyes with decorative printed iris. My doll has large realistic printed eyes with a light blue iris and painted detail.
- Four doll joint buttons or safety screws with washers: two for the legs at the hips, two for the arms at the shoulders.
- Polyester fiberfill stuffing.
- A plastic sole insert or hot glue layer for the base of each foot to keep it flat.
- Yarn needle, stitch marker, scissors, and pins.
Difficulty and Time
- Intermediate level. The stitch count on the head alone runs to 72 stitches across 16 even rounds, so this is not a first amigurumi project. You need to be comfortable counting rounds and placing jointing hardware before you start.
- Expect several sessions rather than one sitting. The head, body, legs, and arms are each substantial pieces.
THE PATTERN
Head in Pink
- Round 1: Work 6 single crochet (sc) into a magic ring (MR). [6 stitches]
- Round 2: Work 1 increase (inc, meaning 2 sc in the same stitch) in each stitch around. [12 stitches]
- Round 3: Work 1 sc then 1 inc, repeated 6 times around. [18 stitches]
- Round 4: Work 2 sc then 1 inc, repeated 6 times around. [24 stitches]
- Round 5: Work 3 sc then 1 inc, repeated 6 times around. [30 stitches]
- Round 6: Work 4 sc then 1 inc, repeated 6 times around. [36 stitches]
- Round 7: Work 5 sc then 1 inc, repeated 6 times around. [42 stitches]
- Round 8: Work 6 sc then 1 inc, repeated 6 times around. [48 stitches]
- Round 9: Work 7 sc then 1 inc, repeated 6 times around. [54 stitches]
- Round 10: Work 8 sc then 1 inc, repeated 6 times around. [60 stitches]
- Round 11: Work 9 sc then 1 inc, repeated 6 times around. [66 stitches]
- Round 12: Work 10 sc then 1 inc, repeated 6 times around. [72 stitches]
- Rounds 13 to 28: Single crochet in each stitch around for 16 rounds. [72 stitches per round] These straight rounds form the full height of the face and back of the head.
- Safety eye placement: Insert the safety eyes between Rounds 21 and 22, spaced 11 stitches apart. Press the backings on firmly from inside before continuing. My doll’s eyes have a printed iris detail and sit forward on the face giving her the expressive look visible in the photo.
- Round 29: Work 10 sc then 1 invisible decrease (dec), repeated 6 times around. [66 stitches]
- Round 30: Work 9 sc then 1 dec, repeated 6 times around. [60 stitches]
- Round 31: Work 8 sc then 1 dec, repeated 6 times around. [54 stitches]
- Round 32: Work 7 sc then 1 dec, repeated 6 times around. [48 stitches]
- Round 33: Work 6 sc then 1 dec, repeated 6 times around. [42 stitches]
- Round 34: Work 5 sc then 1 dec, repeated 6 times around. [36 stitches]
- Round 35: Work 4 sc then 1 dec, repeated 6 times around. [30 stitches]
- Round 36: Work 3 sc then 1 dec, repeated 6 times around. [24 stitches] Stuff the head firmly along the edges at this point, leaving the central core hollow so the neck extension from the body can slide up inside it later.
- Round 37: Working in back loops only (BLO), single crochet in each of the 24 stitches around. [24 stitches] The BLO round creates the ridge that marks the base of the head and the opening of the neck socket.
- Rounds 38 to 50: Single crochet in each stitch around for 13 rounds. [24 stitches per round] This tube is the internal neck socket. It is hidden inside the head and will receive the body’s neck extension, so keep the tension even throughout.
- Round 51: Work 2 sc then 1 dec, repeated 6 times around. [18 stitches]
- Round 52: Work 1 sc then 1 dec, repeated 6 times around. [12 stitches] Fasten off, weave the tail through the front loops of the remaining stitches with a yarn needle, pull tight to close, and push the completed internal tube up into the hollow center of the head.
Arms in Pink, Make Two
- Round 1: Work 7 sc into a MR. [7 stitches]
- Round 2: Work 1 inc in each stitch around. [14 stitches]
- Rounds 3 to 4: Single crochet in each stitch around for 2 rounds. [14 stitches per round]
- Round 5 thumb round: Work 5 sc, work 1 puff stitch (4 unfinished double crochet stitches worked into the same stitch, all joined together at the end) for the thumb, work 8 sc. [14 stitches] The puff bump points outward from the side of the hand. If it pushes inward, turn the piece so the bump faces the right direction before continuing.
- Round 6: Single crochet in each stitch around, working 1 sc into the chain space above the puff stitch. [14 stitches]
- Round 7: Work 5 sc then 1 dec, repeated 2 times. [12 stitches]
- Round 8: Work 4 sc then 1 dec, repeated 2 times. [10 stitches] Lightly stuff only the palm and hand area at this point. Leave the upper arm entirely unstuffed so it lies flat for the shoulder joint later.
- Rounds 9 to 21: Single crochet in each stitch around for 13 rounds. [10 stitches per round]
- Press the top of the arm flat and single crochet across both layers to seal: 4 sc through both layers. Fasten off leaving a long tail for the shoulder jointing step.
Legs and Feet in Pink, Make Two
- Round 1: Chain 6 leaving a 25 cm tail. Starting in the 2nd chain from the hook: work 1 inc, 3 sc, 4 sc in the last chain, turn to work along the bottom of the chain: 3 sc, 1 inc. [14 stitches] This oval base becomes the sole of the foot.
- Round 2: Work 2 inc, 3 sc, 4 inc, 3 sc, 2 inc. [22 stitches]
- Round 3: Work (1 sc, 1 inc) twice, 3 sc, (1 half double crochet (hdc), 1 hdc increase) 4 times, 3 sc, (1 sc, 1 inc) twice. [30 stitches]
- Round 4: Work (2 sc, 1 inc) twice, 3 sc, (2 sc, 1 inc) 4 times, 3 sc, (2 sc, 1 inc) twice. [38 stitches]
- Round 5: Working in BLO, single crochet in each stitch around. [38 stitches] This BLO round creates the sharp edge where the foot meets the leg and keeps the sole flat.
- Rounds 6 to 10: Single crochet in each stitch around for 5 rounds. [38 stitches per round]
- Base support: Fit a plastic sole insert or apply a layer of hot glue to the inside base of the foot at this point to keep it standing flat. This is what lets the finished doll stand on her own.
- Round 11: Work 8 sc, 12 dec, 6 sc. [26 stitches]
- Round 12: Single crochet in each stitch around. [26 stitches]
- Round 13: Work 8 sc, 6 dec, 6 sc. [20 stitches] Stuff the foot firmly now before the opening narrows into the leg tube.
- Rounds 14 to 32: Single crochet in each stitch around for 19 rounds. [20 stitches per round] These long straight rounds form the full length of the leg. My doll’s legs are slender and noticeably longer than the body, which gives her the proportions visible in the photo.
- Leg jointing: Insert the doll joint screw through the side of the leg between Rounds 31 and 32, with the left leg joint facing right and the right leg joint facing left so both legs angle inward toward center when attached. Flatten or melt the screw top on the inside for safety.
- Round 33: Work 8 sc then 1 dec, repeated 2 times. [18 stitches]
- Round 34: Work 1 sc then 1 dec, repeated 6 times. [12 stitches]
- Round 35: Work 6 dec. [6 stitches] Fasten off and weave closed.
Body in Pink
- Round 1: Chain 7 leaving a 25 cm tail. Starting in the 2nd chain from the hook: work 1 inc, 4 sc, 4 sc in the last chain, turn to work along the bottom of the chain: 4 sc, 1 inc. [16 stitches]
- Round 2: Work 2 inc, 4 sc, 4 inc, 4 sc, 2 inc. [24 stitches]
- Round 3: Work (1 sc, 1 inc) twice, 4 sc, (1 sc, 1 inc) 4 times, 4 sc, (1 sc, 1 inc) twice. [32 stitches]
- Surface slip stitch (sl st): Using the initial yarn tail, work sl sts along the middle chain gap on the base to seal the center seam.
- Rounds 4 to 7: Single crochet in each stitch around for 4 rounds. [32 stitches per round]
- Round 8: Work (2 sc, 1 inc) twice, 4 sc, (2 sc, 1 inc) 4 times, 1 sc, 4 inc, 1 sc, 1 inc, 2 sc, 1 inc. [44 stitches]
- Round 9: Single crochet in each stitch around. [44 stitches]
- Round 10: Work (1 sc, 1 inc) 3 times, 12 sc, (1 inc, 1 sc) 3 times, 1 inc, 17 sc, 1 inc, 1 sc. [52 stitches]
- Rounds 11 to 18: Single crochet in each stitch around for 8 rounds. [52 stitches per round]
- Attach legs: Insert the leg joint screws into the hip position between Rounds 7 and 8 on each side of the body and attach the safety washers on the inside to lock them in place.
- Round 19: Work 11 sc then 1 dec, repeated 4 times. [48 stitches]
- Round 20: Single crochet in each stitch around. [48 stitches]
- Round 21: Work 6 sc then 1 dec, repeated 6 times. [42 stitches]
- Rounds 22 to 24: Single crochet in each stitch around for 3 rounds. [42 stitches per round]
- Round 25: Work 5 sc then 1 dec, repeated 6 times. [36 stitches]
- Rounds 26 to 28: Single crochet in each stitch around for 3 rounds. [36 stitches per round]
- Round 29 arm attachment: Work 1 sc, then 4 sc joining the left arm and body through both layers, 13 sc across the chest, 4 sc joining the right arm and body through both layers, 14 sc across the back. [36 stitches] The arms attach at this round so they sit at natural shoulder height on the finished doll.
- Round 30: Work (1 dec, 1 sc) twice, 1 dec, 10 sc, (1 dec, 1 sc) twice, 1 dec, 10 sc. [30 stitches]
- Round 31: Work 3 dec, 8 sc, 3 dec, 10 sc. [24 stitches]
- Round 32: Work 2 sc then 1 dec, repeated 6 times. [18 stitches]
- Rounds 33 to 48: Single crochet in each stitch around for 16 rounds. [18 stitches per round] These rounds form the neck extension column that will insert into the head socket.
- Stuff the neck extension tube very firmly. It needs to be rigid so it does not buckle inside the head socket.
- Round 49: Work 1 sc then 1 dec, repeated 6 times. [12 stitches] Fasten off, weave closed, and thread the neck extension up into the internal neck socket tube inside the head.
Ears in Pink, Make Two
- Work 6 sc into a MR but do not pull the ring closed. Chain 1, turn, then work 1 sc, 4 inc, 1 sc, and 1 sl st into the MR. [10 stitches] Sew one ear to each side of the head, 8 to 9 stitches away from the nearest eye.
Eye Sockets
- Thread yarn through the head base to the inner corner of each eye and pull the thread tight to draw the eye socket inward slightly. This sculpts a more realistic socket shape and gives the face the subtle depth visible in the photo.
Facial Embroidery
- Embroider a white highlight along the bottom edge of each eye, then add brown eyeliner lines above the eyes and short eyelash strokes at the outer corners. My doll also has sculpted eyebrows embroidered above the eyes in a slightly arched shape. Embroider a small nose between the eyes.
Hair Wig Base in Blue
- Layer 1: Chain 15, then work 1 inc, 12 sc, 4 sc in the corner, 12 sc, 1 inc. [32 stitches]
- Next round in BLO: Work 2 inc, 12 sc, 4 inc, 12 sc, 2 inc. [40 stitches] This flat oval piece is the wig cap that sits on top of the head.
Hair Strands in Blue
- Chain 50, turn, and work 47 half double crochet (hdc) or double crochet (dc) back down the chain. Slip stitch into the wig base. Repeat this process to make 20 strands total, spacing them evenly around the wig base. Glue or sew the completed wig onto the top of the head. My doll’s hair falls long and straight past her shoulders in bold blue as seen in the photo, with strands worked close together so no wig base shows through.
Expanded Technique Notes
- Invisible decrease is the most important technique in this pattern because of how many decrease rounds the head and body have. Practice it on a swatch if you have not used it before. Standard decreases leave a visible bump; the invisible version keeps the surface smooth.
- Jointing hardware can feel intimidating but the action is the same as attaching a safety eye: push the post through, place the washer, press hard. Have the washer in your hand before the screw goes through or it is hard to find inside the piece.
- The neck socket tube inside the head only works if it is centered properly. After you push it up into the head, feel the outside to make sure the tube did not twist to one side.
- Stuffing the neck extension column very firmly is not optional. A soft neck will let the head droop sideways once the weight of the wig is added.
- When making the hair strands, keep the chain tension consistent across all 20. Loose chains produce wavy strands and tight chains produce stiff ones. Work all 20 in one session if possible so your tension stays the same.
Tips and Troubleshooting
- If your stitch count drifts during the 16 straight rounds on the head (Rounds 13 to 28), stop and count at the end of Round 20 before placing the eyes. It is much easier to fix a count error before the eyes are locked in place.
- The plastic sole insert or glue layer in the foot matters more than it sounds. Without it the foot base buckles inward from the stuffing pressure and the doll cannot stand flat.
- Check that both leg joints face inward before locking the washers. The orientation of the joint screw decides which direction the leg can swing, and it cannot be changed after the washer is on.
- Pin the wig cap in place before gluing or sewing. Moving it a few millimetres forward or back changes how the hair falls and how the face reads from the front.
FAQ
- Do I need to buy special jointing hardware for this doll? Yes. Standard amigurumi safety eyes will not work for the limb joints. You need doll joint buttons or safety screw sets, which come in packs at craft stores and online. Buy the size matched to your yarn weight and the thickness of your fabric.
- Why does the pattern say to leave the head center hollow when stuffing? The neck extension column from the body needs to slide up into that hollow space. If you stuff the center solid there is nowhere for the neck to go and the head will not sit properly on the body.
- My leg is curling inward instead of standing straight. What went wrong? Leg curl usually means the tension got looser or tighter partway through the 19 straight rounds. Block the leg flat while damp or add a small piece of wire armature inside the leg if you want it to hold a pose.
- Can I make the hair in a different color or style? Yes. The wig base oval and the strand method work in any yarn color. Shorter chains give a bob length, longer chains give floor-length hair. My version uses bold blue for contrast with the pink body.
- The neck extension does not fit inside the head socket. What should I do? The socket tube (Rounds 38 to 50) should measure close to the same diameter as the neck extension (18 stitches around). If it feels too tight, ease the tube with your fingers before inserting rather than forcing it, which can distort the head shape.


