Crochet Baseball Bat Amigurumi Free Pattern
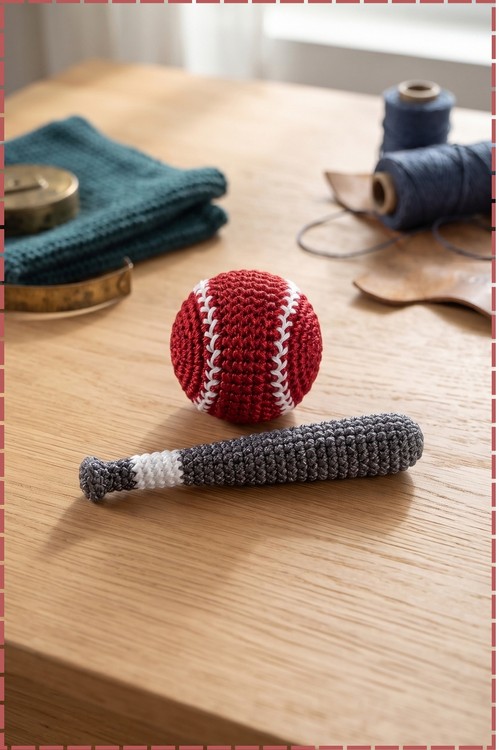
Sport fans can pair this charcoal and white crochet baseball bat with its red and white ball for a miniature desk set. The long taper, rounded barrel, and grip stripe are worked in simple joined rounds; if you prefer a smaller charm project, see the yellow basket keychain.
Requests keep coming for the Crochet Baseball Bat because most sports amigurumi stop at the ball. Having both pieces turns it into a set, and sets sell at craft fairs. Team colours swap in without changing the pattern. Parents ask for a Crochet Baseball Bat for nursery shelves and dugout photos alike.
Crochet Baseball Bat
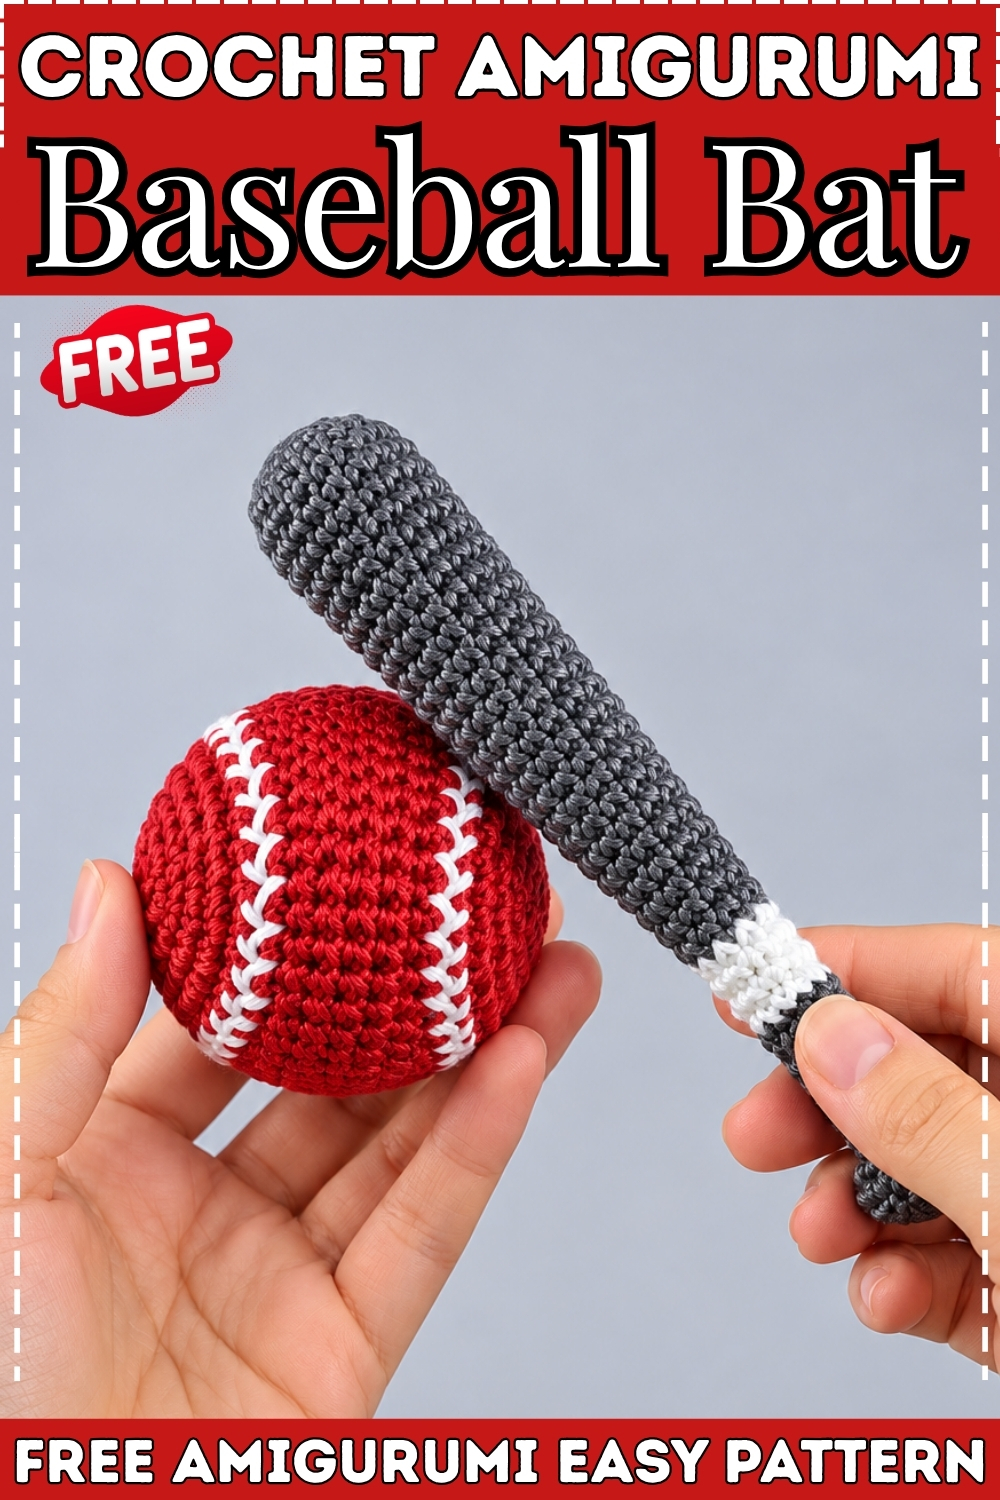
Worked from the wide barrel top down to the rounded knob base, this crochet baseball bat uses a steady sequence of single decreases to taper naturally from barrel to handle without any tricky shaping changes. Every round joins with a slip stitch, so the piece stays clean and defined the whole way down. My bat comes out in dark charcoal grey with a white grip section in the middle, and it sits alongside a matching red and white crocheted baseball. Together they make a set that any baseball fan would keep on a desk or shelf long after they have outgrown toys.
Materials and Tools
- 5-ply milk cotton yarn in dark charcoal grey for the barrel, handle, and knob. The original pattern calls for brown yarn. My version uses charcoal grey throughout, as shown in the photo.
- 5-ply milk cotton yarn in white for the grip section in the middle of the handle.
- 5-ply milk cotton yarn in red and white for the baseball, if you want to make the matching ball.
- A 2.25 mm crochet hook, which is a size 3/0.
- Polyester fiberfill for stuffing.
- A tapestry needle, scissors and tweezers. The tweezers are especially helpful for pushing small amounts of stuffing into the narrow handle section without it clumping.
- An optional keychain ring if you want to attach the bat to a bag or keys.
Difficulty and Time
This is a great beginner amigurumi project. Every round uses only single crochet, single crochet increases, single crochet decreases, and slip stitches. There are no colour changes that require complicated joins, and the decrease pattern repeats in a predictable rhythm that gets easy to anticipate after the first few rounds. In my experience the bat itself takes around two hours, and the baseball adds another hour on top. Give yourself a little extra time on your first attempt to count carefully through the long handle taper.
Beginner Technique Notes
- A magic ring, sometimes called a magic circle, is an adjustable starting loop you work your first stitches into. If the center will not close tightly, check that you are pulling the correct strand.
- Every round in this pattern joins with a chain 1 and then a slip stitch at the end. The chain 1 does not count as a stitch. Work your first sc of every round directly into the first stitch of the previous round, not into the chain.
- An increase means working 2 sc into the same stitch. A decrease means working the next 2 stitches together as one. An invisible decrease, worked through the front loops only, gives a cleaner result and is worth learning before you start this pattern.
- The bat tapers through a long series of alternating even rounds and decrease rounds. Keep a tally of which round you are on. Losing your place in the middle of a taper is the most common reason the finished bat comes out uneven.
- Add stuffing gradually as you go rather than all at once at the end. The handle narrows to just 7 stitches and you cannot pack stuffing in cleanly once it is that small. Push small pieces in with tweezers every 4 or 5 rounds through the open working end.
The Pattern
Part 1: The Barrel in Charcoal Grey
- Round 1: Work a magic ring, chain 1, work 8 sc into the ring, slip stitch to join. (8)
- Round 2: Ch 1, [inc, sc] x 4, slip stitch to join. (12)
- Round 3: Ch 1, [sc, inc, sc] x 4, slip stitch to join. (16)
- Round 4: Ch 1, [inc, 3 sc] x 4, slip stitch to join. (20) The barrel is now at its widest point and should feel solid and round.
- Round 5: Ch 1, 20 sc, slip stitch to join. (20)
- Round 6: Ch 1, dec, 18 sc, slip stitch to join. (19)
- Round 7: Ch 1, 19 sc, slip stitch to join. (19)
- Round 8: Ch 1, 8 sc, dec, 9 sc, slip stitch to join. (18)
- Round 9: Ch 1, 18 sc, slip stitch to join. (18)
- Round 10: Ch 1, dec, 16 sc, slip stitch to join. (17)
- Round 11: Ch 1, 17 sc, slip stitch to join. (17)
- Round 12: Ch 1, 8 sc, dec, 7 sc, slip stitch to join. (16)
- Round 13: Ch 1, 16 sc, slip stitch to join. (16)
Part 2: Stuffing and Tapering the Handle in Charcoal Grey
- Begin adding fiberfill stuffing now, before the opening narrows further. Push small pinches in with tweezers and add more every few rounds as you work down.
- Round 14: Ch 1, dec, 14 sc, slip stitch to join. (15)
- Round 15: Ch 1, 15 sc, slip stitch to join. (15)
- Round 16: Ch 1, 6 sc, dec, 7 sc, slip stitch to join. (14)
- Round 17: Ch 1, 14 sc, slip stitch to join. (14)
- Round 18: Ch 1, dec, 12 sc, slip stitch to join. (13)
- Round 19: Ch 1, 13 sc, slip stitch to join. (13)
- Round 20: Ch 1, 6 sc, dec, 5 sc, slip stitch to join. (12)
- Round 21: Ch 1, 12 sc, slip stitch to join. (12)
- Round 22: Ch 1, dec, 10 sc, slip stitch to join. (11)
- Round 23: Ch 1, 11 sc, slip stitch to join. (11)
- Round 24: Ch 1, 4 sc, dec, 5 sc, slip stitch to join. (10)
- Round 25: Ch 1, 10 sc, slip stitch to join. (10)
- Round 26: Ch 1, dec, 8 sc, slip stitch to join. (9) The handle is now narrow and the taper should read as a smooth gradual slope from the barrel down to this point.
Part 3: The White Grip Section
- Round 27: Ch 1, 9 sc, then switch to white yarn on the final slip stitch to join. (9) Drop the charcoal yarn rather than cutting it, since you will pick it up again after the grip.
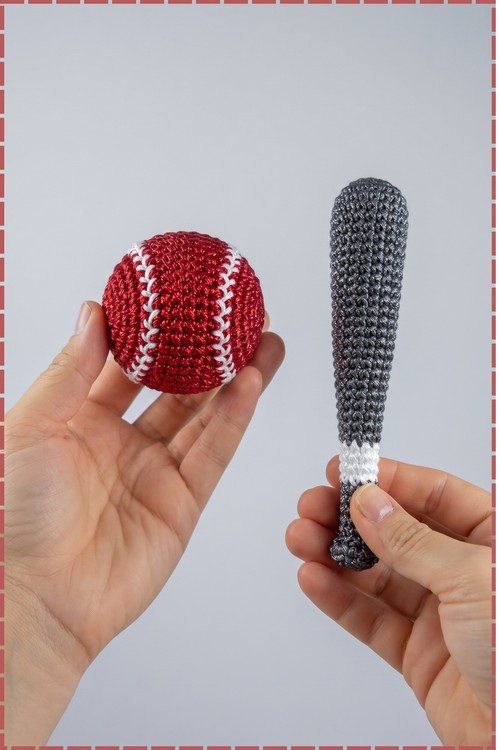
- Round 28: Ch 1, 4 sc, dec, 3 sc, slip stitch to join. (8) The white section is short and sits as a distinct band between the grey handle sections, clearly visible in the photo.
- Round 29: Ch 1, 8 sc, slip stitch to join. (8)
- Round 30: Ch 1, dec, 6 sc, slip stitch to join. (7)
- Round 31: Ch 1, 7 sc, then switch back to charcoal grey yarn on the final slip stitch to join. (7)
Part 4: The Knob Base in Charcoal Grey
- Round 32: Ch 1, 3 sc, dec, 2 sc, slip stitch to join. (6) The piece is very narrow here. Keep pushing small amounts of stuffing in as you go before the knob increases close the opening.
- Round 33: Ch 1, 6 sc, slip stitch to join. (6)
- Round 34: Ch 1, 6 inc, slip stitch to join. (12) The knob begins to expand outward here into the rounded bump at the base that stops your hand sliding off.
- Round 35: Ch 1, 12 sc, slip stitch to join. (12)
- Round 36: Ch 1, 6 dec, slip stitch to join. (6) Finish stuffing through the closing hole before you close it completely.
Part 5: Finishing
- Cut the yarn leaving a tail, then thread the tail onto your tapestry needle and weave it through the front loops of the remaining 6 stitches.
- Pull tight to close the hole cleanly and weave the end inside the knob.
- Attach an optional keychain ring near the top of the barrel or at the base of the knob if you want a keychain version.
Matching Baseball
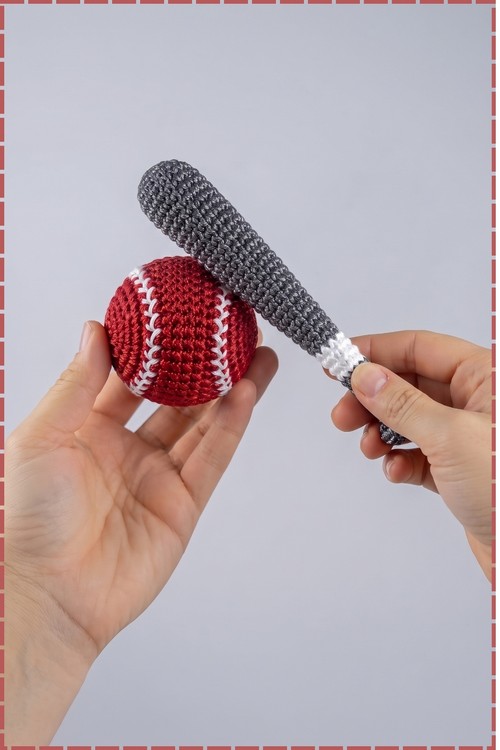
- The baseball in my photo is crocheted in red with white single crochet seam lines embroidered on after assembly. Work a standard amigurumi sphere in red yarn and embroider two curved white stitch lines on opposite sides to mimic the baseball seam, adjusting the size to suit your bat.
Yarn Substitution
Milk cotton gives a clean stitch definition that shows every decrease and increase clearly, which matters in a long taper like this one. Standard DK cotton works at the same hook size and gives a similar result. Acrylic at the same weight also works and is usually softer, though the surface looks slightly less crisp. Avoid fuzzy or textured yarn because the taper and the grip section rely on the stitch texture being visible and distinct. The white grip section especially needs a yarn that contrasts cleanly against the grey.

Customization Ideas
- Work the barrel and handle in any sport colour. Navy blue and white makes a classic bat, or use team colours for a personalised gift.
- Add a thin stripe of red or gold at the seam between the barrel and the handle for a branded look.
- Make the grip section in a team colour instead of white so the bat reads as a particular club.
- Skip the matching baseball and attach the bat to a keychain ring instead for a single item bag charm.
- Work the bat in brown and white as in the original pattern for a traditional wooden bat look.
Frequently Asked Questions
I have never worked a magic ring before. Is it hard? It takes a few tries but comes quickly once your hands understand the motion. Make a small loop with the yarn leaving a 6 inch tail, hold the cross point between your fingers, insert the hook through the loop, yarn over and pull up a loop, then chain 1 and work your 8 sc into the center of the ring before pulling the tail closed. A short video of the magic ring is worth watching alongside this explanation if a visual helps you.
What does chain 1 do at the start of each round? It lifts your hook to working height for the round but does not count as a stitch. Always work your first sc of the round into the very first stitch of the previous round, not into that chain, or your stitch count will creep up by one every round and the bat will flare out.
My decreases look bumpy on the outside. How do I fix that? Switch to the invisible decrease method, which works through the front loops only of the next two stitches before completing the decrease normally. It pulls the fabric flat rather than leaving a visible ridge.
Why does the handle feel lumpy even though I stuffed it? Lumps usually come from large pieces of stuffing pushed in all at once. Tear the fiberfill into small pieces no bigger than a grape and push each one in separately with tweezers. Pressing gently on the outside of the bat as you go helps settle the stuffing evenly.
Can I make this without a baseball to go with it? Absolutely. The bat stands on its own as a sports themed toy or shelf piece. The pattern does not require the ball. The matching baseball in my photo is a bonus make for display only.