Crochet Christmas Light Bulb Garland Free Pattern
Yellow, orange, green and red bulbs with grey caps string along a braided brown cord in this crochet Christmas light garland free pattern. Flat single crochet panels seam into each bulb, and every one takes thirty to forty minutes to finish.
Requests pile up every December for the crochet Christmas light garland, and the curved cord is why. Real strings tangle and burn out. This one drapes over a mantel year after year without a plug. Makers keep returning to the crochet Christmas light garland because nobody has ever asked them for a plain wreath twice.
Crochet Christmas Light Garland
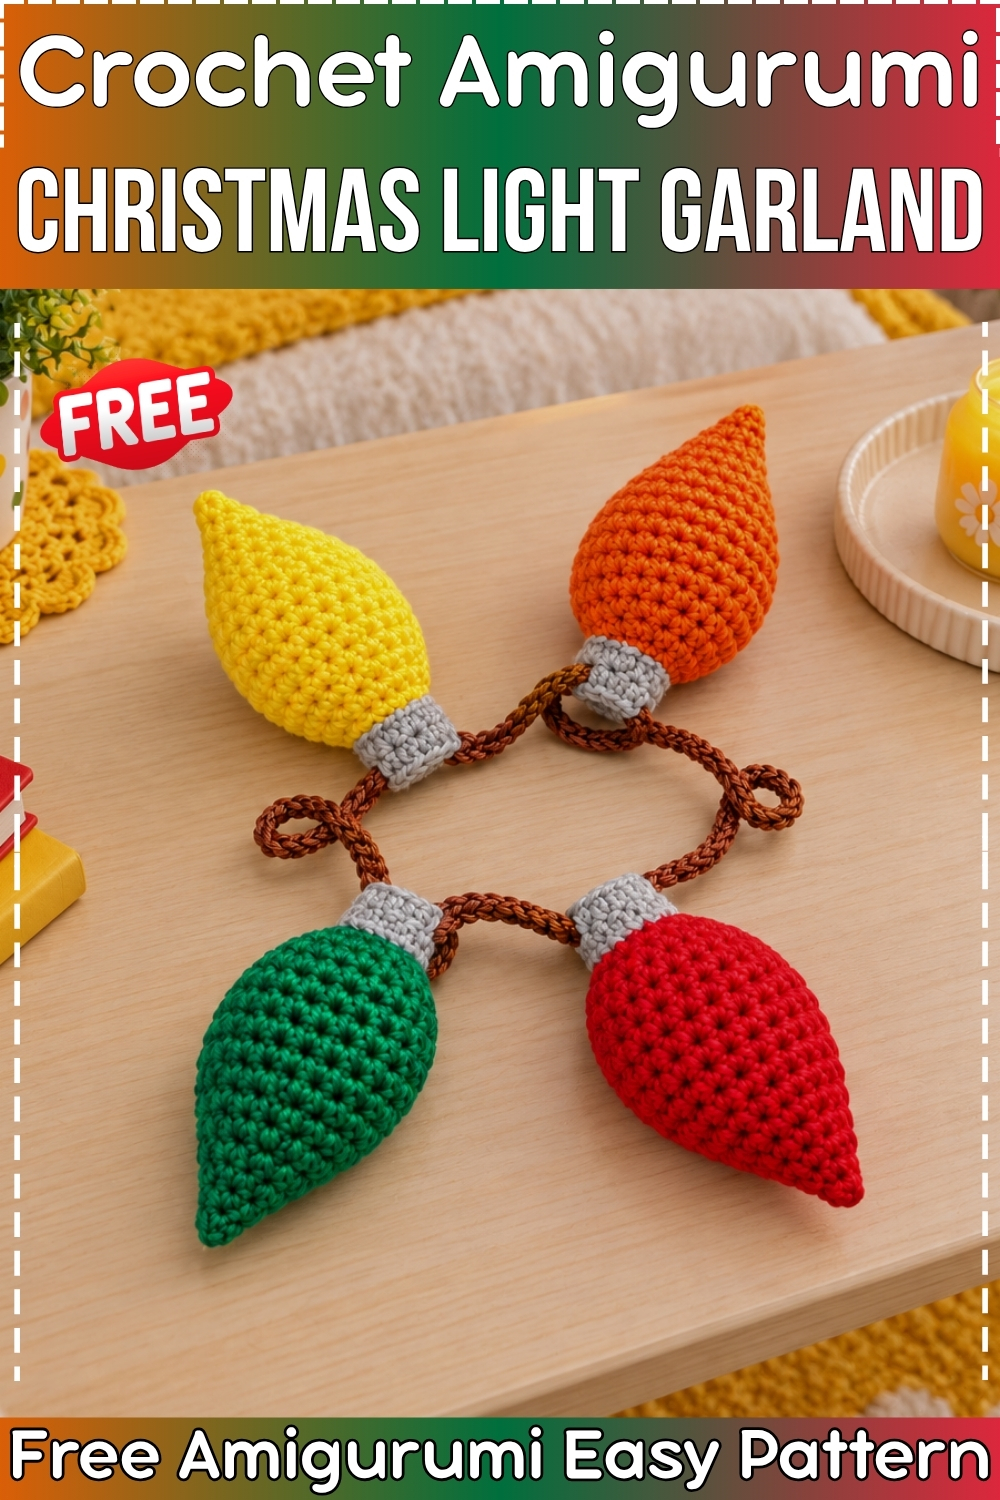
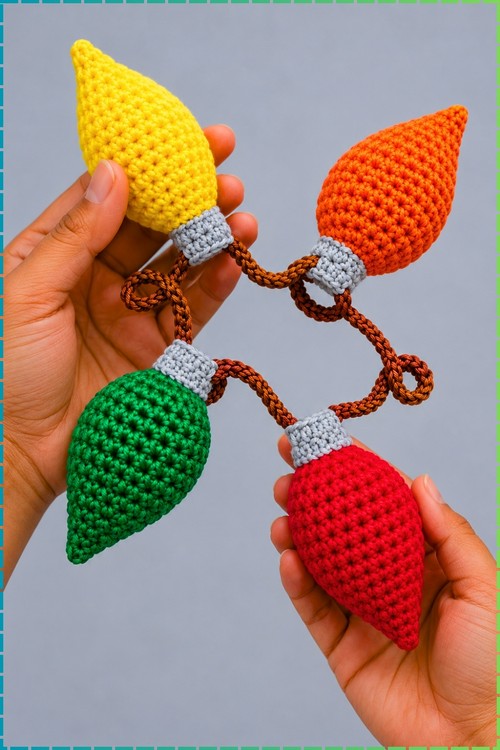
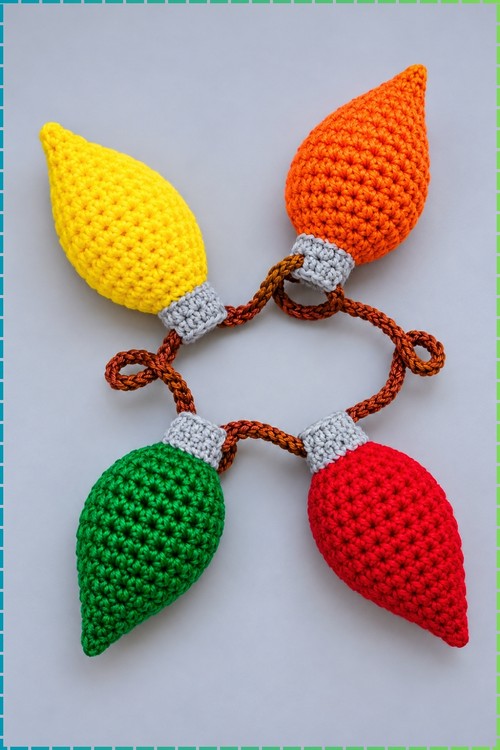
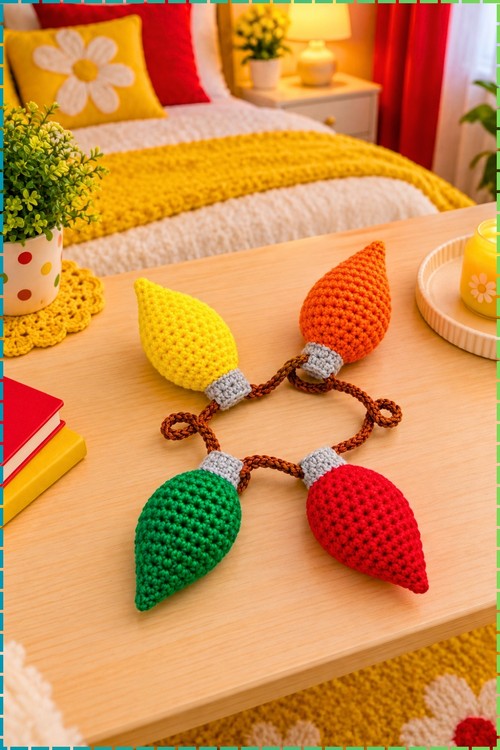
Four pointed bulbs in yellow, orange, green and red link together along a braided brown cord that loops and curves across the table. Grey caps sit at the base of every bulb where the cord passes through. Each bulb is stuffed and worked in the round to a sharp tip, then the cap rounds change colour before the cord is threaded on. The cord itself is a long chain worked separately. Assembly is the main task since the bulbs need even spacing along it. Individual pieces are easy, so the whole garland comes down to repetition rather than difficulty.
Why Make This One
Making the two flat panels first and then seaming them is a very beginner friendly approach because you can see the shape building row by row on a flat surface, which is much easier to track than working in rounds. The stitches are all single crochet, so if you can work a foundation chain and increase or decrease at the ends of rows, you can finish this garland. Each bulb takes around thirty to forty minutes, and a set of four is a complete afternoon project.
Materials And Tools
- Scrap yarn or small balls in yellow, orange, green and red for the four bulb bodies
- Grey yarn for the socket caps
- Brown yarn for the connecting cord and hanging loops
- Crochet hook to match your yarn weight
- Small amounts of fiberfill stuffing
- Yarn needle and scissors
My version uses a smooth medium weight yarn throughout, which keeps the stitch definition crisp and the panels lie flat before joining. All four colours are in the same weight as the grey cap and brown cord yarn.
Beginner Technique Notes
Always make a turning chain of one at the end of each row and turn your work before starting the next row, unless a row specifies not to do so. An increase here means two single crochet worked into the same stitch, which you will do at both the first and last stitch of the increase rows to widen the panel evenly on both sides. A decrease means inserting your hook into the first stitch, pulling up a loop, then inserting into the second stitch, pulling up another loop, and drawing the yarn through all three loops on your hook to close both stitches together as one. This invisible version of the decrease keeps the edge smooth rather than leaving a pulled loop on the surface.
Keep your tension even on the straight rows in the middle section. If you work those tighter than the increase rows, the finished panel will curve inward and the two sides will not meet cleanly when you seam them together.
Lay both panels on top of each other and check the edges line up before you start the joining round. A small gap at the start of the seam is much easier to fix than discovering halfway around that one panel is a row shorter than the other.
The socket cap uses a ridge technique on Rows 2 and 4 where you work into the lower loops or the back of the previous row’s base instead of the top loops. If you are unsure where to place your hook, look for the horizontal bar sitting below the top two loops of each stitch from the previous row, and insert there. This is what creates the raised ridge across the cap.
The Pattern
Abbreviations
- ch means chain
- sc means single crochet
- inc means increase, two single crochet in the same stitch
- dec means decrease, single crochet two stitches together
- sl st means slip stitch
- US crochet terms throughout
Bulb Panels, Make 2 Per Bulb In The Same Colour
Work all rows with a ch 1 and a turn at the end unless the row says otherwise.
- Foundation: Ch 5
- Row 1: Starting in the 2nd ch from the hook, work 1 sc into each chain across [4 sts]
- Row 2: Inc in the first stitch, 2 sc, inc in the last stitch [6 sts]
- Row 3: Inc in the first stitch, 4 sc, inc in the last stitch [8 sts]
- Row 4: Inc in the first stitch, 6 sc, inc in the last stitch [10 sts]
- Row 5: Inc in the first stitch, 8 sc, inc in the last stitch [12 sts]. After five increase rows the panel should be at its widest, roughly teardrop shaped with a pointed base where you started
- Rows 6 to 12, seven rows: Sc in each stitch across without any changes [12 sts per row]. These straight rows form the rounded middle section of the bulb, and keeping an even tension here is what lets the two panels sit flush against each other later
- Row 13: Dec over the first 2 stitches, 8 sc, dec over the last 2 stitches [10 sts]
- Row 14: Sc in each stitch across [10 sts]
- Row 15: Dec over the first 2 stitches, 6 sc, dec over the last 2 stitches [8 sts]
- Row 16: Sc in each stitch across [8 sts]
- Row 17: Dec over the first 2 stitches, 4 sc, dec over the last 2 stitches [6 sts]
- Row 18: Sc in each stitch across [6 sts]
- Row 19: Dec over the first 2 stitches, 2 sc, dec over the last 2 stitches [4 sts]
- Row 20: Sc in each stitch across [4 sts]
- Row 21: Dec twice [2 sts]
- Row 22: Sc in each stitch across [2 sts]
- Row 23: Dec over the 2 stitches [1 st]
- Row 24: Sc into the remaining 1 stitch [1 st]
- Fasten off and cut the yarn for the first panel
- For the second panel, fasten off but do not cut the yarn, since you will use it to join the two panels
Joining The Panels And Stuffing
- Place the two identical panels together with the right sides facing outward so the stitch texture shows on both sides of the finished bulb
- Using the yarn still attached to the second panel, sc around the combined edges to join both pieces together, working through both layers at once so the seam closes as you go
- Work 4 sc across the top edge of the joined panels, which is the narrow end at Row 24 where the socket cap will sit
- Before you close the last section of the edge, leave a small opening and push in a small amount of fiberfill. Too much stuffing here distorts the flat teardrop shape, so use just enough to give the panel a gentle puff when you press it lightly between your fingers
- Complete the remaining edge with sc, join with a sl st to the first stitch, cut the yarn and weave the end inside the bulb
Socket Cap In Grey
- Join grey yarn to the first of the 4 stitches along the top edge of the joined bulb
- Row 1: Ch 1, sc in the same stitch and sc in the next 3 stitches [4 sts]
- Row 2: Do not make a ch 1, turn, and work 4 sc into the lower loops or the base of the previous stitches rather than the top loops, which creates the first raised horizontal ridge across the cap
- Row 3: Ch 1, turn, work 4 sc into the regular top loops [4 sts]
- Row 4: Do not make a ch 1, turn, work 4 sc again into the lower loops from the wrong side to form the second ridge. Two ridges give the cap its textured banded look that resembles a real light socket
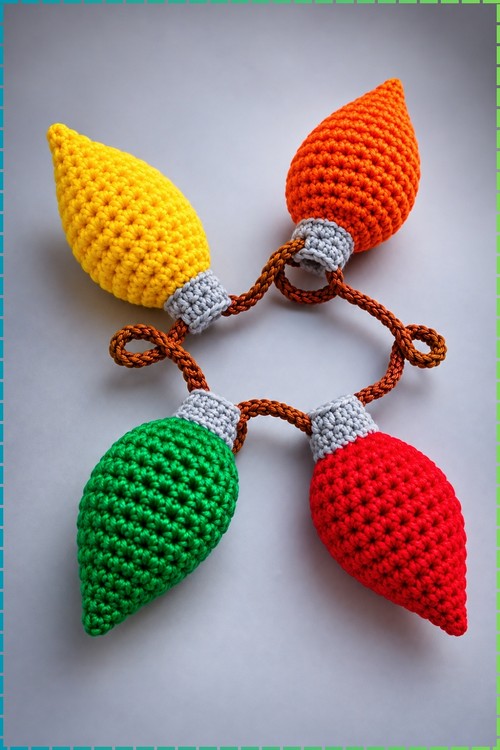
- Ch 1 to fasten off, cut the yarn and weave in all loose ends. The finished cap should sit as a short neat rectangle of grey above the coloured bulb body, exactly as the four caps sit in my photo
Assembling The Garland Cord In Brown
- Using brown yarn, ch 20 and then join with a sl st to the 1st chain to create the first hanging loop at one end of the garland
- Ch 20, or chain until the spacer before the first bulb reaches the length you want
- Work 4 sl st across the top 4 stitches of the first bulb socket cap to attach it to the cord
- Ch 15 to make the spacer between the first and second bulb, adjusting the chain length if your yarn is thicker or thinner so the bulbs hang separately without crowding each other
- Work 4 sl st across the socket cap of the second bulb
- Repeat ch 15 and 4 sl st across the socket for each remaining bulb until all four are attached, with a 15 chain spacer between each pair
- After attaching the last bulb, ch 20, then ch an additional 20 and sl st back to create the final hanging loop at the other end
- Fasten off and weave in all yarn ends. Check that each bulb hangs free and the cord between them forms gentle curves rather than pulling tight, which is the look you can see in my photo
Troubleshooting Tips
- If the panels do not match when you hold them together, check whether you missed a chain one turning chain on any row. A missing turning chain shortens a row by one stitch and pulls the whole panel in at that point.
- If the grey cap curls forward after finishing, the ridge rows were probably worked too tightly. The cap only has four stitches, so even half a step tighter than the bulb rows is noticeable. Block it lightly under a damp cloth.
- If the cord twists between bulbs, you have too few chains in the spacer sections for your yarn weight. Add two or three more chains to each spacer and the cord will relax.
Customization Ideas
Make six or eight bulbs in a wider range of colours for a longer garland to drape across a mantel or staircase. Single bulbs on a short individual cord become gift tags or bag charms. Swapping brown for black cord gives a more modern look. Leaving out the stuffing keeps the bulbs completely flat and makes them much faster to finish.
FAQ
Do both panels need to be exactly the same size? Yes, or as close as you can get them. Any difference in tension between the two panels will make the seam pucker at the edges, and the bulb will sit at an angle rather than lying flat. Crochet both panels in the same sitting and with the same hook if you can.
How do I keep my increases and decreases at the edges neat? Work them into the very first and very last stitch of the row every time, not the second stitch from the edge. Working them into the second stitch leaves a loose loop that shows on the surface.
Can I make the bulbs without stuffing? Yes. Flat unstuffed bulbs lie completely flush against the surface and are quicker to finish. They also work better as gift tags since they do not add bulk to a wrapped parcel.
What if I want more or fewer bulbs on my garland? Add or remove bulbs freely. Each extra bulb needs two panels, one cap, and an extra ch 15 spacer on the cord. The hanging loops at each end stay the same.
Why does my cord twist even though I counted the chains? Cotton cord tends to hold its shape well, but acrylic and stretchy yarns can twist as you work the slip stitches onto the cap. Try holding the cord taut between two fixed points while you attach each bulb.