Crochet Bauble Ornament Free Pattern For Christmas
Make a red-and-gold crochet bauble from eight flat circles joined into ridged vanes, then cinch it with a golden hanging loop. Pair this handmade ornament with a crocheted cat amigurumi for a playful seasonal display; the firm, unstuffed form holds its shape on a tree or bag.
Hang one up and the Crochet Bauble Ornament acts less like decoration and more like a small character on the branch. The gold ribbing gives it a proud, puffed up posture. Make a Crochet Bauble Ornament in a second colour and the pair start bickering for attention.
Crochet Bauble Ornament
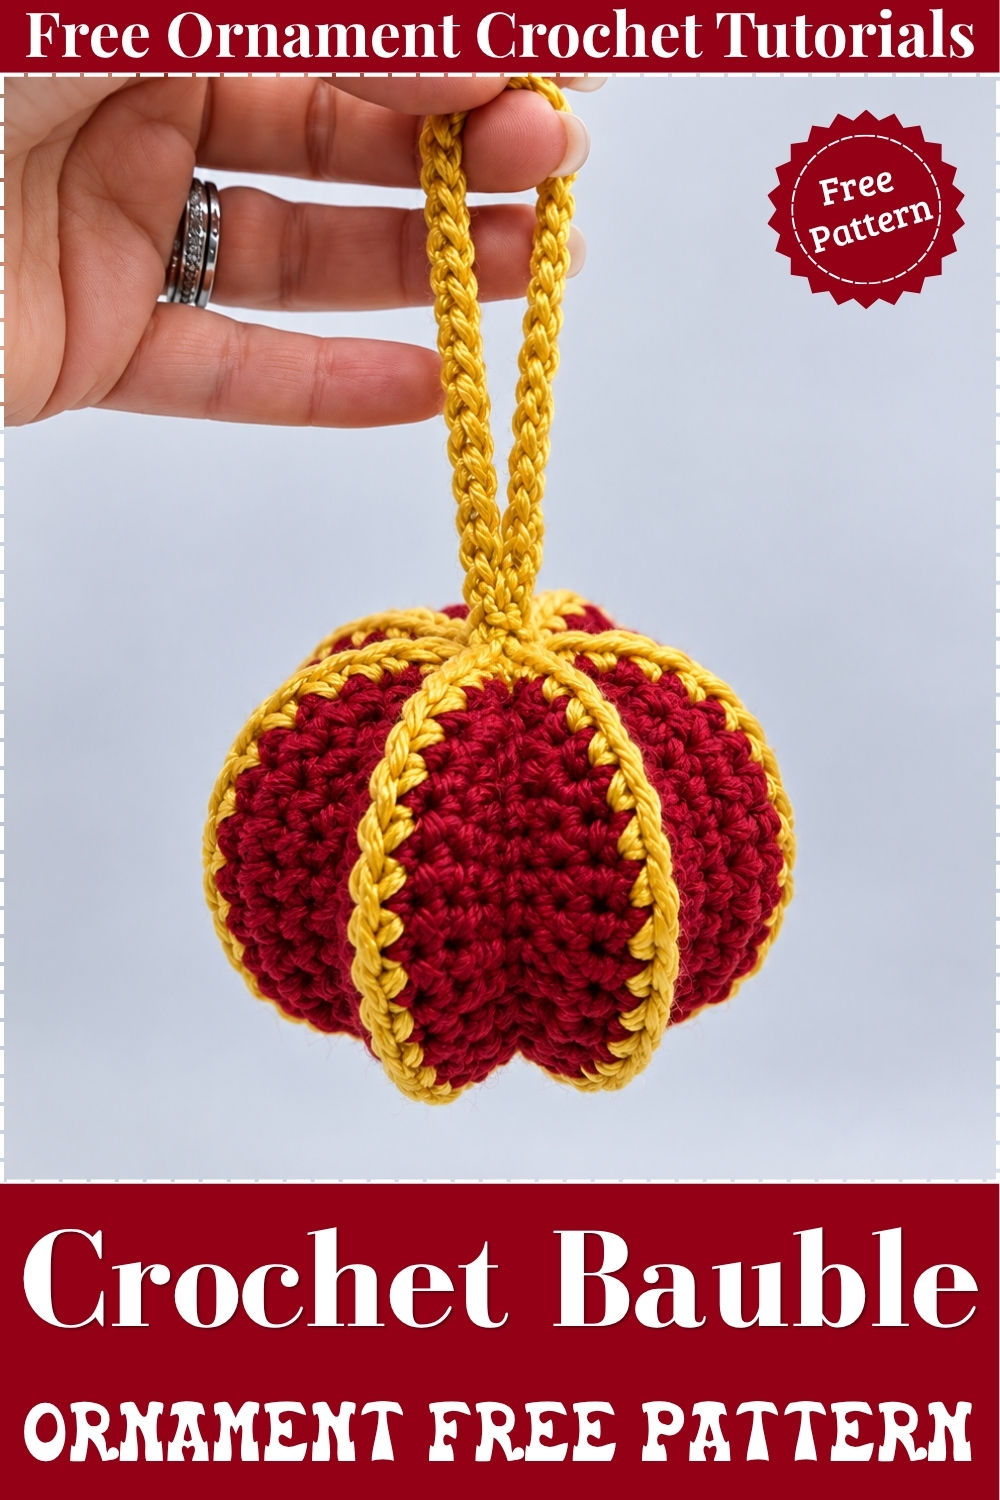
Eight flat crocheted circles join edge to edge to build this crochet bauble ornament, and nothing goes inside it at any stage. Tight stitches worked on a small hook hold the round shape all on their own. Red yarn forms the eight vanes while golden yellow outlines every seam and carries the long hanging loop. Every yarn tail hides inside the body, so the finishing takes minutes instead of a whole evening of weaving. You can start one after breakfast and hang it before lunch. My version came off the hook firm, glossy, and ready for the tree straight away.
Materials and Tools
- Medium weight number 4 acrylic yarn in deep red for the body, which is Color A in the steps below. A stiffer acrylic such as Red Heart Super Saver holds the shape best, and that stiffness is doing real structural work here since there is no stuffing.
- Medium weight number 4 acrylic yarn in golden yellow for the seams and hanger, which is Color B. My photo shows a warm mustard gold rather than a pale lemon, and the deeper tone reads much better against red.
- A 4.0 mm crochet hook, size G. This is smaller than the yarn label suggests on purpose.
- A darning or tapestry needle with an eye large enough for worsted yarn.
- Scissors.
You will not need stuffing, a stitch marker, or safety eyes for this one.
Difficulty and Time
In my experience this sits at an easy advanced beginner level. If you can work a magic ring, a double crochet, and a single crochet, you already have everything the pattern asks for. The eight circles took me a little under an hour altogether, and the joining plus finishing added roughly another hour. Your first bauble will run slower than that while you work out how the circles sit back to back, and the second one will fly.
Beginner Technique Notes
- A magic ring, sometimes called a magic circle, is an adjustable loop you crochet into and then pull closed. If yours refuses to close after the round, the working yarn and the tail have most likely been swapped, so try pulling the other strand.
- The chain 3 at the start of each round counts as your first double crochet. Forgetting that is the most common way people end up with the wrong stitch count.
- Joining with a slip stitch means inserting your hook into the top of that starting chain 3, yarning over, and pulling straight through both the stitch and the loop on your hook.
- Working through both layers simply means pushing the hook through the matching stitch on the front circle and the back circle at the same time, then finishing the stitch as normal.
The Pattern
Step 1: Make the Eight Flat Circles in Red
- Make a magic ring with your red yarn.
- Chain 3, which counts as your first double crochet, then work 11 double crochet into the ring.
- Pull the ring closed tightly before you join, because a loose center will show as a hole once the bauble is assembled.
- Join with a slip stitch into the top of the starting chain 3. [12 dc]
- The piece should now sit flat as a small solid disc with no gap in the middle.
- Round 2: chain 3, work 1 double crochet into the same base stitch you slip stitched into, then work 2 double crochet into every stitch around.
- Join with a slip stitch into the top of the starting chain 3. [24 dc]
- The disc should still lie flat on the table. Cupping means your stitches are too tight, and ruffling means they are too loose.
- Round 3: chain 3, work 1 double crochet into the same base stitch, then repeat 1 double crochet in the next stitch and 2 double crochet in the following stitch all the way around.
- You should finish the round on a single double crochet.
- Join with a slip stitch into the top of the starting chain 3. [36 dc]
- The finished circle should measure roughly the size of a drink coaster and feel dense and slightly stiff when you bend it.
- Fasten off leaving a short tail and do not weave it in. Every one of these tails gets tied off and hidden inside the bauble later.
- Repeat until you have 8 identical red circles.
- Lay all eight out and check them against each other before you start joining. One noticeably larger circle will pull the finished bauble lopsided.

Step 2: Join the Circles With Golden Yellow
- Take 2 circles and hold them back to back with the wrong sides facing each other.
- Line up the tops where the two joining slip stitches sit, since those points become the top of the ornament.
- Insert your hook through both layers at that top edge.
- Attach the golden yellow yarn, chain 1, and work 1 single crochet back into the same stitch.
- Work 18 single crochet in total through both layers, travelling halfway down the edge of the circles.
- Stop at 18 and resist the urge to keep going. That halfway point is what lets the circle open out into a vane.
- Cut the yarn, pull the tail through the loop to fasten off, and leave the tail hanging.
- Fold the second circle back out of the way and place a new circle back to back against it, matching the top edges again.
- Insert your hook through both layers, attach golden yellow, chain 1, and work 18 single crochet down the edge.
- Cut the yarn and pull it through to fasten off.
- Repeat until all 8 circles are joined side by side in one continuous ribbon.
- Check as you go that every seam started at the same top point, because a seam that begins low will tilt one vane and the error compounds around the bauble.
- Fold the eighth circle around to meet the first circle so the ribbon closes into a 3D ball shape.
- Align the top edges and work 18 single crochet down this final seam in golden yellow.
- Fasten off.
- The piece will look like a squashed lantern at this stage, open at the top and the bottom, and that is exactly right.

Step 3: Secure the Tails and Cinch the Bottom
- Push all the red tails through to the center inside of the ornament.
- Group the red tails in pairs from neighbouring circles and tie each pair in a tight double knot.
- Push the knotted tails down inside the body so nothing shows through the gaps.
- Thread a length of golden yellow onto your darning needle.
- Weave the needle through the top loops of the single crochet seam edges all the way around the bottom opening.
- Keep the needle in the same row of loops the whole way round or the gather will pucker to one side.
- Pull the yarn tight to gather the bottom hole fully closed.
- Tie a secure double knot, trim the excess, and use the needle to push the remaining tail inside the ornament.
- The bottom should now look like the photo, with the eight red vanes meeting at a neat gold point.
Step 4: Make the Hanger and Cinch the Top
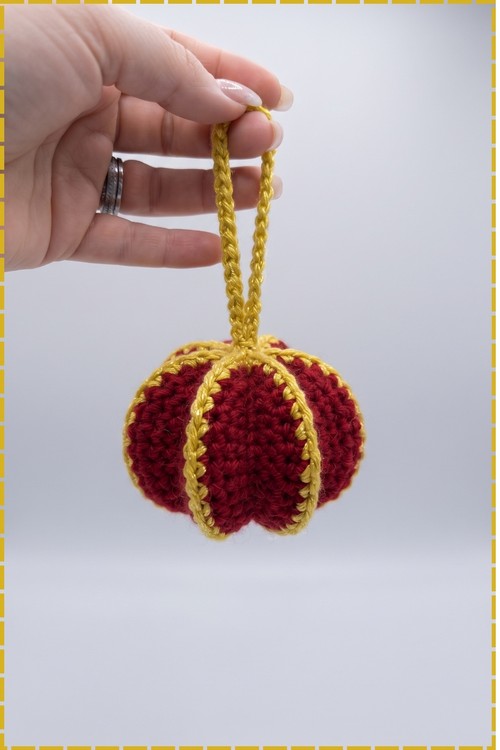
- Using golden yellow, chain until your hanging loop reaches the length you want. My loop hangs long enough to drop well below my fingers when I hold it up, roughly the length shown in the photo.
- Fasten off and tie the two tail ends together in a thick knot at the base so the chain forms a closed loop.
- Make that base knot bulky on purpose, since it is what stops the hanger pulling back out through the cinched top.
- Tie the golden yellow seam tails at the top of the ornament together in pairs, the same way you did with the red ones, and push them inside.
- Insert the knotted base of the chain loop down into the top opening, leaving the loop standing up outside.
- Thread another length of golden yellow onto your darning needle.
- Weave through the single crochet stitches all around the top opening.
- Pull tight around the base of the hanger so the top closes completely and grips the loop.
- Tie securely, run the tail through the body of the bauble and out the other side, trim it close, and tuck the end back inside.
- The chain loop should sit upright and centered, not leaning off one vane.

Step 5: Final Shaping
- Gently pull and flatten each of the 8 vanes outward so they space evenly around the ornament.
- Work around the bauble twice rather than fixing one vane at a time, since evening out one always pulls its neighbour.
- Because you used a small hook, the stitches stay stiff and the star burst shape holds without any stuffing.
Tips and Troubleshooting
- Work your red circles in one sitting if you can. Tension drifts between sessions, and eight circles of slightly different sizes are the main reason a bauble ends up egg shaped.
- Count your 18 single crochet on every seam out loud. A seam of 17 or 19 will visibly twist the vane it sits on.
- If your finished bauble feels floppy, go down to a 3.75 mm hook for the next one rather than adding stuffing. Stuffing rounds out the vanes and loses the pumpkin ridge shape.
- Tie the red tails in firm double knots rather than single ones. They sit under permanent tension once the top and bottom are cinched.
- If the cinched opening still shows a small hole, thread the same yarn again, take a few tiny stitches across the gap, and pull. Nobody will find it once the bauble is hanging.
- Block nothing here. The stiffness of the unblocked acrylic is the whole structure.
Yarn Substitution
Acrylic is the right call for this one. Cotton works and gives a crisper stitch definition, but it has less memory, so a cotton bauble slowly relaxes out of shape over a season in storage. Wool blends bloom and soften, which sounds nice but fights the rigid look you want. Avoid anything with a halo or a slub, since the vane edges depend on clean visible single crochet. If you swap to a different worsted yarn, drop your hook a half size below whatever the label recommends and check that the first circle still lies flat and feels board firm.
Customization Ideas
- Swap the red and gold for white circles with silver seams for a frosted look, or green with gold for a more traditional tree palette.
- Work each of the eight circles in a different color for a rainbow bauble. It reads as a beach ball rather than a Christmas ornament, which is lovely for a nursery.
- Thread a few wooden or metal beads onto the chain hanger before tying the loop closed.
- Make the chain hanger very short to turn the bauble into a zipper pull or bag charm.
- Add a small gold tassel to the cinched bottom so it hangs like a lantern.
- Scale the whole thing up by adding a fourth increase round to every circle and lengthening each seam to match, which gives a large statement bauble.
Frequently Asked Questions
Why does my bauble look flat instead of round? Almost always the seams. If your single crochet joins run too far down the edge of the circles, the vanes cannot open out. Eighteen stitches takes you to roughly the halfway point, and stopping there is what gives the ball its depth.
Do I really not need stuffing? No stuffing at all. The small hook and the stiff acrylic keep each circle rigid, and eight rigid circles braced against each other hold the round shape. Adding stuffing actually hurts the look, because it pushes the vanes outward and blurs the ridges.
Can I weave in the ends the normal way instead of tying them? You can, but tying and hiding is faster and stronger here. The tails end up sealed inside a closed body where nothing can rub them loose, which is why this design has no visible finishing at all.
My circles are curling up at the edges. What went wrong? Your tension is too tight for the increase rate. Try the same round again with a slightly looser hand, and make sure you are working 2 double crochet into every stitch in round 2 rather than skipping any.
How do I stop the hanger pulling out? Make the knot at the base of the chain loop thicker than you think it needs to be, then cinch the top opening tightly around it. The knot has to be too fat to pass back through the gathered hole.