Crochet Bird Amigurumi Free Pattern In Red
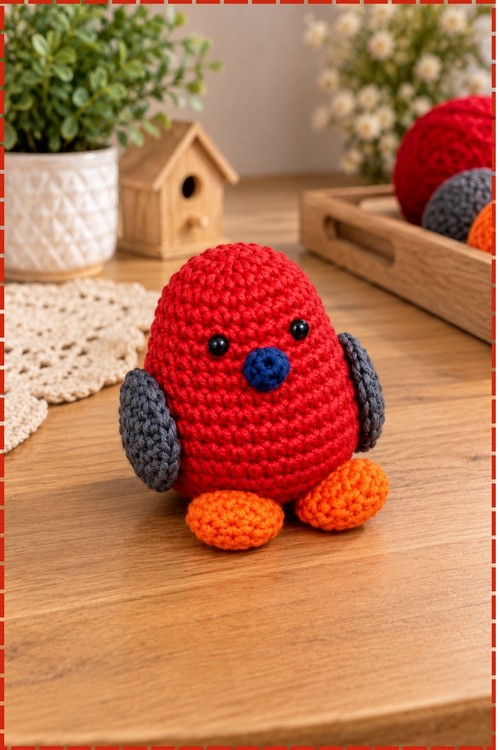
Two increase sections at the front push out the belly of this crochet bird amigurumi, so it leans like a little red egg while the back stays straight. Joined rounds keep the head and body one seamless shape, then grey wings, orange feet and a navy beak sew on.
Shaping the body of the Crochet Bird Amigurumi happens in one continuous piece, so you watch the egg form under your hands with no seams to dread later. The flat wings go fast. Attaching them is the fussy bit, and pinning before sewing is what keeps the Crochet Bird Amigurumi from ending up lopsided.
Crochet Bird Amigurumi
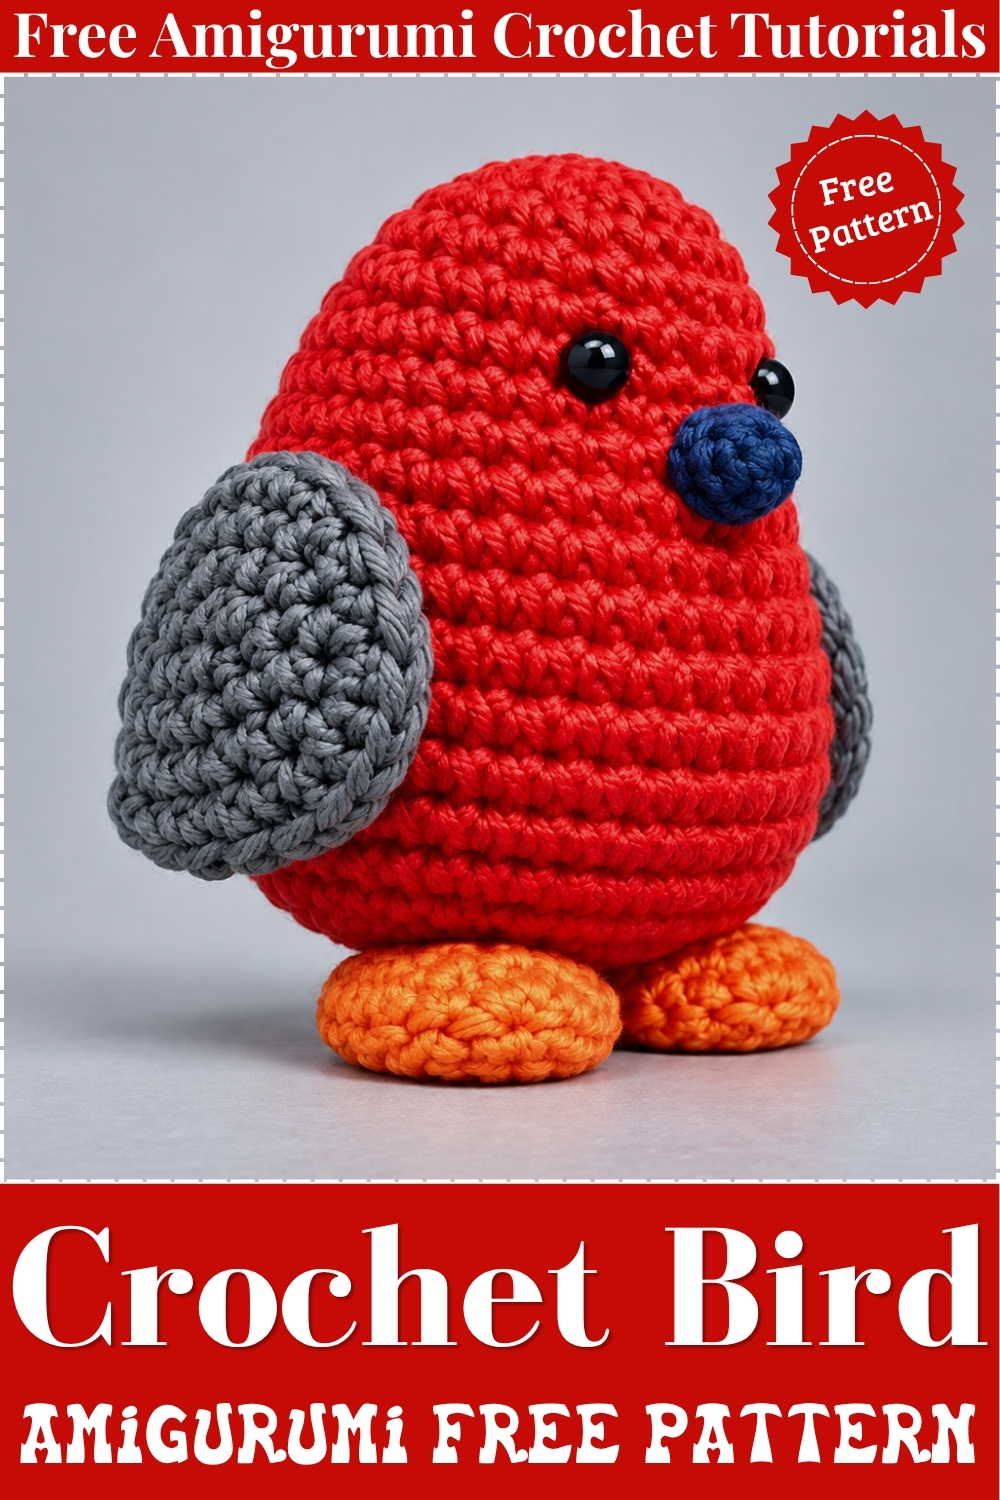
Joined rounds build this crochet bird amigurumi from the top of the head straight down to the base, so the body needs no separate head piece and no neck seam. Two increase sections placed at the front push the belly outward while the back stays straight, which is what gives the bird its leaning egg shape. Wings, feet, and beak all work up small and attach afterward. My version pairs a bright red body with grey wings, a navy beak, and orange feet. Beads serve as eyes, kept low and wide on the face.
Quick Facts
- Difficulty: easy, suitable for anyone comfortable with increases and decreases
- Time: roughly three hours in my own making, most of it on the body
- Hook: 3.0 mm for the body and parts, a fine hook around 1.0 mm for the beak
- Finished size: small enough to sit in one palm, though this shifts with your tension
- Construction: one piece body, four small pieces sewn or glued on
Materials and Tools
- 4 ply wool in red for the body, grey for the wings and tail, and orange for the feet
- Fine thread or thin yarn in navy blue for the beak
- 3.0 mm crochet hook for the body and larger parts
- Fine hook, around 1.0 mm, for the beak
- Fiberfill stuffing
- Two small black beads for the eyes
- Tapestry needle
- Glue gun, or a needle and thread if you prefer to sew everything
Customization Ideas
- Change the body colour and keep the grey wings, since grey sits well against almost anything.
- Use orange for the beak as well as the feet for a classic songbird look.
- Skip the tail for a rounder, chick like bird, which is close to how mine reads from the front.
- Embroider the eyes instead of using beads if the bird is going to a small child.
- Work the wings in a variegated yarn so each one comes out slightly different.
- Make a set in red, blue, and yellow and group them on a shelf.
The Pattern
Body
- Work in joined rounds throughout: slip stitch (sl st) to the first single crochet (sc), chain (ch) 1, then start the next round in the same stitch.
- Round 1: 6 sc in a magic ring (MR). Sl st to join, ch 1. (6 sts)
- Round 2: work an increase (inc) in each stitch, 6 times. Sl st to join, ch 1. (12 sts)
- Round 3: [1 sc, 1 inc] repeated 6 times. Sl st to join, ch 1. (18 sts)
- Round 4: [2 sc, 1 inc] repeated 6 times. Sl st to join, ch 1. (24 sts) The disc should still lie flat here, which becomes the top of the head.
- Rounds 5 to 7: sc in all 24 sts. Sl st to join, ch 1. (24 sts per round) These straight rounds form the head and upper chest, and the eyes will sit inside this section.
- Round 8: sc in the first 7 sts, then repeat [1 sc, 1 inc] 6 times, then sc in the remaining 6 sts. Sl st to join, ch 1. (30 sts) Placing all the increases in the middle of the round pushes the belly forward and leaves the back straight, which is what makes my bird lean the way it does.
- Round 9: sc in all 30 sts. Sl st to join, ch 1. (30 sts)
- Round 10: sc in the first 8 sts, then repeat [2 sc, 1 inc] 6 times, then sc in the remaining 6 sts. Sl st to join, ch 1. (36 sts) Keep the increase block lined up with the one from Round 8 or the belly will spiral sideways.
- Rounds 11 to 14: sc in all 36 sts. Sl st to join, ch 1. (36 sts per round) This is the widest part of the body and it takes the most yarn, so check your tension stays even.
- Round 15: [4 sc, 1 decrease (dec)] repeated 6 times. Sl st to join, ch 1. (30 sts) Use an invisible decrease worked through the front loops so no gaps open up on the red.
- Round 16: sc in all 30 sts. Sl st to join, ch 1. (30 sts)
- Round 17: [3 sc, 1 dec] repeated 6 times. Sl st to join, ch 1. (24 sts)
- Round 18: [2 sc, 1 dec] repeated 6 times. Sl st to join, ch 1. (18 sts) Stuff the body firmly now, shaping the belly forward with your fingers as you fill it.
- Round 19: [1 sc, 1 dec] repeated 6 times. Sl st to join, ch 1. (12 sts) Add more stuffing through the opening before it closes further.
- Round 20: work a dec 6 times around. (6 sts)
- Fasten off leaving a tail, weave it through the remaining front loops, pull tight to close, then hide the end inside. This closed point sits flat underneath and the feet will cover it.
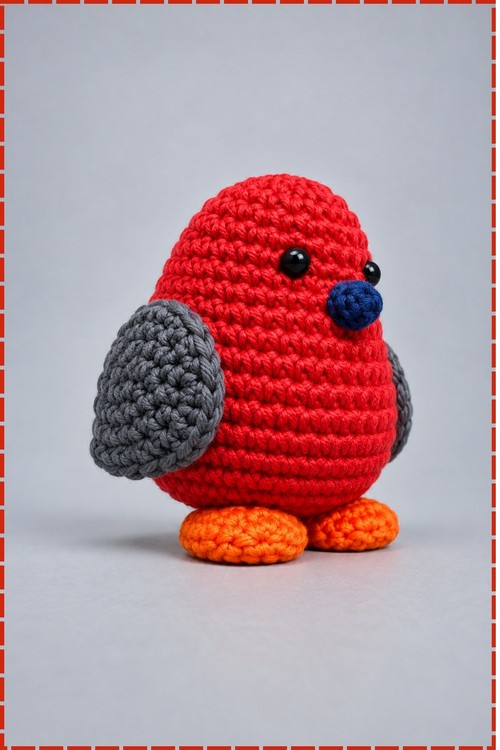
Wings (Make 2)
- Use grey yarn.
- Round 1: 6 sc in MR. Sl st, ch 1. (6 sts)
- Round 2: inc in each stitch, 6 times. Sl st, ch 1. (12 sts)
- Round 3: sc in the first 3 sts, then work 1 sc and 1 half double crochet (hdc) in the 4th st, 1 double crochet (dc) in the 5th st, 1 treble crochet (tr) in the 6th st, 1 dc and 1 hdc in the 7th st, 1 hdc in the 8th st, 1 hdc in the 9th st, then sc in the remaining 4 sts. The rising and falling stitch heights are what create the pointed wing tip, and skipping any of them leaves you with a plain circle.
- Fasten off with a seamless needle join and leave a length of yarn for attaching.
- My wings sit flat and unstuffed against the body, which is how they keep that smooth oval face.
Feet (Make 2)
- Use orange yarn.
- Round 1: 6 sc in MR. Sl st, ch 1. (6 sts)
- Round 2: inc in each stitch, 6 times. Sl st, ch 1. (12 sts)
- Round 3: sc in all 12 sts. Sl st, ch 1. (12 sts)
- Round 4: [1 sc, 1 dec] repeated 4 times. Sl st, ch 1. (8 sts)
- Flatten the opening and work sc across both layers, around 4 sc, to seal it flat. Keep the foot genuinely flat rather than padded, since a flat foot is what lets the bird stand steady on a shelf.
- Fasten off.
Tail
- Use grey yarn and make two identical cone pieces.
- Round 1: 6 sc in MR. Sl st, ch 1. (6 sts)
- Round 2: [1 sc, 1 inc] repeated 3 times. Sl st, ch 1. (9 sts)
- Rounds 3 and 4: sc in all 9 sts for 2 rounds. Sl st, ch 1. (9 sts)
- Fasten off the first piece. Do not fasten off the second piece.
- Round 5: join the second piece to the first by working [1 sc, 1 dec] repeatedly across both pieces, combining them into one round. (12 sts) Hold the two cones side by side with their openings facing you so the join sits straight.
- Round 6: sc in all 12 sts around. (12 sts)
- Fold the piece flat and sc through opposing pairs of stitches across the top to seal it.
- Fasten off.
- My photographed bird shows the tail tucked close behind the wing rather than standing out, so treat the tail as optional if you want a fully rounded back.
Beak
- Use the navy blue thread and the fine hook.
- Round 1: 6 sc in MR. Sl st, ch 1. (6 sts)
- Round 2: sc in all 6 sts. Sl st, ch 1. (6 sts)
- Round 3: [1 sc, 1 inc] repeated 3 times. Sl st. (9 sts) The piece should form a small dome rather than a flat disc.
- Fasten off.
- Push a tiny pinch of stuffing inside before attaching so the beak stands proud of the face the way mine does.
Assembly
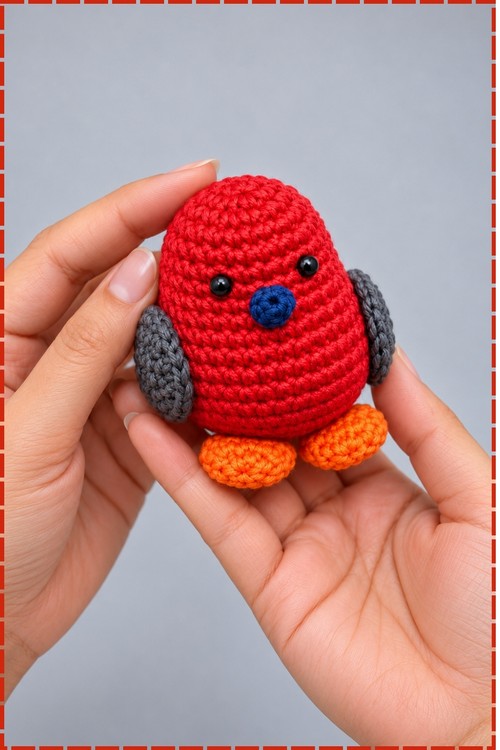
- Count 5 rounds down from the centre top of the head and sew the black beads on opposite sides of the front face. On my bird they sit fairly high and wide apart, which gives the face its open look.
- Attach the beak centred just below and between the eyes, slightly to the front, using glue or a needle. Mine tilts down a little rather than sitting level.
- Position the wings symmetrically on each side of the body, angled slightly backward, and attach with glue or yarn. Mine sit low on the sides with the pointed tips facing forward and down, covering a good part of the body width.
- Attach the flat feet underneath the base, spaced apart and toed forward so the bird stands without tipping.
- Attach the tail horizontally to the centre back of the lower body if you are using it.
Tips and Troubleshooting
- Keep the increase blocks in Rounds 8 and 10 stacked over each other. If they drift, the belly twists to one side and the bird will not stand straight.
- Dry fit the wings with pins before gluing. Wing height changes the whole character of the face, and glue gives no second chances.
- Stuff in small pieces and press the belly forward as you go. A body stuffed in one lump comes out barrel shaped rather than pear shaped.
Yarn Substitution
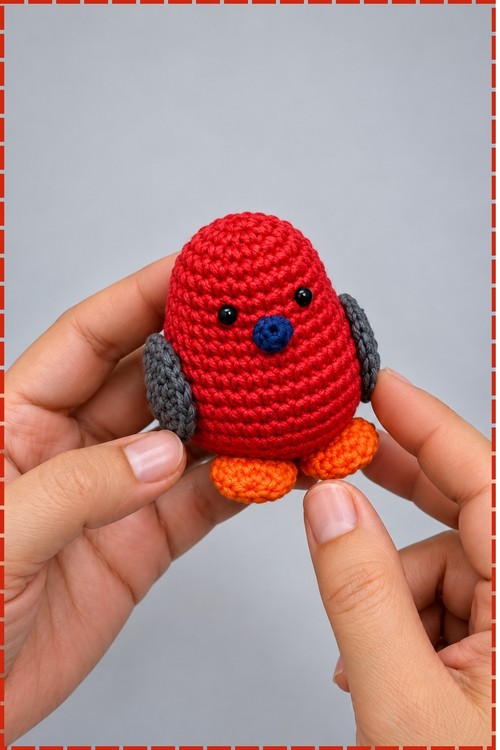
Smooth 4 ply cotton or wool suits this best, since the stitch definition on my bird is part of the look. Acrylic works too and makes a lighter piece. Avoid fuzzy or fluffy yarn, because the wing tip shaping disappears into the halo. For the beak, any fine thread that holds a tight stitch will do, and a slightly thicker one just makes a chunkier beak.
FAQ
Can I use safety eyes instead of beads? Yes, place them in the same position five rounds down, and insert them before the body is closed and stuffed, since the backs need to be reached from inside.
Why do my wings curl instead of lying flat? Too much tension in Round 3, usually on the treble crochet. Work the tall stitches loosely and block the wings flat under a damp cloth if needed.
Do I have to glue the parts on? No. Everything can be sewn with a tapestry needle and matching yarn, which holds better over time and is the safer choice for a toy.
My bird tips forward when I stand it up. How do I fix it? Move the feet slightly further forward under the belly and make sure both are flat rather than rounded. A heavier stuffed base also helps it settle.