Crochet Christmas Angel Amigurumi Free Pattern
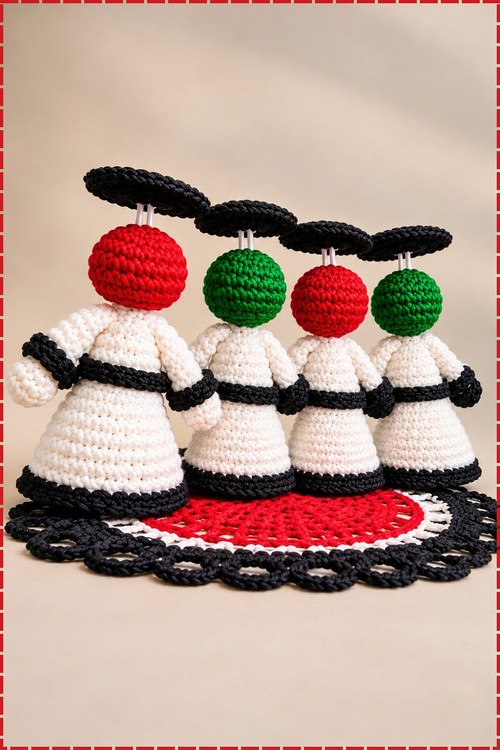
Red and green heads turn four crochet Christmas angel amigurumi into a matched choir, each one dressed in white with black trim bands and a wire halo. Circle them on the mantel beside the holiday dessert spread and let their outstretched arms link up.
Standing in a row with halos hovering, these crochet christmas angel amigurumi look solemn right up until you notice the tiny arms. There is something stiff and formal about the posture, like a choir holding a note. Each crochet christmas angel amigurumi keeps a straight face while the head colour gives the joke away, and a crochet christmas angel amigurumi never breaks character.
Crochet Christmas Angel Amigurumi
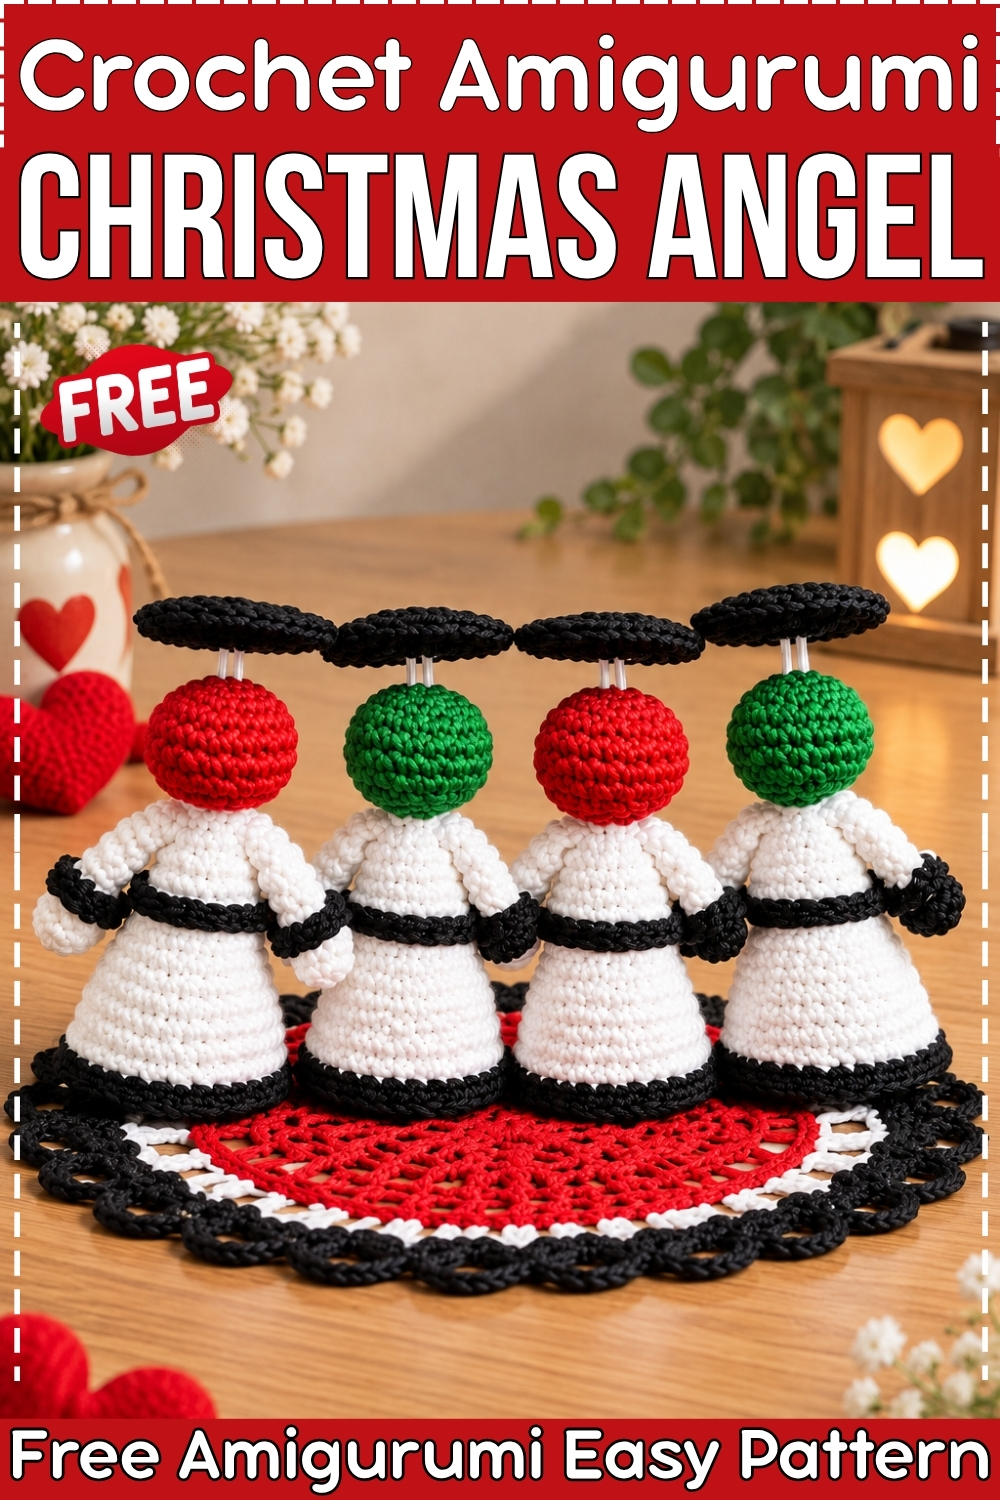
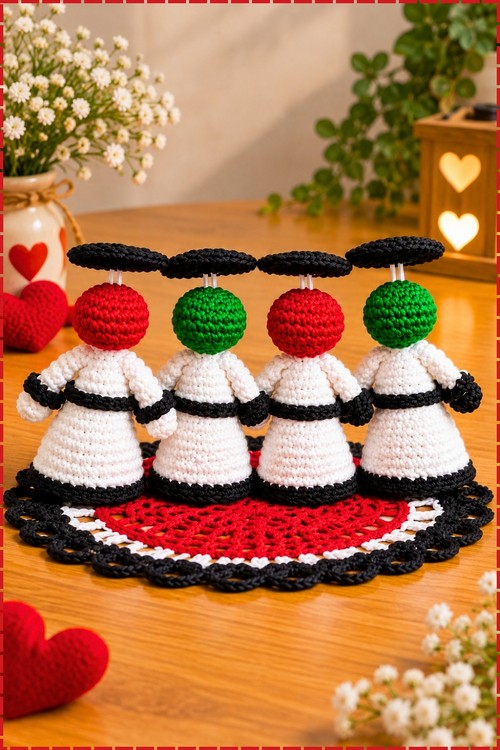
Four angels worked from the same pattern stand together as a set when you swap head colors between them. Each crochet Christmas angel amigurumi starts from a small stuffed head, continues directly into a flared white dress body, and ends with a flat halo held up by a wire stem inserted into the top of the head. My set uses alternating red and green heads rather than a skin tone, and the trim, arms, and halos are all worked in black instead of gold. Arranged in a circle, the four figures face outward and hold each other at the arms. The wire stem keeps every halo sitting flat and horizontal above the head.
Materials And Tools
- 3.25 mm crochet hook
- DK or worsted weight yarn in red for two heads
- DK or worsted weight yarn in green for two heads
- White yarn for the dress body on all four angels
- Black yarn for the trim, arms, and halos on all four angels
- Plumbing wire, approximately 7 to 8 inches per angel, for the halo stem
- Polyester fiberfill stuffing
- Tapestry needle
- Scissors
I made four angels in this session, alternating the head color between red and green so that the set reads as two pairs when arranged in a circle. The gold yarn from the original pattern is replaced entirely with black here.
Difficulty And Time
This one sits at intermediate level. The dress uses back loop only and front loop only rounds that run right next to each other, and keeping track of which loops you are in at each round is the thing that takes focus. From my own making, each angel took me roughly two to three hours including the halo assembly.
Beginner Technique Notes
- Back loop only (BLO) means inserting your hook into only the far loop of the stitch, leaving the near loop free. Front loop only (FLO) means the opposite. When the pattern works trim into the exposed front loops of a BLO round, those loops are still sitting there waiting for you once you finish the BLO pass.
- The gold trim color in the original pattern becomes black in my version. Every step that says gold yarn is worked in black yarn throughout this post.
- Keep a second stitch marker for the trim rounds. Putting one in the BLO pass and one in the FLO trim pass helps you see at a glance which loops you already used.
- The halo sits flat and horizontal because the wire stem goes straight down into the head rather than bending. Keep the wire tail straight and smooth before inserting.
The Pattern
Head (Red Or Green Yarn, Make 2 Of Each)
- Round 1: chain 2, work 6 single crochet (sc) into the 2nd chain from the hook as a magic circle, then slip stitch (sl st) into the first stitch and chain 1. (6 sts)
- Round 2: work 2 sc in each stitch around, then sl st and chain 1. (12 sts) This is 6 increases (inc) around the ring.
- Round 3: work [1 sc, 1 inc] six times around, then sl st and chain 1. (18 sts)
- Rounds 4 to 6: work 1 sc in each stitch around for all three rounds, sl st and chain 1 at the end of each round. (18 sts per round)
- Round 7: work [1 sc, 1 sc decrease (dec)] six times around, then sl st and chain 1. (12 sts) The sphere is closing here.
- Begin stuffing the head with fiberfill now, before round 8 closes the opening further.
- Round 8: work 6 dec around, then on the last decrease stitch pull white yarn through the loops to complete the stitch and join color. (6 sts) The head is now complete and closed. Do not fasten off.
Dress And Body (White And Black Yarn)
- Do not fasten off after the head. Cut the head color yarn and push the end inside the head, then continue directly with white yarn.
- Round 1 (neck): work 1 sc in each stitch around. (6 sts)
- Round 2: work 2 sc in each stitch around. (12 sts)
- Rounds 3 to 4: work 1 sc in each stitch around for both rounds. (12 sts per round)
- Round 5: work [2 sc, 1 inc] four times around. (16 sts)
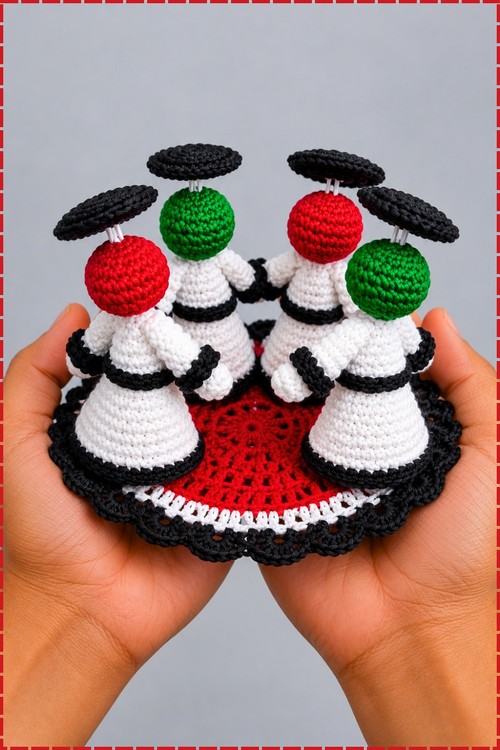
- Round 6 Part 1 (BLO): working in back loops only, work 1 sc in each stitch around. (16 sts) The front loops remain exposed for the trim step directly below.
- Round 6 Part 2 (Trim FLO, Black Yarn): attach black yarn into the exposed front loops of round 6. Work [1 sc, 1 sc, chain 1] around the front loops, then sl st and fasten off black yarn, weaving the ends inside. This creates the first black trim band that runs around the upper dress.
- Round 7: rejoin white yarn to the back loops of round 6 and work 1 sc in each stitch around. (16 sts)
- Round 8: work [3 sc, 1 inc] four times around. (20 sts)
- Round 9: work 2 sc, 1 inc, [4 sc, 1 inc] three times, then end with 2 sc. (24 sts)
- Begin stuffing the body periodically as you work down through these expanding rounds.
- Round 10: work 1 sc in each stitch around. (24 sts)
- Round 11: work [7 sc, 1 inc] three times around. (27 sts)
- Round 12: work 1 sc in each stitch around. (27 sts)
- Round 13: work 4 sc, 1 inc, [8 sc, 1 inc] two times, then end with 4 sc. (30 sts) The dress is now at its widest point.
- Round 14 Part 1 (BLO): working in back loops only, work [3 sc, 1 dec] six times around. (24 sts)
- Round 14 Part 2 (Bottom Trim FLO, Black Yarn): attach black yarn into the exposed front loops of round 14. Work [3 sc, then in the next stitch work 1 sc, chain 1, 1 sc] around, then sl st and cut black yarn, weaving in ends. This is the wide black trim band at the lower dress hem, which is clearly visible as a bold black stripe in my photo.
- Round 15 (BLO): working in back loops only with white yarn, work 1 sc, 1 dec, [2 sc, 1 dec] five times, then end with 1 sc. (18 sts)
- Round 16 (BLO): working in back loops only, work [1 sc, 1 dec] six times around. (12 sts)
- Round 17 (BLO): working in back loops only, work 6 dec around. (6 sts)
- Fasten off leaving an 8-inch tail.
- Thread the tail onto a tapestry needle and weave it through the back loops skipping every other stitch, then pull tightly to close the base flat so the angel stands on its own.
Arms (Make 2 Per Angel, Black Yarn Throughout)
- Round 1: chain 2, work 6 sc into the 2nd chain from the hook. (6 sts)
- Round 2: work [1 sc, 1 inc] three times around. (9 sts)
- Round 3: work 1 sc in each stitch around. (9 sts)
- Round 4: work [1 dec, 1 sc] three times around. (6 sts) On the last stitch, switch to white yarn to continue.
- Round 5 Part 1 (BLO): working in back loops only with white yarn, work 1 sc in each stitch around. (6 sts)
- Round 5 Part 2 (Sleeve Trim FLO, Black Yarn): attach black yarn into the exposed front loops of round 5. Work [1 sc, chain 1, 1 sc, chain 1] around, then sl st, tie off, and weave ends inside the sleeve. The sleeve trim appears as a small black ring at the wrist, matching the dress trim.
- Rounds 6 to 8: continuing with white yarn through both loops, work 1 sc in each stitch around for all three rounds. (6 sts per round)
- Round 9: flatten the top of the arm and crochet 2 sc across both layers together to seal the edge closed.
- Fasten off leaving a long tail for sewing.
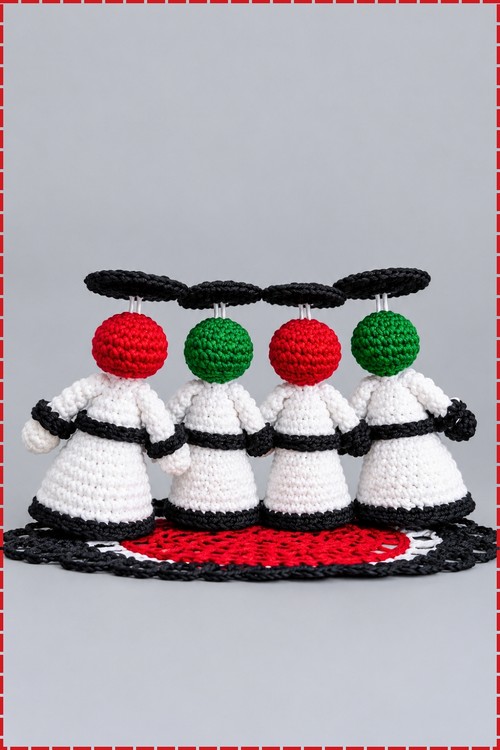
- Position each arm on the side of the dress 2 rounds down from the neck seam and sew securely into place. My angels hold their arms slightly outward, which is how they link together in the circular arrangement visible in my photo.
Halo (Black Yarn And Plumbing Wire, Make 1 Per Angel)
- Take a piece of plumbing wire approximately 7 to 8 inches long and fold it in half.
- Form a circle at the folded end by wrapping it around one finger, then twist and straighten the remaining wire tail below the circle. The flat disc shape of the halo in my photo comes from keeping this ring open and round rather than squeezing it oval.
- Attach black yarn to the circular part of the wire.
- Work single crochet repeatedly over the wire loop, covering the entire ring with black yarn. Keep the stitches close together so no bare wire shows through.
- Sl st into the first stitch, fasten off, and weave in ends.
- Insert the straight wire stem down into the back top of the angel’s head to secure the halo. Push it far enough that it sits stable and the halo rests flat and horizontal above the head, the way each halo reads in my photo.
Tips And Troubleshooting
- Work the BLO and FLO trim rounds in the correct order. The BLO pass always comes first. The front loops sit open and wait for the trim yarn. If you accidentally work both passes into the same set of loops, the trim will look tangled and you will need to pull it out.
- Stuff the body as you decrease rather than all at once at the end. Adding fiberfill in small pinches every few rounds gives you control over the shape and stops you from overstuffing through a closing hole.
- When inserting the wire halo stem, check from above that the halo disc sits level before pressing the wire all the way in. A wire that goes in at a slight angle tilts the halo to one side and it cannot easily be adjusted once it is seated deep in the head.
- Use a tapestry needle rather than a sharp needle for sewing the arms. A blunt tip slides through the stitches cleanly without splitting the yarn, which matters when you are attaching through multiple layers of white dress.
- For the circular group arrangement visible in my photo, finish all four angels before arranging them. Stand them together and gently bend the outer arms so they touch. The base of each dress is flat enough to hold the arrangement without pinning.
- Keep a small piece of scrap wire and test your halo ring size before crocheting over it. My halos sit as a wide flat disc, so the ring needs to be generous rather than tight.
Yarn Substitution
DK and worsted both work at 3.25 mm, though worsted gives a slightly heavier, fuller body. Cotton is fine for the dress if you want a crisp, structured look. For the head yarn, any smooth plied yarn in red or green holds the sphere shape well. Avoid single-ply or loosely twisted yarn for the head because the stuffing can push through. The black trim yarn should match the dress weight so the trim rows sit flat rather than puckering.
Customization Ideas
- Vary the head colors across a set: try red and green pairs as I did, or work all four in one color for a uniform look.
- Swap the black trim for gold or silver to return to a more traditional angel finish.
- Add a small embroidered face with closed eyes and a simple smile if you display the angels facing forward.
- Arrange the group on a decorative doily or wooden slice as a centrepiece, which is how my four are displayed in the photo.
- Make just one angel in traditional skin tone with a gold halo as a tree topper or a single ornament gift.
- Work the dress in ivory instead of bright white for a softer, vintage finish.
Frequently Asked Questions
Is the plumbing wire safe to use in a toy? This piece is a decorative ornament rather than a toy because of the wire. Keep it out of reach of young children. If you want to give it to a child, skip the wire halo entirely and embroider a flat circle onto the top of the head in gold or black thread instead.
Why do the BLO and FLO rounds matter so much in the dress? Working the dress body in BLO creates a layered structure where the front loops stay exposed for the trim. If you skip the BLO and work both loops as usual, the trim yarn has nowhere clean to attach and the finished dress loses its defined stripe bands.
My angels will not stand up straight. What went wrong? The flat base comes from cinching the closing tail tightly and passing the needle through the center several times. If the base is not flat, undo the closing stitches, re-cinch, and knot more firmly. Make sure the body is stuffed firmly enough to resist tipping.
Can I make just one angel instead of a set of four? Absolutely. One angel in any head color makes a complete standalone ornament or shelf piece. The set of four is just how I chose to display them, not a requirement of the pattern.
How do I keep the halo from spinning on the wire stem? Add a small drop of craft glue at the point where the wire enters the head before it dries. Alternatively, bend the very tip of the wire into a tiny hook before inserting it so it catches the interior fiberfill and locks in place.