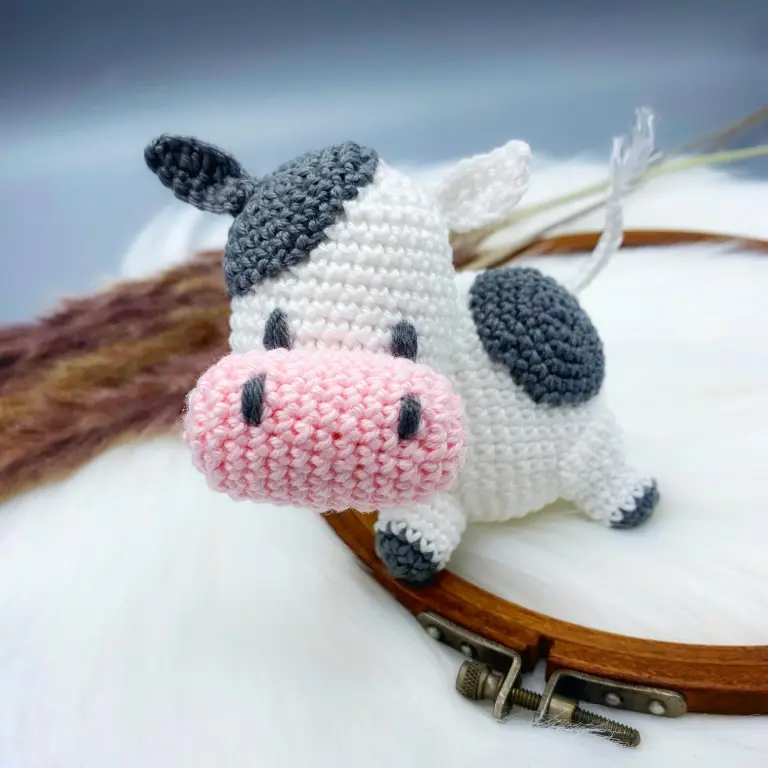
Free Crochet Black Cat Amigurumi Pattern
Wide-eyed cat amigurumi have a specific kind of appeal that comes down almost entirely to proportion, and this crochet black cat amigurumi pattern gets that balance right from the start. The oversized white eye patches set against the dark gray body create a strong graphic contrast that makes the face the immediate focal point.
Crochet Black Cat Amigurumi

- One keychain runs about 45–60 minutes once you know the construction. For a first make, budget 90 minutes — the ear joining round takes a few minutes to understand before it clicks.
- A batch of six sits around 5–6 hours total, less if you chain-make all ears first before starting any bodies.
- Starting from scratch for a party or classroom event: you can realistically finish one the night before. For a class set of 20+, start at least two weeks out if you’re making them yourself.
Safety First — Read Before You Start
This section sits at the top because it affects every decision you make while building.
- Safety eyes are not appropriate for children under three. The locking washer mechanism holds well during normal play, but “normal play” for a toddler includes chewing, pulling, and sustained force that no safety eye is rated for. If this keychain is going to a child under three — or into a treat bag, party favour set, or classroom where you cannot control who picks it up — embroider all facial features with black or dark brown floss instead. It takes five extra minutes and removes the risk entirely.
- For keychains going to older children: safety eyes are fine provided they’re seated and locked properly. Press the washer on firmly until you feel it click and resist. A washer that slides off under hand pressure was never properly locked. Test every single one before gifting.
- Washing: this pattern calls for milk cotton or sport-weight cotton yarn, which handles a gentle machine wash in a mesh bag without losing its shape. Polyester fiberfill dries quickly. If a child is going to carry this daily — and they will — wash it before gifting so you know it survives the cycle, and use a keychain ring rather than a lobster clasp for small hands.
- Keychain hardware: standard split rings are fine for older kids. For younger children or anyone prone to putting things in their mouth, skip the metal ring entirely and make a short chain loop in yarn instead.
Making These for a Group
- For a classroom or party set, buy yarn in one or two colourways and work assembly-line style — all ears first, all bodies second, faces last. This is faster than finishing one complete cat before starting the next.
- Per cat: approximately 15–20g of yarn in main colour, plus scraps for details.
- Name-tagging: if you’re making a set where kids will each take one home, attach a small paper tag through the keychain ring with the child’s name written in permanent marker. Do this before you hand them out — not after — or you’ll spend ten minutes sorting a pile of identical cats.
- For a group of 20, you’ll want to start at least two weeks early if you’re making them alone, or recruit one other maker and split the batch.
Pieces List
- Ears × 2 (joined together, then worked as the start of the body)
- Body × 1 (continuous from the ear joining round)
- Tail × 1
- Keychain ring or yarn loop × 1
Total separate pieces: 2 (body/ear unit, tail). The construction is more integrated than it first appears.
Materials
- 4-ply or 5-ply milk cotton yarn, or sport-weight cotton (main colour + scraps for facial details)
- 2.5 mm or 3.0 mm crochet hook
- Polyester fiberfill
- Stitch marker
- Tapestry needle
- Scissors
- Safety eyes (or black embroidery floss — see safety section above)
- Keychain ring or split ring
Abbreviations (US Terms)
MR — Magic Ring ch — Chain sc — Single Crochet inc — Increase (2 sc in the same stitch) dec — Decrease (sc 2 stitches together) slst — Slip Stitch st / sts — Stitch / Stitches Rnd — Round
The Pattern
Ears
Work both ears separately, then join them in Round 4 of the second ear.
First Ear:
- Rnd 1: 4 sc into MR. (4) Rnd 2: Inc in each st around. (8) Rnd 3: Sc in each st around. (8)
- Fasten off with a slip stitch. Set aside — do not cut the tail short, you’ll need it to secure the join later.

Second Ear:
- Rnd 1: 4 sc into MR. (4) Rnd 2: Inc in each st around. (8) Rnd 3: Sc in each st around. (8)
Joining Round (Rnd 4):
- Sc in the next 4 sts of the second ear, ch 3. Insert hook into the first stitch of the first ear’s last round and sc across all 8 sts of the first ear. Sc in each of the 3 chain stitches. Continue back around the remaining 4 sts of the second ear. (22 sts total)
→ Shape checkpoint: After the joining round, you should have a flat figure-8 shape — two small rounds connected by a short chain bridge. The two ear tips should point upward and the whole piece should lie flat. If the ears are twisting, the chain bridge is too tight; start the joining round again with a slightly looser chain.
Still getting the hang of reading crochet patterns? That’s completely okay, the video tutorial below breaks everything down in a simple, beginner-friendly way!
Do not fasten off. Continue directly into the body.
Body
Work continues in a continuous spiral from the joining round. Place a stitch marker at the start of each round.
- Rnds 5–6: Sc in each st around. (22) Rnd 7: [Sc in next 10 sts, inc] × 2. (24) Rnd 8: [Sc in next 3 sts, inc] × 6. (30) Rnds 9–12: Sc in each st around. (30)
→ Shape checkpoint: By Round 8, the body should be noticeably wider than the ear section — you’re building the face and upper body. By Round 12, it should look like a rounded cylinder, not a flat disc. If it’s collapsing inward, your tension may be too tight. If it’s flaring outward, loosen the stitch marker placement and check that you’re working in a continuous spiral, not joined rounds.

Face placement:
- Attach safety eyes (or embroider eyes) around Round 8, positioned on either side of centre. Embroider the nose and any whisker details between Rounds 9 and 11. Do this now, before the body starts closing — once you’re past Round 13 the opening is too narrow to work comfortably.
- Rnd 13: [Sc in next 3 sts, dec] × 6. (24) Rnd 14: [Sc in next 2 sts, dec] × 6. (18)

Stuff the body now.
- Fill firmly enough that the cat holds its round shape, but leave the very bottom slightly less packed so it doesn’t bulge at the closing seam.
- Rnd 15: [Sc in next st, dec] × 6. (12) Rnd 16: Dec × 6. (6)
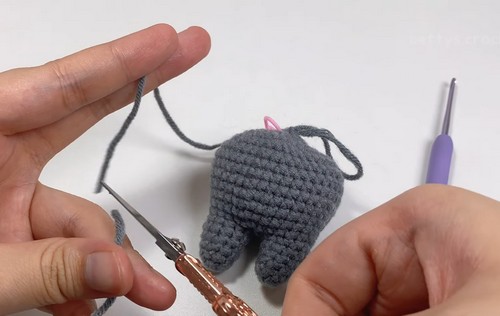
- Fasten off, leaving a long tail. Thread through a tapestry needle, weave through the front loops of the remaining 6 stitches, and pull firmly to close. Pass the needle into the body and out through the side to hide the end.
→ Shape checkpoint: Finished body should be a firm oval — wider at the face, slightly tapered at the bottom. The ears should sit at a natural angle on either side of the top. If they’re flopping forward, the joining round chain was too loose; a few anchor stitches at the base of each ear will fix it.
Tail
Using main colour yarn.
- Rnd 1: 6 sc into MR. (6) Rnd 2: [Sc, inc] × 3. (9) Rnds 3–5: Sc in each st around. (9) Rnd 6: [Sc in next st, dec] × 3. (6) Rnds 7–10: Sc in each st around. (6)
- Lightly stuff the tail — just enough to keep it from collapsing completely. A tail that’s overstuffed stands out rigidly and looks wrong; a tail that’s understuffed goes flat and wrinkled. A small pinch of fiberfill at the base only is usually right.
- Fasten off with a long tail for sewing.
- Attachment: Sew the tail to the back of the body around Round 12, curving it slightly to one side. Pin before sewing and check the placement from the front — the tail should peek out from behind when the cat faces forward.
Assembly Order
- Complete and fasten off both ears, join them.
- Work the body directly from the joining round. Place eyes and embroider face between Rounds 8–11.
- Stuff and close the body.
- Make the tail. Attach at Round 12 on the back.
- Attach keychain ring through the top of the body between the ears, or make a short yarn loop and knot it securely.
Stuffing Notes
- The body needs to be firm enough to hold its shape on a keychain — it’ll get knocked around in a bag. That said, don’t pack it so hard that the stitches stretch and gaps appear between them. Stop adding stuffing when the shape looks right and the stitches are still closed.
- The tail gets just a pinch. The ears are not stuffed.

Safety Eye Timing
- Eyes go in around Round 8, while the body is still open and you can reach inside to press the washer on firmly.
- Once you pass Round 13, the opening is too narrow to seat a safety eye properly. If you reach the decrease rounds and haven’t placed eyes yet, switch to embroidered eyes — two small satin-stitched ovals in black floss will look just as good and be safer anyway.
- Reminder for party and classroom makes: embroider all features if you cannot guarantee these won’t go to children under three. See the safety section at the top.
The Character Dial
- The cat silhouette is neutral enough that it reads differently depending on almost nothing — just colour and expression.
- Toward Halloween: work the body in black with orange safety eyes, or use deep amber yarn with a tiny embroidered ghost on the chest (lazy daisy stitches form one quickly). A slightly crooked mouth stitched in white floss tips a regular cat into something slightly unsettling. Orange and black striping on the tail by alternating yarn every two rounds is effective and fast.
- Toward sweet and gift-ready: pastel colourways — dusty rose, soft cream, sage — read as a gift rather than a toy. Add two small embroidered rosy cheeks in pink floss. A slightly wider-spaced eye placement gives the face a more open, younger expression. A bow tied from narrow ribbon at the base of one ear completes the effect without any extra crochet.
- The detail most people skip: the tail curve. A tail sewn straight down the back reads as an afterthought. A tail sewn at a slight angle, curling around toward the front, reads as a cat that’s actually sitting. It’s the same tail either way. The difference is one pin placement before you sew.
Colourways
- Halloween Black Cat — black body, orange safety eyes, tiny orange nose. Classic. Works because it’s supposed to.
- Harvest Tabby — burnt orange body, cream underbelly detail embroidered in chain stitch, brown nose. Autumnal without being costumed.
- Silver Fog — ash grey body, pale green eyes, white whiskers. Clean and slightly mysterious. Photographs well against dark backgrounds.
- Cotton Candy — bubblegum pink body, white muzzle patch in contrast yarn, lilac or mint safety eyes. For the child who wants a cat in their favourite colour, which is rarely brown.
Display and Use Ideas
- A keychain this size actually gets used, which is the point. A few other places it works:
- Zipper pull on a school bag — more durable than it looks, especially in cotton yarn. Tied to a gift bag handle as a topper that the recipient keeps. Hung from a small pegboard or corkboard as part of a craft display. Clipped to a lanyard for school events where kids need to be identified quickly.
- If you’re making a set for a party, displaying them in a small basket at the take-home table rather than stuffed into individual bags means kids get to choose their own — which they will ask to do regardless, so lean into it.
After the Season
Cotton yarn holds up well in storage but will pick up dust and smell if left loose. Put finished keychains in a small zip bag or drawstring pouch before storing. A quick hand wash and air dry when you bring them back out next year, and they’ll look as good as new. The keychain ring may tarnish slightly — wipe it with a dry cloth, or swap it for a new one if the original looks worn.