
Crochet Christmas Bauble Free Pattern – 3D Ornament
Dozen of these cost you a scrap bag and one weekend. Firm stuffing is what keeps a crochet christmas bauble round on the branch rather than sagging, and a set in three colours reads as deliberate instead of leftover.
A bauble holds its sphere only if the decrease rounds mirror the increases exactly, and this crochet christmas bauble free pattern gives both halves counted out to match. The body works in continuous rounds from a magic ring, closing at the top where the hanging loop attaches. Stuff it firmly or it flattens against the branch. One small bauble takes a few metres, which is what makes a set of twelve realistic rather than ambitious.
Crochet Christmas Bauble
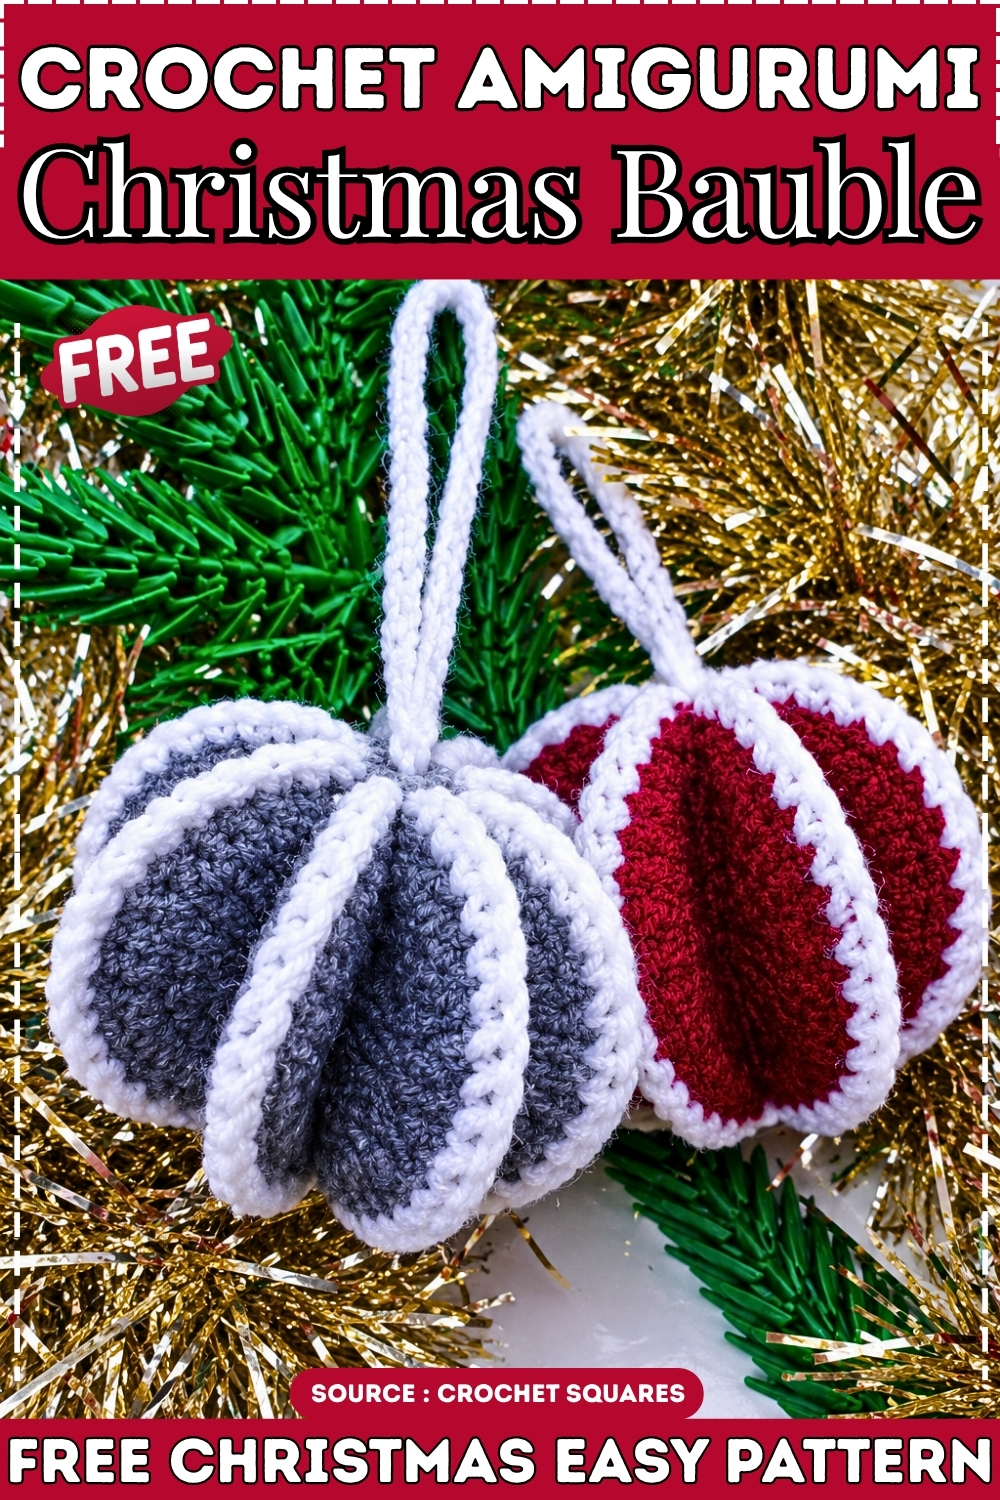
Eight identical crocheted wedges, joined along their edges, fold themselves into a sphere that holds its shape without any stuffing at all. The construction is the interesting part. Each section is a small flat fan of double crochets, and the joining is just slip stitches through both layers at once, which means even a maker who has only worked flat pieces can handle it. Finished size depends on your yarn weight, but at a standard DK with a 4mm hook you are looking at a bauble somewhere between a golf ball and a tennis ball. Solid enough to survive children, light enough to hang on a branch.
Christmas Countdown Math
- One bauble, start to finish: ninety minutes to two hours, including the joining and the hanging loop. Most of that time is the eight sections, not the assembly.
- A batch of six: eight to ten hours, or about two evenings. The sections go faster once you have made four or five and the round sequence is automatic.
- A classroom set of twenty-four: allow four full weekends. Start in mid-November.
- Latest start for one: the morning of the day it is needed, if you have uninterrupted time. It is a realistic last-minute make.
- Latest for six: four days out.
- Note: having all eight sections finished before you begin joining saves time and frustration. Do not join as you go. Lay them all out first and check they match.
Safety First
This section comes before the pattern because the answers here change what you make, not just how you finish it.
- No stuffing, no safety eyes, no small parts. The structure of this bauble is its biggest safety advantage. There is nothing inside, no loose filler, no button eyes, and no sewn-on pieces that a child could pull free. The three-dimensional shape comes entirely from the way the sections are joined under tension. For children of any age this is one of the more low-risk crochet decorations you can make.
- The hanging loop is the one thing to think about. A chain-50 loop is roughly 25 cm long when folded, which is long enough to be a hazard for very young children if the bauble is accessible during play. For under-threes or any setting where unsupervised access is possible, shorten the loop to chain 20 or remove it entirely and tie the bauble directly to a branch with a short ribbon. Alternatively, skip the loop and give the bauble as a floor toy or bowl filler with no hanging element.
- Yarn tails inside the bauble. The pattern calls for knotting pairs of yarn tails on the inside and weaving them in. Do this carefully, especially if the bauble might go to a baby or toddler. A tail that is not fully secured can work its way out through the section gaps over time. Knot each pair twice, push the ends deep, and trim short before closing.
- Washing. Acrylic yarn can go in a mesh laundry bag on a cool gentle cycle. Natural fibres hand wash only. Do not machine dry; the joined sections can distort when wet and it is easier to reshape by hand while still damp and let air dry. A bauble that has been handled by small children all December probably needs a wash before storage.
Making These for a Group
Twenty-four baubles for a classroom means one hundred and ninety-two individual sections. That number is worth looking at before you buy yarn.
- Buy all yarn in one go, same dye lot for anything that is meant to match. Even mid-season, dye lots shift enough to be visible when baubles hang side by side.
- Make sections in batches by colour, not one complete bauble at a time. Work all your white sections across one evening, all your red sections the next. It is faster and the tension stays consistent.
- For name-tagging: use a permanent fabric marker on a small piece of ribbon and tie it through the loop knot before the loop goes inside the bauble. The tag is invisible from outside but the owner can find it.
- Yarn per bauble: roughly 40 to 50 metres of DK for the eight sections, plus a small amount of the joining colour. Multiply by your count and add ten percent for waste.
What You Need
- DK or worsted weight yarn in your chosen section colour and a separate colour for joining (the original uses white for joining).
- A 3.5 mm or 4 mm crochet hook, sized to your yarn.
- A yarn needle for weaving in ends.
- Scissors.
- No stuffing, no safety eyes, no wire.
Abbreviations
- ch: chain
- dc: double crochet
- sl st: slip stitch
- rnd: round
- st, sts: stitch, stitches
Each section is worked in joined rounds, not continuous. Each round ends with a slip stitch and begins with a chain-3 that counts as the first double crochet. This is different from the amigurumi style used in most toy patterns and is standard for flat worked medallions.
Pieces List
- Sections: 8, all identical, worked in your main colour
- Joining: slip stitches in your joining colour, worked through pairs of sections
- Hanging loop: 1, worked in joining colour
The Pattern

One Section, Make 8
- Rnd 1: Make a magic ring. Ch 2, then work 11 dc into the ring. Pull the ring closed. (12 sts including the ch-2)
- Rnd 2: Sl st into the top of the ch-2. Ch 3, 1 dc in the same st, then 2 dc in every st around. Sl st to join in the top of the ch-3. (24)
- Rnd 3: Sl st into the top of the ch-3. Ch 3, then 1 dc in the next st, (2 dc in the next st, 1 dc in the following st) x 5, then continue the pattern to the end of the round. Sl st to join. (36)
- Rnd 4: Sl st into the top of the ch-3. Ch 3. Work 1 dc in each st around without any increases. Sl st to join. Cut yarn and fasten off, leaving a tail for weaving in. (36) — After Rnd 4 each section should look like a small flat crocheted fan or half-moon, widest at the outer edge. Eight of them should look identical in size and shape. If any section is visibly smaller, check your hook size and tension before joining, because the sphere only forms correctly when all eight sections are the same.
- Make 8 total.
Joining the Sections

The joining is done in pairs, then pairs of pairs, until all 8 are connected into one sphere. The original joins with white yarn using slip stitches through both layers at once.
- Take 2 sections and hold them back-to-back, wrong sides together, with the chain edges at the same point.
- Using your joining colour, work a sl st through the corresponding sts of both sections simultaneously at one end. Then work 17 more sl sts along the edge, one through each pair of matching sts, giving 18 sl sts total along the shared seam. Cut yarn and fasten off.
- Repeat to join all 8 sections into a single 3D sphere.
- As you join, the sections will begin to curve and pull toward each other. Do not force the shape. The sphere forms on its own as more seams are added.

Finishing and Hanging Loop
- Once all 8 sections are joined, take the remaining yarn tails two at a time, tie them in double knots on the inside of the bauble, and push the ends deep before trimming.
- For the hanging loop: using your joining colour, make a slip knot and ch 50. Cut yarn and tie both ends together in a firm knot to make a closed loop.
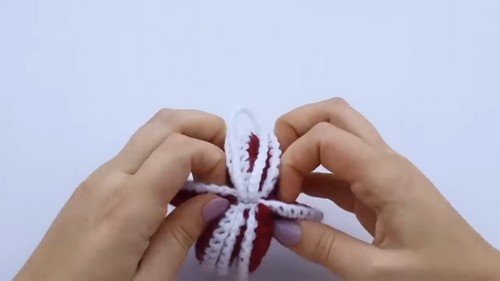
- Push the knot and a length of the loop inside the top of the bauble so only the loop itself protrudes. Secure the knot to the inside with a few stitches using the yarn needle, or tie it around a nearby yarn join. Weave in all remaining ends.
The Character Dial: Rustic or Bright
- Rustic. Natural undyed cream sections with a brown or jute joining yarn. The slip stitch seams become visible ridges across the surface, and in a natural fibre with visible twist they look deliberately textural rather than like exposed joins. A simple satin ribbon loop instead of a yarn chain. Four or five of these in a wooden bowl look like something from a Scandinavian farmhouse, which is exactly what the search term says they are looking for.
- Bright. Work each of the eight sections in a different solid colour, all saturated, all contrasting. Red, green, gold, white, navy, purple, orange, pink. The sphere becomes a patchwork of colour and photographs exceptionally well against dark backgrounds or a dark tree. Use a gold metallic DK for the joining yarn and the seam lines catch the light. This version reads as a children’s toy more than a decoration, and it is entirely on purpose.
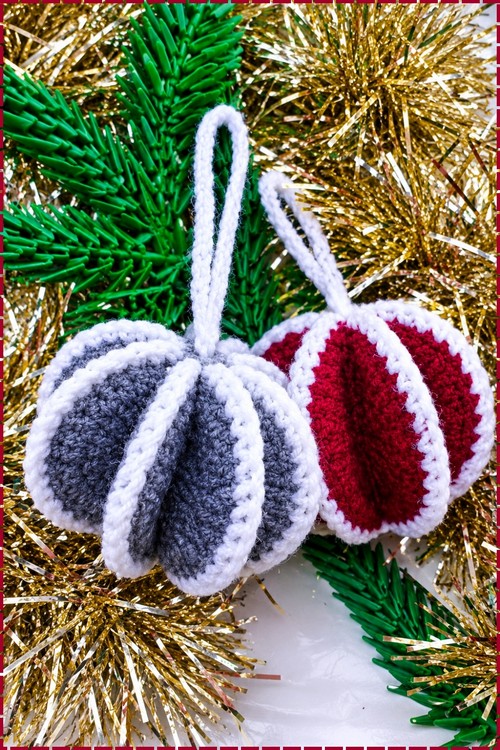
- One direction nobody usually tries: work all eight sections in the same yarn but alternate the joining colour on every seam, using red for four seams and gold for the other four. The result is a bauble that looks significantly more complex than it is, and the joining is the same pattern regardless.
Colourways
- Advent Red. Deep red sections, white joining seams, a white loop. Classic and visible from across a room.
- Frost. Pale ice blue sections, silver or white joining seams. Works better than it sounds on a dark-needled tree.
- Pine Green. Forest green sections, cream or gold joining seams. Disappears into a real tree and stands out on a white artificial one.
- Patchwork. Eight sections in eight different colours, gold joining seams. The one that takes the longest to wind yarn for and the most photographs.
Display Ideas
- Hung directly on a tree branch with the chain loop. The 3D sphere shape holds its proportion better than flat ornaments at distances.
- A glass bowl or vase filled with six or eight in coordinating colours. They sit rounded-side up without any support, which is the whole point of making them this way.
- On a garland or a wreath, tied through the loop with a short ribbon so they hang at different heights.
- Tied to the outside of a wrapped gift with the ribbon running through the loop. The bauble becomes part of the presentation and the recipient has a decoration to keep.
- A string of eight in graduated sizes, hung in a window. Vary the hook size to vary the size, using the same pattern.
After the Season
These store very well because there is nothing inside to compress or shift. A cardboard box with each bauble in a paper bag to stop the seam ridges snagging is sufficient. Do not store in a sealed plastic bag — any residual moisture from washing will not escape and the yarn can go musty. Check the hanging knot before putting them away and re-tie anything that has loosened, because a year of storage is long enough for a single knot to work open.
Quick Answers
- Can a child make this? The sections are straightforward double crochet rounds and a confident child of ten or eleven who already knows the basic stitches can handle them. The joining is the fiddlier part because you are working through two layers at once, but it is slow rather than difficult. Joining is a good job for an adult to do at the end.
- Is it safe on a tree with young children around? The bauble itself is safe — no small parts, no filling, nothing to pull off. The one thing to watch is the hanging loop length if the tree is accessible to very young children. Cut it shorter, or replace the yarn loop with a short wide ribbon that is harder to get around a small hand.
- Can I wash it if it gets grubby? Yes. Put it in a mesh bag and run it on a cool, gentle machine cycle if it is acrylic, or hand wash in cool water if it is a natural fibre. Reshape while damp and let it air dry. The 3D shape comes back without any help from you once dry.
- My eight sections are not all the same size. Will it still work? It will close, but the seams will not lie straight and the sphere will have flat patches. If the difference is small, joining with slightly tighter tension on the larger section corrects it partially. If sections are genuinely different sizes, it is faster to remake the outliers than to fight the join. The good news is that one section takes about ten minutes once you know the rounds.


