Crochet Snail Amigurumi Free Pattern For Beginners
A coiled strip is all the shell takes, which is why beginners get through this in an evening. The green base is what turns this crochet snail amigurumi from a toy into something that sits on a shelf, and the flowers use up whatever scraps are nearest.
The shell is a flat spiral rather than a dome on this crochet snail amigurumi free pattern for beginners, worked as a long coiled strip in red and sewn onto the side of the body. White dots go on afterwards as surface stitches. The body is a cream tapered shape with two upright antennae, a stitched smile, and a small red bow between them. It sits on a green base worked flat, with small flowers stitched around the front edge.
Crochet Snail Amigurumi
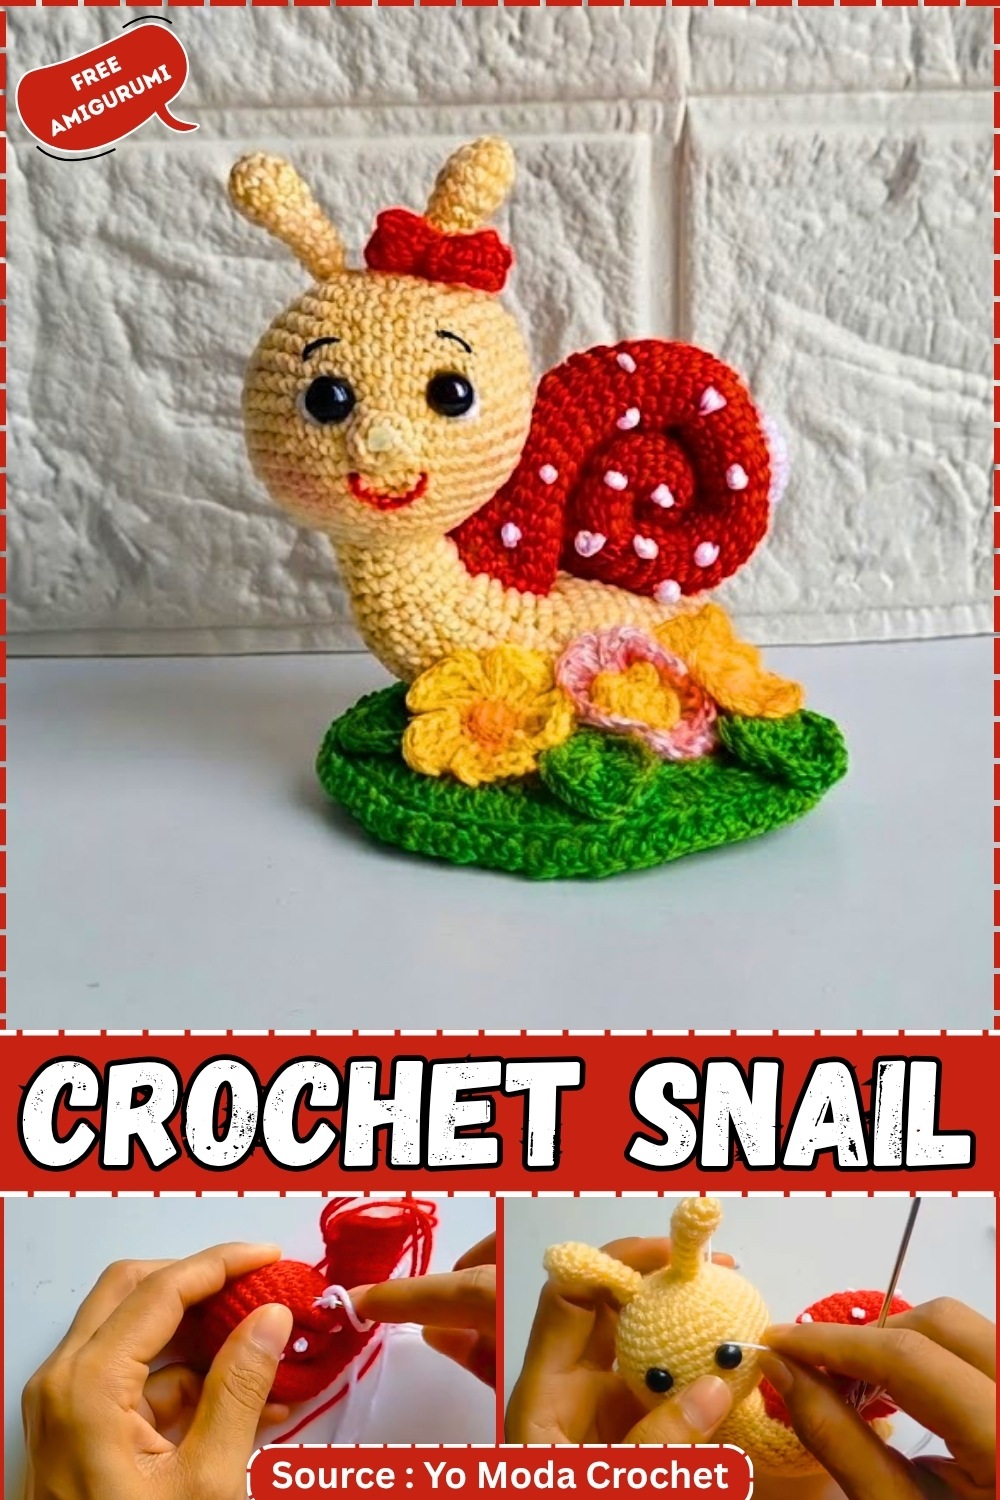
Snails make surprisingly good first amigurumi projects. The body is a long tube of plain single crochet, 38 rounds of the same stitch, which is exactly the kind of repetitive work that builds muscle memory fast, and the shell is a straightforward sphere that uses the same increase and decrease sequences that appear in almost every amigurumi you will ever make after this one.
Master the shell and the body and you have learned the two fundamental shapes of the craft. The tentacles are small and quick. The accessories are optional. The whole thing rewards patience more than skill, which makes it a good starting point.
Countdown Block
- One snail, start to finish: 6 to 10 hours across all pieces and assembly. The body tube alone accounts for 2 to 3 of those hours.
- A batch of six: not recommended as a first project. Make one first and make it well.
- Latest safe start for one as a gift: five days out, working across evenings.
Before You Pick Up the Hook
What Is a Magic Ring?
A magic ring is how most amigurumi start. Instead of making a chain and joining it into a circle, you wrap the yarn around your fingers to create an adjustable loop, work stitches into that loop, and then pull the yarn tail to close the hole completely. The result is a centre with no gap, which matters for stuffed pieces where a gap in the centre is visible.
To make a magic ring: wrap the yarn twice around two fingers so the tail hangs behind and the working yarn comes from the front. Insert your hook under the front wrap, catch the working yarn, pull it through, then chain 1 to anchor. Work your first round of stitches directly into the ring. When the round is complete, pull the tail firmly to close the hole. That is it.
What Are Continuous Rounds?
Amigurumi is worked in a continuous spiral, meaning you never slip stitch to close a round and never chain at the start of a new one. You simply keep going. The only way to know where one round ends and the next begins is a stitch marker — a small clip or a piece of scrap yarn in a contrasting colour placed into the first stitch of each round and moved up every time you complete a lap. Without a stitch marker, you will lose count. Use one every single round, without exception.
What Is an Invisible Decrease?
A standard decrease pulls two stitches together and leaves a small bump or hole on the surface. An invisible decrease does the same thing but hides the join. To work it: insert your hook into the front loop only of the next stitch, then without yarning over, go straight into the front loop of the stitch after it. Two front loops are on your hook. Yarn over, pull through both front loops, then yarn over and pull through the two remaining loops. The decrease is invisible from the outside. Use this version any time the pattern says decrease.
What Does Closing a Sphere Mean?
When an amigurumi is nearly closed, you reach a point where only 6 or 8 stitches remain. At this point, cut the yarn leaving a tail of roughly 15 cm. Thread the tail onto a tapestry needle and weave through the front loop of each remaining stitch, going around the ring once. Pull gently and evenly to draw the hole closed, then push the needle through to the inside and bury the tail in the stuffing. Do not pull the tail hard all at once — ease it around the ring first so every stitch closes at the same rate.
Pieces List
- Body — make 1
- Shell — make 1
- Tentacles — make 2
- Shell ruffle — make 1 (optional, decorative)
- Leaves — make as many as you like (optional)
- Flower — make 1 (optional)
- Mini bow — make 1 (optional)
Materials
- 2.5 mm crochet hook
- Triple-ply wool or equivalent yarn weight, in your chosen colours
- 8 mm black safety eyes
- Polyfill fiberfill stuffing
- Yarn needle
- Scissors
- Stitch marker — essential, not optional
- Fabric glue or hot glue for optional finishing touches
Abbreviations
- MR — magic ring
- ch — chain
- sc — single crochet
- hdc — half double crochet
- dc — double crochet
- inc — increase, two sc worked into the same stitch
- dec — invisible decrease as described above
- sl st — slip stitch
- st / sts — stitch / stitches
Work in continuous unjoined spirals throughout every piece unless a piece is specifically noted as worked flat in rows. Move your stitch marker up every round.
The Pattern
Snail Body
- Round 1: MR, ch 1, 8 sc into the ring. Pull the tail to close. [8]. This is the nose end of the body. The ring should close to a clean point with no visible gap.
- Round 2: Inc in every st around. [16]
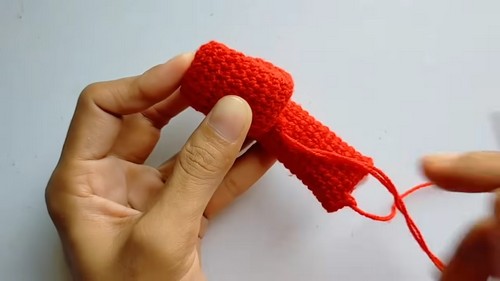
- Rounds 3 to 40: Sc in each st around. [16 each round]. This is 38 rounds of plain single crochet, all at the same stitch count. Use your stitch marker religiously. By round 10 the body should look like a narrow open-ended tube, roughly 2 to 3 cm long. By round 20 it will feel long. By round 30 it should look obviously snail-body-shaped. Keep going.
- Round 41: Work the sequence of 3 sc then 1 inc, repeating this around.
- Round 42: Sc in each st around. [20]
- Finishing: Ch 1, cut yarn leaving a tail. Thread the tail onto your tapestry needle and close the end by sewing or pinching it shut as shown in the video. Lightly stuff the body — do not pack it firm. The body should be soft and flexible, able to curve, not rigid.
Snail Shell
- Round 1: MR, ch 1, 6 sc into the ring. Pull tight. [6]. The ring should lie completely flat. If it is cupping upward at this point your tension is too tight; try pulling the tail a little less firmly.
- Round 2: Inc in every st around. [12]
- Round 3: Work 1 sc then 1 inc, repeat around. [18]
- Round 4: Work 2 sc then 1 inc, repeat around. [24]
- Round 5: Work 3 sc then 1 inc, repeat around. [30]
- Round 6: Work 4 sc then 1 inc, repeat around. [36]
- Round 7: Work 5 sc then 1 inc, repeat around. [42].
- By the end of round 7 you have a flat disc approximately 7 to 8 cm across, depending on your tension.
- It should lie completely flat on a table. If the edges are ruffling upward you have miscounted somewhere in the increase rounds. Lay it out and check before continuing.
- Rounds 8 to 13: Sc in each st around, no shaping. [42 each round].
- The flat disc is now building into a cup shape. By round 13 it should look like a shallow bowl with sides rising roughly 1.5 to 2 cm from the flat base.
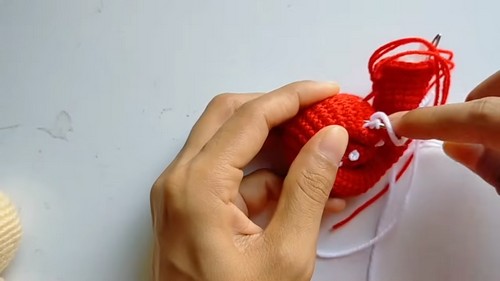
- Round 14: Work 5 sc then 1 dec, repeat around. [36]
- Round 15: Work 4 sc then 1 dec, repeat around. [30]
- Round 16: Work 3 sc then 1 dec, repeat around. [24]
- Round 17: Work 2 sc then 1 dec, repeat around. [18]
- Round 18: Work 1 sc then 1 dec, repeat around. [12]. The shell is closing into a sphere now. Stuff it firmly with polyfill before the opening narrows further. The shell should feel solid and hold its domed shape when you press it from the outside. A loosely stuffed shell will flatten after assembly and the shape is not recoverable.
- Rounds 19 to 20: Sc in each st around. [12 each round]. These rounds form the collar that will connect to the body.
- Round 21: Work 2 sc then 1 inc, repeat around. [16]
- Rounds 22 to 23: Sc in each st around. [16 each round].
- Rounds 24 onward:
- Closing: Fasten off and close the final opening of the shell once the detailing is complete and the shell is stuffed.
Tentacles — make 2
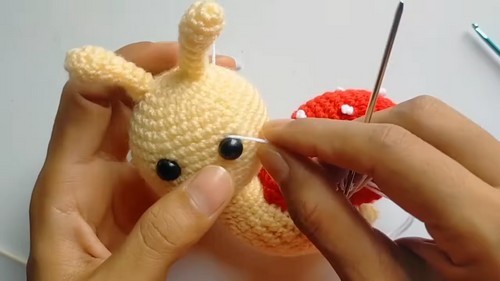
Place the 8 mm safety eyes before beginning the tentacles. Insert them into the body between rounds 10 and 11, spaced 6 stitches apart. Lock the washers on the inside now, before anything else is attached. See the safety eye timing section below.
- Round 1: MR, ch 1, 6 sc into the ring. Pull tight. [6]
- Round 2: Work 1 sc then 1 inc, repeat around. [9]. The tip should be a small dome at this point. It should not be flat.
- Rounds 3 to 4: Sc in each st around. [9 each round]
- Round 5: Work 1 sc then 1 dec, repeat around. [6]. Lightly stuff the tentacle at this point. Very lightly — it should have some body but not be stiff.
- Rounds 6 to 8: Sc in each st around. [6 each round]
- Fasten off with a long sewing tail. Make the second tentacle identically. Set both aside for assembly.
Shell Ruffle — optional decorative piece
- Round 1 (flat circle): MR, ch 3, 12 dc into the ring, sl st to join. [12 dc]
- Round 2: Work 2 dc in each st around. [24]
- Round 3: Work 1 dc then 2 dc in the next st, repeat around. [36].
- Ruffle border: Work a decorative border along the outer edge using ch 2 and sl st alternating across the back and front loops of the edge stitches.
- Fasten off.
Leaf — make as many as desired
- Make a slip knot and ch 8.
- Skip the first chain, then work along the chain as follows: 1 sc, 1 hdc, 3 dc, 1 hdc, 1 sc. [7 stitches along the chain]
- Ch 1, then work along the other side of the foundation chain using the remaining loops: 1 sc, 1 hdc, 3 dc, 1 hdc, 1 sc.
- Sl st to join, fasten off.
Flower — optional
- MR, ch 1, 6 sc into the ring, sl st to close. [6]
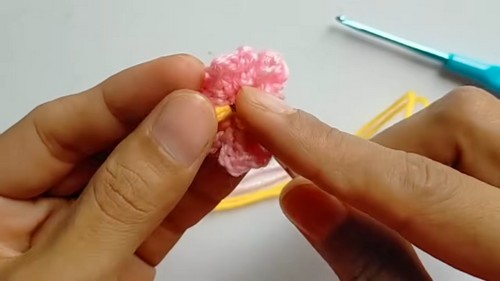
- Work petals: for each petal, ch 3, work 2 dc into the same stitch or the next stitch, ch 3, sl st back into the base stitch to close the petal. Repeat around all 6 stitches.
- Fasten off.
Mini Bow — optional
- Make a slip knot and ch 13.
- Skip the first chain, work 12 sc along the chain. [12]
- Fasten off. Thread a yarn needle and pinch the centre of the strip together tightly. Wrap the needle thread around the pinched centre several times and knot to secure the bow shape.

Safety Eye Timing
- Place the eyes between rounds 10 and 11 of the body, 6 stitches apart, while the body is still open and unstuffed at the head end. This is the moment. Once you close and stuff the body the eyes cannot be seated properly, and the washers cannot be locked from the outside.
- Push both eye posts through from the outside, hold them where they look right, and check the spacing before locking either washer. The 6-stitch gap is about right for the size of the body, but hold the piece at arm’s length first. When you are satisfied, push the washers onto the posts from the inside and press firmly. They do not come off.
- For any version going to a child under three, or into a party bag, a classroom gift exchange, or any group handout situation where you do not know all the children: embroider the eyes instead. Use black yarn worked as a filled oval in satin stitch, secured with a tiny whip stitch around the perimeter. The embroidered version is safer and looks slightly softer, which suits the snail’s character.
Assembly
- Attach the tentacles first, while the head end of the body is the most accessible. Pin them on either side of the eye line and sew each through its full base using a whip stitch. Tug the finished join gently to check it is firm.
- Coil the body tube gently and lay the shell over the back section. The shell sits on top of the body, not threaded through it. Pin before sewing.
- Sew the shell to the body through the collar section worked in rounds 19 to 23, attaching it firmly around the contact point with the body.
- Add the ruffle around the base of the shell join if using, and sew or glue in place.
- Leaves and the flower can be tucked underneath the shell or sewn directly onto the body, whichever looks balanced.
- The bow attaches to one tentacle or to the ruffle edge, depending on the look you want.
Stuffing
- Body: light. The body tube should be flexible enough to coil naturally under the shell. A firmly stuffed body will be stiff and resist the curve, and the snail will look like it has a pipe inside it rather than a soft form.
- Shell: firm. The shell needs to hold its domed shape against the weight of its own fabric and against the contact with the body below. If the shell is under-stuffed it will flatten at the base after assembly.
- Tentacles: very light. Just enough to give them some body. They should feel soft when touched.
- Over-stuffing shows most on the body, where a rigid tube will pucker at the closing seam rather than tapering smoothly. If you see puckering, remove some stuffing before the seam is fully closed.
The Character Dial
Snails work across a wider tonal range than most amigurumi because the shell colour is doing most of the reading. Two directions:
- Soft and garden-naturalistic. Keep the body in a warm mid-brown or terracotta. Use a creamy white or pale sage for the shell. The ruffle, if you include it, in a slightly darker shade of the shell colour rather than a contrast. No bow. One small leaf pressed under the shell. Eyes slightly further apart than the pattern suggests. This version looks like a small art object rather than a toy, and it sits as well on a plant shelf as it does in a child’s room.
- Bright and playful. Give the body a colour that has no relationship to a real snail — dusty rose, lemon, mint. Make the shell in a contrasting bold colour. Keep the ruffle in a third colour. Add the bow to one tentacle in a fourth. Stack the contrasts deliberately so the palette reads as intentional rather than random. The eyes go on in safety eyes rather than embroidered. This version is the one that photographs well against a bright background for a pattern post.
Colourways
- Sage and Cream. Mid sage body, ivory shell, light olive ruffle edge. Quiet and botanical. The version that sits on a bookshelf without looking like it needs explaining.
- Lilac and Soft Gold. A muted lavender body with a warm golden-yellow shell. Unexpected and immediately likeable. The gold reads as warm rather than loud in this combination.
- Rust and Teal. A deep terracotta body, dusty teal shell, no ruffle. The most graphic combination. Strong enough to hold its own in a room with pattern and colour already in it.
- All Cream. Body and shell in the same ivory or natural undyed yarn, with eyes as the only contrast. Relies entirely on the shape and texture for its effect. Harder to photograph than it sounds, and much better in person than it sounds on paper.
Display Ideas
- On a plant shelf or windowsill beside actual trailing plants. The snail reads as intentional décor rather than a misplaced toy in that context.
- Half-tucked under a leaf on a tiered tray in a spring or garden-themed display. The shell shows, the body hides slightly.
- A small cluster of two or three in a shallow terracotta pot with some dried moss.
- As a bookmark topper — a long body looped over the top edge of a book with the shell visible above the cover. The flexible body tube makes this possible in a way that a rigid amigurumi could not manage.
After the Season
If this is a seasonal piece rather than a toy in daily use, store it away from anything that can compress the shell. The shell loses its dome if something heavy sits on it in a storage box for months, and the shape does not come back fully. Keep it wrapped loosely in tissue or in its own small bag, shell side up. The body tube is fine stored any way, but the shell needs room. A light steam from a hand steamer at distance will help relax any flattening in the shell yarn if it happens.
Quick Answers
- My magic ring keeps opening up. What is going wrong? The tail needs to be pulled tighter. After working round 1, hold the ring in one hand, find the tail end, and pull it firmly while the working yarn is taut. Then weave the tail into the back of the first few stitches with your yarn needle to lock it. A tail that just hangs loose will loosen over time.
- I am losing count on the body tube rounds. Is there a better way to track? Use a row counter if you have one. If not, make a small tally mark on a piece of paper every time you pass your stitch marker. Trying to hold 38 rounds in your head without physical tracking is asking for a mistake somewhere around round 24.
- The decrease stitches on the shell look bumpy from the outside. What am I doing wrong? Standard decreases pull two stitches together visibly. Use the invisible decrease method described at the top of this post — insert into the front loop only of the first stitch, then straight into the front loop of the second, without yarning over in between. This buries the join and produces a clean surface.
- Can I skip the ruffle and the accessories? Completely. The snail reads clearly without them. The ruffle adds a finished look to the shell join but it is not structural. The leaves, flower, and bow are entirely decorative. Make the base snail first, then decide which additions you want once you can see the proportions.
- My shell and body look very different in size. Is this right? It should be. The shell is a sphere roughly twice the diameter of the body tube at its widest, which is the correct proportion for this snail. If the shell looks smaller than the body, check whether you missed any of the increase rounds in the shell’s early rounds.