
Crochet Christmas Gifts Free Pattern Last Minute
Every pattern in this crochet christmas gifts free patterns roundup finishes in one evening, which is the only thing that matters by mid December. Small makes only, worked from scraps and single skeins, with no blocking or seaming to slow anything down.
If you have never finished a crochet project and given it away on the same day, this one makes that possible. The base is a flat circle worked in double crochet, the feet are small stuffed ovals worked from a foundation chain, and the bow is a few chains and clusters that look far more complicated than they are.
Last Minute Crochet Christmas Gifts
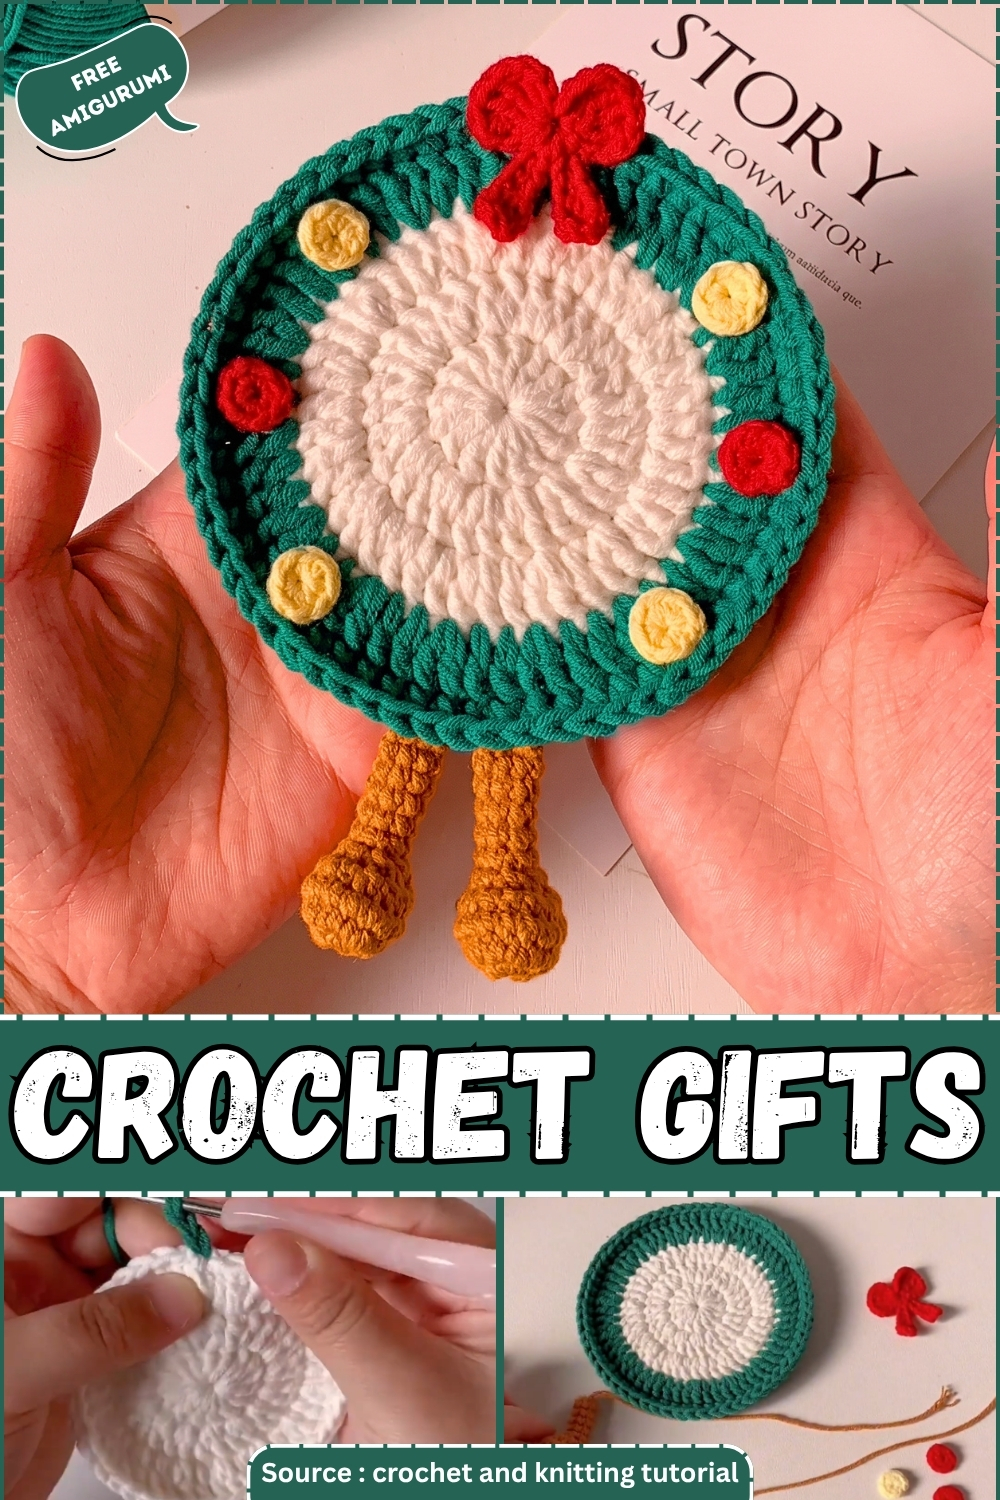
Nothing here requires you to count past thirty, and nothing requires you to close a sphere or manage a continuous spiral. Everything joins at the end of each round, which means you always know exactly where you are.
Countdown Before You Start
- One coaster with both feet and a bow: around ninety minutes at a relaxed beginner pace. An experienced maker finishes in forty-five.
- A set of four: an evening. Make all the bases first, then all the feet, then all the bows.
- Latest sensible start for a single gift: the morning of the day you need it. There is no drying time and no blocking.
- Latest start for a set of six: two days before. The feet need light stuffing and a little shaping time to settle, but nothing overnight.
- If you are learning as you go, add thirty minutes the first time you meet a new stitch, and do not rush Round 4 of the feet. That is where most of the shaping lives.
Before You Pick Up The Hook: Techniques You’ll Use
This pattern is a genuinely good starting project. Here is what each technique looks like before you encounter it mid-round.
The Magic Ring
The magic ring is how you start a circle without leaving a hole at the centre. Make a loop with your yarn, leaving a tail of about fifteen centimetres, then insert your hook through the loop, pull up a working yarn loop, and chain once. Work your stitches into the loop itself rather than into a chain. When the round is done, pull the tail end to close the centre tight. If it does not close all the way, the tail is on the wrong side of the loop. Undo and try again — it takes most beginners two attempts and then it clicks permanently.
Stitch Markers
Place a stitch marker into the very first stitch of each round before you do anything else. In a joined round you can usually find the first stitch by looking for the chain-2 at the start, but a marker removes all doubt. A scrap of contrasting yarn looped through the stitch works just as well as a plastic marker.
Double Crochet
Yarn over once before inserting your hook, insert the hook into the stitch, pull up a loop so you have three loops on the hook, yarn over and pull through two loops, yarn over again and pull through the remaining two. That is one double crochet. The chain-2 at the start of each round here stands in as the first double crochet, so count it as one when you are checking your stitch total.
The FLO Decrease
FLO means front loop only. Insert your hook into the front loop only of the first stitch, pull up a loop, then insert into the front loop only of the next stitch, pull up a loop, and yarn over to pull through all three loops together. This makes a neater decrease than working through both loops, and it is especially useful on the boot toe where the shaping needs to look clean.
Joining With A Slip Stitch
At the end of each round, insert your hook into the marked first stitch, yarn over and pull the yarn through both the stitch and the loop on your hook in one motion. That is the join. Pull it snug but not tight, because a too-tight join puckers the round edge.
Pieces List
- Coaster base, make 1 in white or cream with a green border
- Boot foot, make 2 in the same colour as the coaster base
- Decorative bow, make 1 in red
What You’ll Need
- Double-strand main yarn in white or cream. Holding two strands together throughout the base rounds is what gives the coaster its thickness and stiffness, so do not single-strand it.
- Accent yarn in green for Round 4 of the base.
- Accent yarn in red for the bow.
- 3.5 mm crochet hook.
- Stitch markers, at least two.
- A small amount of fiberfill or cotton stuffing for the feet.
- Yarn needle and scissors.
Abbreviations Used
- MR = magic ring
- ch = chain
- sc = single crochet
- dc = double crochet
- hdc = half double crochet
- tr = treble crochet
- inc = increase, two stitches in the same stitch
- dec = decrease, two stitches worked together
- FLO = front loop only
- slst = slip stitch
- st, sts = stitch, stitches
The Pattern
Coaster Base
Worked in joined rounds with two strands of main yarn held together, using the 3.5 mm hook.
- MR with two strands held together. Ch 1, then work 2 dc into the ring to stand as the first dc. Place a stitch marker in the top of this first stitch. Work 13 more dc into the ring [15 dc total, counting the starting ch-1 and 2 dc as 1]. Pull the tail to close the ring. Slst to join to the marked first stitch. The base should look like a tight, flat coin with no visible hole at the centre and no ruffling at the edges.
- Round 2: Ch 2. Work 2 dc into every stitch around [30 dc]. Slst to join. The disc should have grown noticeably and still lie completely flat. If the edges are curling upward, your tension may be tight — try a slightly looser grip on the yarn.
- Round 3: Ch 2. Work [1 dc in the next st, 2 dc in the following st] around, repeating the pair 15 times [45 dc]. Slst to join. The circle should be roughly 10 cm across at this point when laid flat.
- Round 4: Change to green yarn. Ch 2. Work [1 dc, 2 dc in the next st, 1 dc] around, repeating the group 15 times [60 dc]. Slst to join. The green border should sit as a clean outer ring with no puckering. If the circle is starting to dome upward instead of lying flat, pull the join slightly looser next round.
- Round 5: Ch 1. Work 1 sc in every stitch around [60 sc]. Slst to join. Fasten off and weave in ends. The sc border gives the coaster a tidy, slightly firmer edge, and the change from dc to sc naturally draws the outer round in just enough to keep the circle flat.

Boot Foot — Make 2
Worked in joined rounds with a single strand of main yarn.
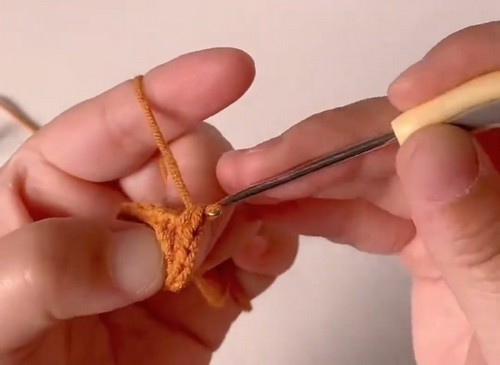
- Foundation: Ch 5. Starting in the 2nd ch from the hook, work 2 sc in the same stitch [inc]. Work 1 sc in each of the next 2 chains. In the last chain, work 3 sc to round the toe end. Turn to work along the opposite side of the chain. Work 1 sc in each of the next 3 stitches along the underside. Slst to join to the first sc. By the end of this round the piece should look like a long, thin oval — narrow at the heel and rounded at the toe.
- Round 2: Work 1 sc inc in the first st. Work 1 sc in each of the next 2 sts. Work 3 sc inc across the toe end. Work 1 sc in each of the next 2 sts. Work 1 sc inc in the final st. Slst to join [CHECK — count unclear in source. The toe increases are stated as 3 inc but the round total is not given. Expect approximately 16 sts].
- Round 3: Work 1 sc in every stitch around, no increases [16 sc or as per your Round 2 total]. Slst to join. The oval should now have a little depth to it and feel like it is starting to become a three-dimensional shape rather than a flat piece.
- Round 4 (Shaping): Work 5 sc. Work 4 consecutive FLO decreases across the toe to pull the toe inward and create the boot shape. Work 3 sc in the remaining stitches. Slst to join [CHECK — count unclear in source after decreases]. After this round the toe end should look visibly narrower and more boot-like, and the heel end should still be rounded and even.
- Round 5: Work 1 sc in every remaining stitch around to lengthen the ankle section slightly [CHECK — stitch count not stated in source]. Slst to join. Before fastening off, lightly stuff the foot through the open top with a small pinch of fiberfill. Do not overstuff — the foot should feel gently firm but still flexible enough to bend slightly. Fasten off, leaving a long tail for sewing.
If you’re still learning how to read crochet patterns, no stress! Follow the video tutorial below and use the written pattern below as you get more comfortable!
Decorative Bow
Worked in red yarn with the 3.5 mm hook.
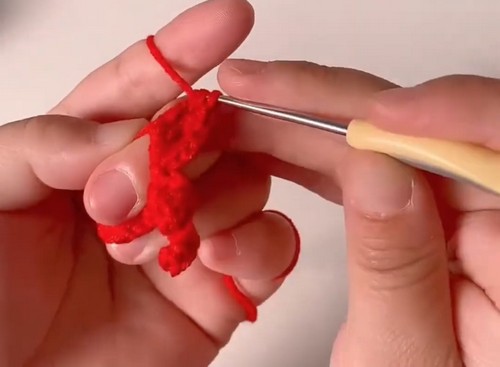
- Make a loop with the red yarn without closing it yet. Ch 1, then ch 3.
- Work 4 tr into the loop [CHECK — source says treble or double crochet; treble creates taller, more distinct bow loops]. Ch 4, then slst back into the centre loop to close the first bow loop.
- First ribbon tail: Ch 8. Working back from the 4th ch from the hook, work 1 dc, 1 hdc, then 3 sc back toward the bow centre. Pull the thread through to anchor it. This creates one shaped ribbon tail that tapers from the bow outward.
- Second ribbon tail: Ch 8 again. Work 1 dc, 1 hdc, then 3 sc the same way. The two tails should look like a pair of V-shaped streamers hanging from the centre.
- Opposite bow loop: Ch 4, work 4 tr into the centre loop, ch 4, and slst into the loop. Cut the yarn and pull the tail tight to cinch the loop centre, creating the knotted middle of the bow. Fasten off. The finished bow should have two distinct rounded loops above and two diagonal ribbon tails hanging below the centre knot.
Assembly
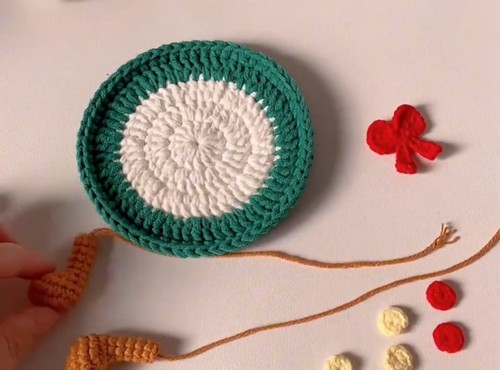
- Lay the coaster base flat with the green border facing up and the white side down, since the green border is the display face.
- Position both feet against the bottom edge of the coaster, toes pointing outward and heels slightly toward each other, so they read as two boots side by side. Pin them before sewing.
- Thread the long tail from one foot onto a yarn needle and sew it to the coaster edge with small, even stitches through the base border round. Sew around the full top edge of the foot so it sits flush rather than dangling. Repeat with the second foot.
- Position the bow at the upper centre of the coaster, on the green side. It works at roughly eleven o’clock rather than dead centre, which looks more like a bow on a gift than a button. Pin it.
- Sew the bow down through its centre knot only, pulling the stitches through to the back of the coaster. The bow loops should stand slightly free of the surface.
- Weave all remaining ends into the back of the coaster where they will not show.
Stuffing
Feet only. A light pinch of fiberfill or a small rolled ball of cotton wadding is enough. The goal is a foot that holds its boot shape when you press it, not one that is rigid. Overstuffed feet stand too proud of the coaster surface and pull away from the sewing at the join, particularly after a few uses. If you do not have fiberfill, a small amount of clean yarn scraps works fine.
Safety Eyes And Embellishments
This design has no eyes in the base pattern, and the bow is the only attached piece, so there is nothing here that poses a swallowing risk for older children. If you add button embellishments to personalise — a small button at the bow centre is the most common addition — use embroidered dots instead for anything going to a child under three or into a treat bag. A French knot in black yarn, stitched through the bow and knotted at the back of the coaster, is secure enough to survive weekly handling.
The Character Dial: Rustic Or Bright
Rustic. Swap the white main yarn for an undyed oatmeal or warm ecru cotton, and take the green border down to sage or eucalyptus. Work the bow in a soft rust or cinnamon rather than pillar-box red. The ribbon tails look better slightly longer in this version, around ten chains instead of eight, because they drape rather than pointing stiffly outward. Skip the fiberfill in the feet and let them lie flat instead of standing out from the coaster, which reads as woven rather than stuffed. A running stitch in cream around the green border edge, worked after the coaster is finished, adds texture without adding colour.
Bright. Stark white yarn held double, the brightest green you own for the border, and a bow in candy red with a gold metallic thread held alongside the red. Work the bow loops taller by switching from treble to double treble, so they stand up rather than curving. Add a tiny jingle bell through the bow centre before sewing it down. Work the feet in bright red rather than white to read as Santa boots specifically, and use a narrow row of white sc around the top of each foot before fastening off to suggest the boot cuff. This version photographs well and is the one to choose if it is going to appear in a flat lay next to other gifts.
Colourways
- Nordic Cabin. Stone grey main colour, warm charcoal border, rust bow. No white anywhere. Reads as wool-toned and Scandinavian.
- Sugar Plum. Pale lilac main colour, deep plum border, dusty rose bow. Completely off the standard Christmas palette and very easy to use after December.
- Glacier. Ice blue main colour, silver-white border, pale gold bow. Looks cold in the best possible way and coordinates well with silver decorations.
- Kraft And Twine. Undyed natural cotton, dark forest green border, cream bow. The bow tied as a flat overhand knot in chunky natural cotton twine rather than crocheted. The one colourway where skipping the crocheted bow entirely is actually the better choice.

Display Ideas
- Coffee table, in a set of four, stacked at an angle so the bow face shows on the top one.
- Gift topper, sitting on top of a wrapped box with the ribbon tails pointing toward the recipient.
- Advent countdown, one per day from the first of December, hung by the ribbon tail from a length of twine across a mantel.
- Teacher’s desk, where it works all season as an actual coaster for a mug rather than just sitting there looking seasonal.
- Children’s table place setting, one per seat, with the child’s initial embroidered into the green border in white yarn.
- Holiday market stall display, three coasters fanned out in a basket so the green border faces forward.
After The Season
Cotton washes well, but the stuffed feet need a gentle hand wash rather than a machine cycle, because machine agitation compresses the fiberfill unevenly and the toes come out lopsided in a way that blocking will not fix. Lay flat to dry. Store the coasters flat rather than rolled, because a bow left compressed in a rolled position for eleven months will need reshaping before it looks right again. A shallow box with the coasters lying face up takes up almost no space and keeps everything usable.
Quick Answers
- I have never made a magic ring. Is there a simpler start? Chain 4 and slip stitch into the first chain to make a small ring instead. It leaves a slightly larger hole at the centre but is completely invisible once the first round is finished and you pull the tail. It works exactly the same way for every round that follows.
- My coaster is cupping upward instead of lying flat. What went wrong? Tension is the most common cause. Double crochet with tight tension pulls the rounds inward. Try going up one hook size, or consciously loosen your grip on the yarn. You can also block a cupped cotton coaster by dampening it and pressing it flat under a heavy book overnight.
- Can I use a single strand of yarn instead of holding two together? Yes, but the coaster will be noticeably thinner and will shift more easily on a smooth table surface. It also drinks up less heat from a mug. If single strand is what you have, try a 3.0 mm hook instead of 3.5 mm to keep the stitches tighter and the fabric firmer.
- The bow looks flat rather than loopy. What do I do? The bow loops need to be worked loosely into the centre ring rather than pulled tight as you go. If you closed the centre ring before working the loops, they have nowhere to spread to. Work with the ring still open and only close it by pulling the tail at the very end, once both loops are done.
- How do I know when the feet are stuffed the right amount? Press the foot gently between two fingers. It should feel like a firm grape rather than a stone. If your fingers touch with fabric in between, it needs more. If the seam at the sewing edge is pulling open, it has too much.


