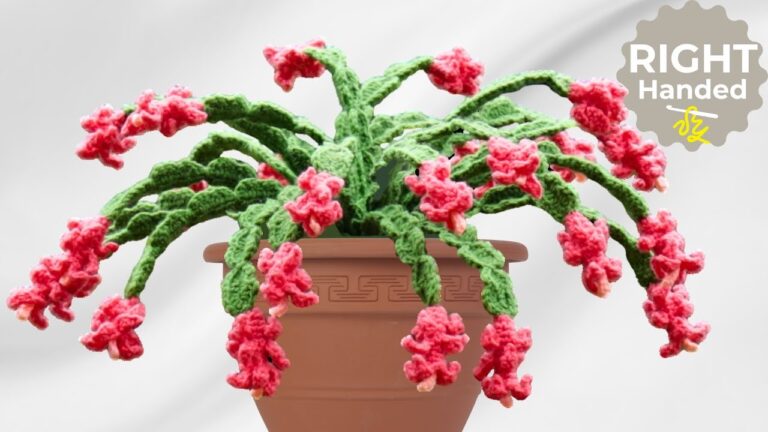
Crochet Christmas Mittens Free Pattern
Ribbing at the cuff stops these crochet christmas mittens sliding down a wrist, which plain rounds never manage. Work the pair back to back rather than leaving the second for later, since matching row counts from memory is how mismatched mittens happen.
Before this pattern, a lot of people have never joined two pieces together mid-round. That one round, where the thumb meets the hand — is the moment this make levels you up, and the good news is that the join is far simpler than it looks on paper.
Crochet Christmas Mittens

The mitten itself is small enough that any mistake is small too, and you can frog and restart in under five minutes. Red and white is the obvious palette, but the construction is solid enough to carry any colourway you bring to it. Two pieces, fourteen rounds, one finished mitten. Make the second one and you have a pair.
The Countdown
- One mitten: 45 minutes to 1 hour for a first attempt, around 25 to 30 minutes once you have done two or three.
- A pair: 1.5 to 2 hours.
- A pair plus a ribbon or key ring finish: add another 10 minutes.
- Latest sensible start: two days out for a pair as a gift topper. The evening before works if you are comfortable with magic rings already.
Pieces List
- Thumb, make 1 per mitten
- Hand, make 1 per mitten
- That is it. The cuff is worked directly from the hand, so nothing gets sewn together except the thumb join, which happens inside the pattern.
Technique Notes for Beginners
Read this section before you start. Not as a formality. Actually read it, because these four things are where first-timers get stuck on this specific make.
How to Make a Magic Ring
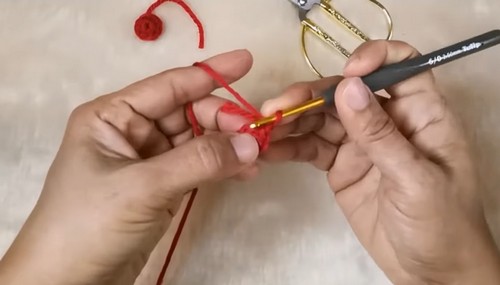
The magic ring is a starting loop that you can pull tight after the first round, closing the center hole completely. Make a loop with the yarn, leaving a tail of about 15 cm. Insert your hook through the loop, catch the working yarn, and pull it through. Chain 1 to anchor, then work your stitches into the loop itself, not into a chain. When the round is done, pull the tail to close the center, then darn it in securely. A loose tail at the center will work its way out over time.
What a Stitch Marker Does Here
This pattern uses joined rounds, not continuous spiral rounds, so you do not need a stitch marker to track the round end the same way you would in amigurumi. The marker here sits in the first stitch of the round as a reference point so you can confirm your join lands in the right place. Any small clip or a loop of scrap yarn works. Move it up with each new round.
How to Work Front Post and Back Post Stitches
These appear in the cuff ribbing and they are what give the cuff its elasticity. For a front post stitch, insert your hook from front to back around the post (the vertical column) of the stitch below, not into the top loops. For a back post stitch, insert from back to front around the same post. The stitch sits in front of or behind the fabric and the resulting row has a raised texture that stretches.
The Invisible Join
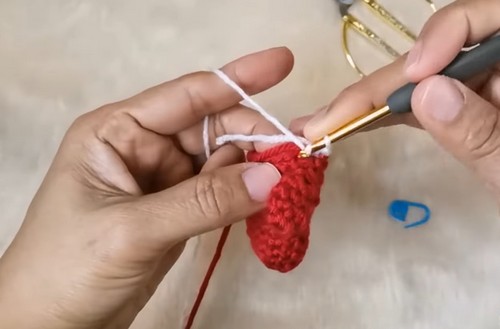
At the end of the final round, cut the yarn leaving a 15 cm tail. Thread it onto a yarn needle. Insert the needle into the first stitch of the round from front to back, then insert it under both loops of the last stitch and pull through. This mimics a stitch and closes the round without a visible bump at the join. Pull gently until it matches the tension of the surrounding stitches.
What You Need
- Red yarn, worsted weight or any weight you have, for the mitten body. The finished size will depend on your yarn weight.
- White yarn or a contrasting color for the cuff, roughly one metre.
- A crochet hook sized to your yarn. The source video uses a small hook appropriate for the mini mitten scale. Check your yarn label for guidance.
- A yarn needle and scissors.
- A stitch marker.
- Optional: a key ring and fabric glue for the finished keychain version, or a short length of ribbon for the ornament version.
Abbreviations
- ch — chain
- sc — single crochet
- hdc — half double crochet
- sc2tog — single crochet two together (decrease)
- sl st — slip stitch
- FP — front post
- BP — back post
The Pattern
Thumb
Work this piece first and set it aside. You will join it to the hand in Round 8.
- Make a magic ring in red. Work 6 sc into the ring. Join with sl st. [6]
- Round 2: ch 1, 1 sc in each stitch around. Place a stitch marker in the first sc. Join with sl st. Fasten off, leaving a tail long enough to join later. [6] — The thumb is a flat, tight cylinder about the diameter of a pencil eraser. If it is puffing outward, the magic ring center was not pulled tight enough.
Hand
- Make a magic ring in red. Work 6 sc into the ring. Join with sl st. [6]
- Round 2: ch 1, 2 sc in each stitch around. Place a stitch marker in the first sc. Join with sl st. [12]
- Round 3: ch 1, work [1 sc, 2 sc in next st] around. Join with sl st. [18] — After Round 3, the piece should be a flat disc with no raised center. If the edges are curling up into a bowl shape, your tension is too tight. Loosen your grip on the working yarn and try the next round.
- Rounds 4 to 6: ch 1, 1 sc in each stitch around. Join with sl st at the end of each round. [18] [CHECK — the transcript states rounds 4 to 6 continue working around the hand but does not specify whether any shaping happens; all-sc rounds are consistent with the stitch counts on either side, so they are recorded here as plain sc rounds]
- Round 7: ch 1, 1 sc in each stitch around. Join with sl st. [18] — By Round 7 the hand should be a small cup shape, roughly as deep as it is wide, sitting cleanly on a flat surface without tipping.
Never made an amigurumi before? The video tutorial below is the perfect starting point, and the written pattern is right here whenever you’re ready!
Joining Thumb to Hand
This is the key round and it sounds harder than it is. You are simply picking up both pieces on the same round and working around the combined stitch count.
- Round 8: ch 1, insert hook into the same stitch on the hand and into any stitch on the thumb, sl st to join the two pieces together. Ch 1, work 1 sc in each of the 6 sts of the thumb, then 1 sc in each of the 18 sts of the hand all the way around. Join with sl st. [24] — After this round, the thumb should sit at the side of the hand like a real mitten thumb, not flapping loose. If it points outward at a strange angle, the joining sl st was pulled too tight; you can ease it with a blunt needle.

Shaping the Hand
- Round 9: ch 1, sc2tog 3 times, 1 sc in each of the next 8 sts, sc2tog once, 1 sc in each of the next 8 sts. Join with sl st. [20]
- Round 10: ch 1, work [sc2tog, 1 sc in each of the next 8 sts] twice around. Join with sl st. [18]
- Round 11: ch 1, work [sc2tog, 1 sc in each of the next 7 sts] twice around. Join with sl st and change to your cuff color on the final pull-through. [16] — The mitten body should now look recognisably mitten-shaped: a rounded palm narrowing slightly at the wrist opening. If it still looks too wide and boxy, check that your sc2tog stitches are worked into two separate stitches and not doubled into one.
Cuff and Ribbing
The cuff changes to hdc and then to post stitches. Work these looser than your body rounds, because the ribbing needs to stretch slightly to pull over the hand.
- Round 12: ch 1, 1 hdc in each stitch around. Join with sl st. [16]
- Round 13: ch 1, work [2 FPhdc, 1 BPhdc] around. Join with sl st. [16] — The ribbing pattern starts here. After this round you should see raised vertical columns forming on the outside of the cuff. If the fabric looks the same on both sides, check that you are wrapping around the post of the stitch below rather than into the top loops.
- Round 14: ch 1, work [2 FPsc, 1 BPsc] around. Join with an invisible join. [16]
Assembly and Finishing
- Darn in all ends on the inside of the mitten, weaving through several stitches in two directions so nothing pulls loose.
- For the keychain version: close the key ring through the last loop before you darn in, so the ring is anchored into the fabric rather than just attached to a tail.
- For the ribbon version: apply a small amount of fabric glue at the attachment point on the cuff, press the ribbon in place, and allow to dry flat before hanging. Do not skip the drying time or the ribbon will shift.
- Make the second mitten exactly as the first. There is no left and right at this scale, so both mittens come out the same.
Stuffing
These mittens are not stuffed. The fabric holds its shape on its own because the sc body rounds are worked at a close tension. If you want a slightly more dimensional look, a tiny pinch of fibrefill tucked into the palm before the cuff rounds will round out the silhouette. Do not stuff past the point where the fabric starts to distort.
Safety Notes
- The finished mittens have no eyes or attachments by default, so no safety-eye guidance applies here.
- If you add button decorations to the cuff, use embroidery thread and sew them down securely with multiple passes. Buttons on a keychain that gets handled daily will work loose faster than on a static ornament.
- For a version going to a child under three or into a treat bag, skip any button or bead decoration entirely and finish with a simple ribbon loop only.
The Character Dial: Two Easy Swaps
- Push it rustic: swap the bright red for a deep burgundy or brick, and work the cuff in undyed cream instead of white. The cuff ribbing in cream reads as a knitted cuff from a distance and the whole thing looks less novelty, more heirloom. Tie them together with a scrap of waxed jute instead of ribbon.
- Push it bright: work the entire body in the highest-contrast red you have, then add a single round of green or gold sc between the body and the cuff before the hdc round begins. One contrast round is enough. More than that and the mitten starts to look striped rather than festive.
- Both versions work at this scale because the mitten is small enough that even a bold choice reads as intentional rather than loud.

Colourways
- Birch and Berry. Cream body with a berry pink cuff. Less specifically Christmas, works from November through February.
- Midnight Market. Navy body with a gold or mustard cuff. The ribbing in mustard against navy is the whole look.
- Frosty Morning. Pale blue-grey body with a white cuff. The colour change is subtle, which is exactly the point.
- Spruce and Snow. Forest green body with a white cuff. The obvious swap from red that most people do not think of first, and it photographs better than the red version on a light background.
Display Ideas
- Strung on a length of twine across a mantel, alternating direction so they look like they belong together. Ten to twelve of them across two metres reads as a garland without being one.
- Hung from a wreath hook as a gift tag, with the recipient’s name written on a small card tucked into the cuff.
- Piled loosely in a small bowl on the kitchen table, mixed colourways, as a seasonal centrepiece that cost less than a candle.

After the Season
Acrylic mittens at this scale store in almost nothing — a small zip-lock bag, a tin, a corner of the Christmas decoration box. The only thing that damages them is sustained compression against a sharp object, which can split the yarn at the sc2tog decreases. Keep them away from metal hooks or ornament hangers in storage. No special washing needed unless they pick up dust; a cool hand-rinse and a flat dry is enough.
Quick Answers
- I have never made a magic ring before. What if it keeps coming undone? Pull the tail firmly after Round 1 to close the center hole, then work a small knot with the tail and the working yarn before darning in. The knot adds a millimetre of bulk that locks the ring in place. Darn over it rather than around it.
- My thumb is sitting at a weird angle after the join round. Did I do something wrong? Probably the joining sl st was pulled too tight, which pulls the thumb toward the palm rather than letting it sit outward. You can ease it with a blunt yarn needle after the fact, or just leave it — at this scale, a slightly angled thumb is invisible from half a metre away.
- The cuff is tighter than the rest of the mitten. How do I fix it? Go up half a hook size for the cuff rounds only. The post stitches have less give than plain sc and a slightly larger hook keeps the ribbing stretchy without changing the look.
- What hook size should I actually use? Match the hook to your yarn label. The mini scale of this mitten comes from the yarn weight, not from using an unusually small hook. Fingering weight gives you a tiny ornament-scale mitten; worsted weight gives you something closer to a tree decoration or bag charm.
- My stitch count is off after Round 8. What happened? Count the thumb stitches separately from the hand stitches, then add them. If you have more than 24, you likely worked into the joining sl st as though it were a stitch. It is not a stitch; skip it and continue from the first sc of the thumb.