Free Halloween Cauldron Amigurumi Crochet Pattern – Bubbling Potion Cauldron For Spooky Decor
Bubble bubble, hook and yarn — this Halloween Crochet Cauldron Amigurumi might just be the most underrated project of the entire spooky season and it’s about time someone said it Round, chunky, and absolutely brimming with Halloween charm, this little cauldron looks incredible sitting next to your witch amigurumi or styled into a full spooky shelf scene that your Pinterest followers will genuinely lose their minds over. What makes this pattern so satisfying is how the simple construction somehow produces something that looks genuinely detailed and intentional when it’s finished, a deep mossy green or classic black yarn with a few pops of color bubbling over the top and you’ve got yourself the coziest little piece of Halloween magic your hook has ever produced.
Cauldron amigurumi works so well as a Halloween decoration because the shape is immediately recognizable while still being simple enough to crochet in an evening. This version uses a cream gray body with neon green bobble yarn overflowing from the top to mimic a bubbling potion, and the contrast between the two colors is what gives it its impact. Four small feet at the base lift it slightly off the surface and add a detail that makes the finished piece look more considered than a plain rounded base would.
Halloween Cauldron Amigurumi Crochet
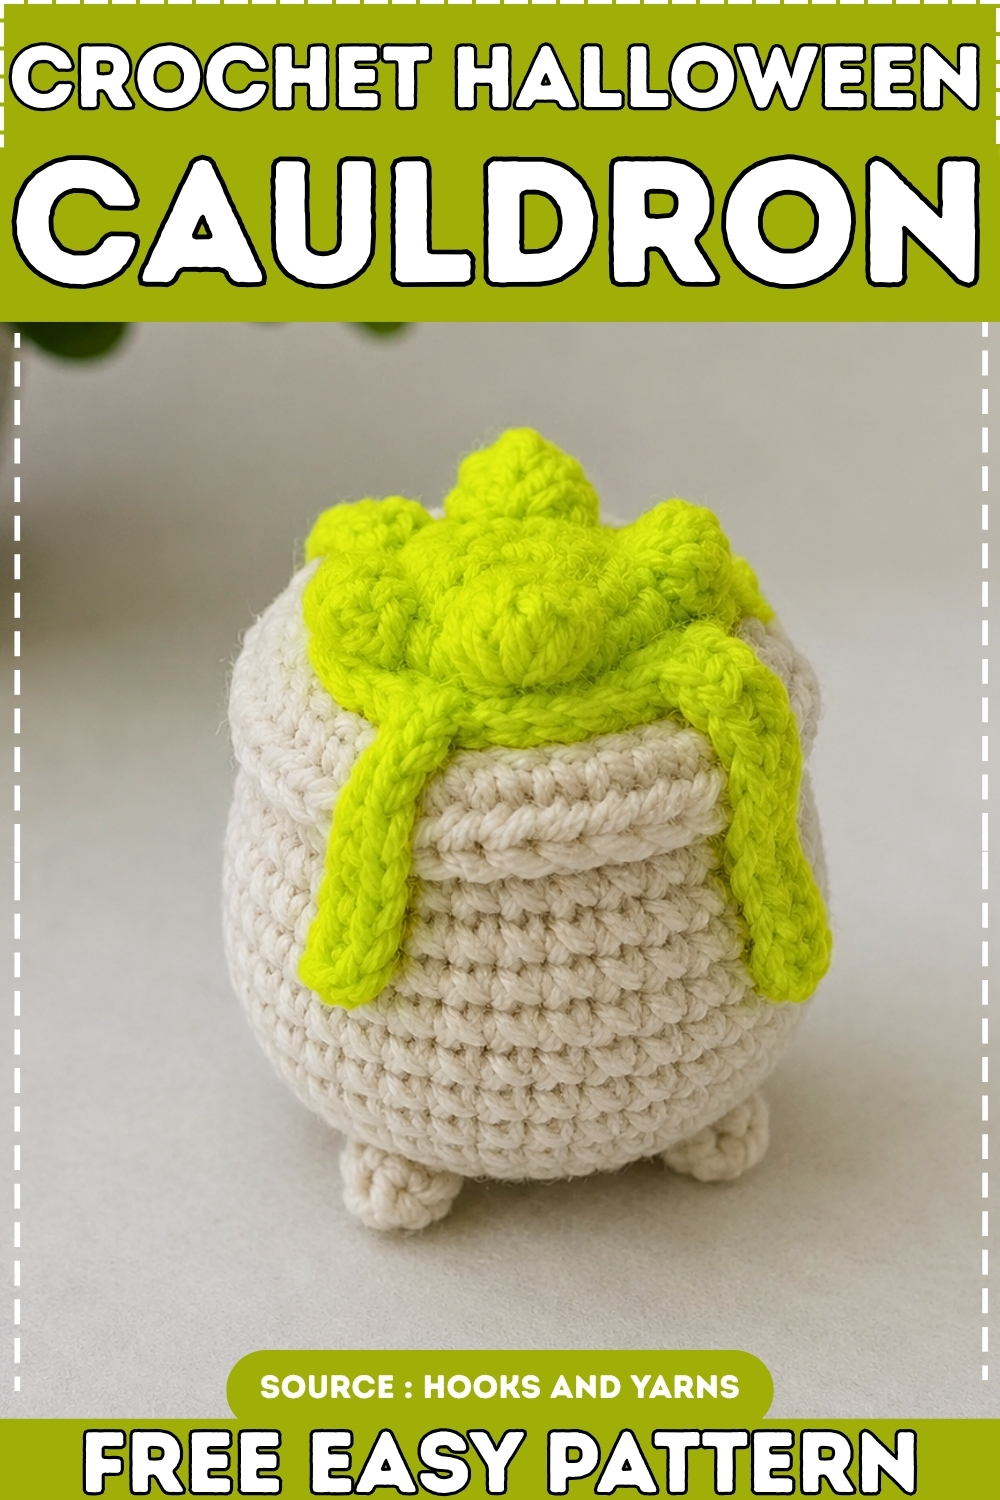
Worked in gray yarn for the body with neon green used for the potion bubbles, this free Halloween cauldron amigurumi pattern uses a rounded amigurumi base with an open top and separately crocheted bubble details sewn into place. The bobble texture on the potion section creates visual depth without requiring any complex color work mid-round. At a small finished size it works well as a shelf decoration on its own or grouped with other Halloween amigurumi like a skull or grim reaper for a fuller seasonal display.
Quick Answers
- How long does this take to make? Most crocheters finish one cauldron in two to three hours. The feet are the fiddliest part — allow a full half-hour just for those three little pieces, especially if you haven’t worked a popcorn stitch before.
- Can I make a whole batch for a party or display? Absolutely. A group of six sits very naturally on a tiered tray or mantel shelf, and working assembly-line style — all bodies first, then all potion tops, then attaching feet in one go — keeps the rhythm steady. Budget around two to two-and-a-half hours per cauldron once you’ve made your first and worked out the drip variation you prefer.
- What skill level is this? Intermediate. You’ll need to be comfortable with magic ring starts, the front-loop-only technique, and basic bobble or popcorn stitches. The cauldron body itself is approachable; the potion top’s drip row is where the pattern gets interesting.
Where This One Lives in a Room
Set a single cauldron on a side table with a few loose dried leaves around the base and it looks considered, not crafted-in-a-rush. That’s rarer than it sounds with Halloween decor. The three-footed silhouette gives it a proper witchy profile even at small scale — it doesn’t flatten or tip over — and the lime potion colour pops hard against dark surfaces, black fabric runners, or the inside of a wooden bowl.
A cluster of three in different drip variations works particularly well as a centrepiece. Make one with long drips hanging low, one with shorter stubby ones, one with the middle variation — they read as a family rather than a repeated unit. Place them on a small round mirror for an instant cauldron-reflection effect that looks deliberate without requiring any extra effort.
These also sit well on a narrow porch shelf if it has any overhang to protect them from direct weather. The yarn won’t thank you for rain, but a covered porch absolutely works.
Display Ideas
- Tiered tray: One cauldron per tier, surrounded by small faux pumpkins, black ribbon scraps, or dried orange slices. The graduated heights do the work for you.
- Mantel grouping: Line three or five across, varying the drip lengths. Odd numbers feel less staged.
- Bowl filler: Drop one cauldron into a black or terracotta bowl with Spanish moss and a few plastic spiders. It anchors the whole thing.
- Desk or bookshelf: A single cauldron beside a stack of books or a candle reads as intentional seasonal decor without tipping into full Halloween-decoration territory.
- Gift topper: Tie one to the top of a wrapped gift with black twine. A handmade tag, a few fake leaves, done.
- Wreath accent: Attach one to a dried grapevine or eucalyptus wreath using floral wire through the base. The three feet act as natural anchor points.
Pieces List
- Cauldron Body — make 1
- Brewing Potion Top — make 1
- Feet — make 3
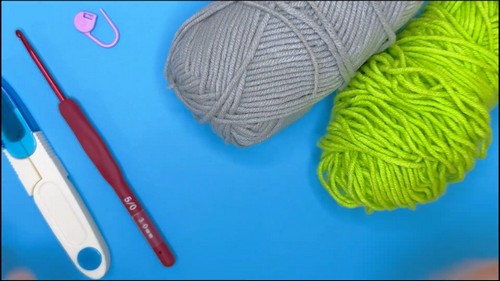
Materials
- Gray yarn (main cauldron body)
- Lime or yellow-green yarn (bubbling potion top)
- Crochet hook sized for your yarn weight
- Polyfil stuffing
- Stitch markers
- Yarn needle for finishing
Stitch Abbreviations
- sc — single crochet
- hdc — half double crochet
- inc — increase (2 sc in same stitch)
- hdc-inc — hdc increase (2 hdc in same stitch)
- dec — decrease
- bob — bobble stitch
- pop — popcorn stitch
- ch — chain
- sl st — slip stitch
- mr — magic ring
- FLO — front loops only
- BLO — back loops only
Note: Bobble stitch and popcorn stitch are specialty stitches. If you haven’t used them before, look up a short tutorial before starting — the popcorn on the feet and the bobbles on the potion top are both load-bearing for the finished look.
The Pattern
Part 1 — Feet (make 3)
Color: Gray yarn
- R1: 6 sc in magic ring (6)
- R2: (inc) x 6 (12)
- R3: (sc, inc) x 6 (18)
- R4: (inc, 2sc, inc, sc, pop, ch1) x 3 (24)
Fasten off, leaving a long tail for sewing. Set aside.

Shape checkpoint: By the end of R3 the foot should look like a small flat disc, about the size of a large button. R4 adds the popcorn texture and begins to give it a slight raised bump on one side — that bumpy side faces outward on the finished cauldron.
Part 2 — Cauldron Body
Color: Gray yarn
- R1: 6 sc in magic ring (6)
- R2: (inc) x 6 (12)
- R3: (sc, inc) x 6 (18)
- R4: (2sc, inc) x 6 (24)
- R5: (3sc, inc) x 6 (30)
- R6: (inc, 4sc) x 6 (36)
- R7–R14: 1 sc in each stitch — 8 even rounds (36)
- R15: (4sc, dec) x 6 (30)
- R16: (dec, 7sc) x 3 (27)
- R17 [FLO]: (inc, 7sc) x 3 — worked in front loops only (30)
- R18: (4hdc, hdc-inc) x 6 (36)
Do not fasten off. The brewing potion top will be joined here.
Reading crochet patterns can be tricky when you’re just starting out, feel free to follow the video tutorial below instead!
Shape checkpoints:
- After R6, the base should sit flat and slightly rounded, like a shallow bowl with no lip yet.
- After R14, the straight-sided section should be complete — the body is a clean cylinder at this point.
- After R15–R16, the top is visibly narrowing inward, pulling the opening in toward the cauldron neck.
- R17’s FLO ridge is the cauldron’s rim detail — that raised line around the inside edge. R18 flares back outward and upward using hdc, which is where the cauldron lip forms. It should feel distinctly wider at the top than at R16.
Part 3 — Brewing Potion Top
Color: Lime or yellow-green yarn
- R1: 6 sc in magic ring (6)
- R2: (inc) x 6 (12)
- R3: [(sc, inc) x 2, bob, ch1, inc] x 2 (18)
- R4: [inc, sc, bob, ch1, (inc, 2sc) x 2] x 2 (24)
- R5: Drip row — choose one variation below, or mix them for an organic look
- R5 Variation A: 4sc, (ch11, 4 sl st, 4sc, 2hdc), repeat for drips
- R5 Variation B: 3sc, inc, (ch7, inc, 3sc, 2hdc), repeat for drips
- R5 Variation C: 8sc, (ch10, inc, 2 sl st, 3sc, 3hdc), sc in same stitch, repeat
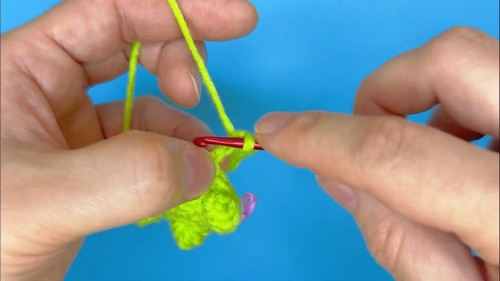
Fasten off, leaving a long tail for joining.
Shape checkpoints:
- After R2, this is a small flat circle — identical to starting any amigurumi disc.
- After R4 with the bobbles worked in, it should have a slightly raised, uneven bubbly texture on the surface. That’s correct — it’s meant to look like something actively bubbling.
- After R5, the drip chains hang freely off the edge. Longer chain drips (Variation A) hang lower; shorter ones (Variation B) sit closer to the edge. The piece won’t lie flat at this point and that’s expected.
Safety Eye Timing
There are no safety eyes in this pattern — the cauldron is decor, not a character with a face. If you’re adapting it to add eyes (say, making it into a jack-o-lantern-adjacent piece), add them before you stuff and close the body, around R10–R12 when the opening is still wide enough to reach inside. Standard placement rule: insert and secure eyes before stuffing, always.
For any version going into a treat bag, party favour bag, or anywhere near children under three, skip safety eyes entirely and embroider instead. Plastic components and small hands are a combination worth being deliberate about.
Assembly
- Step 1 — Attach the feet Sew the three feet evenly spaced around the bottom of the cauldron body, popcorn texture facing outward. Pin all three before sewing any of them — spacing errors are much easier to catch at the pinning stage than after two are already sewn.
- Step 2 — Stuff the cauldron Fill the body firmly with polyfil. The cauldron should hold its round shape without collapsing at the sides when you set it down. Don’t overstuff the neck area near R15–R16 — too much bulk there can distort the rim detail you built in R17–R18.
- Step 3 — Join the brewing potion top Slip stitch through the last round of the brewing potion top and through the back loops of R16 on the cauldron body, working all the way around the opening to join them. The drips should fall over the outside of the cauldron rim naturally.
- Step 4 — Finish Weave in all ends securely. Give the drip chains a gentle tug to make sure they’re anchored.
Stuffing Notes
Firm enough that the cauldron holds its barrel shape when you set it on a flat surface. The feet take the weight, so if the body is too soft it will sag between them. The potion top doesn’t need separate stuffing — it sits on top of the body and is joined, not stuffed.

The Character Dial — Creepier vs Sweeter
This design sits naturally in the middle of the Halloween spectrum, which makes it easy to push in either direction without rebuilding the pattern.
- Creepier: Switch the body to a very dark charcoal or near-black gray rather than mid-gray. Replace the lime potion top with a sickly yellowish-green or a deep purple — either reads more ominous than bright lime. Make the drips using Variation A with the longest chains, so they hang far down the sides. Work the feet in a slightly different grey so they look uneven, like the cauldron has seen better decades. Add a few French knot “bubbles” in a slightly darker green on the potion surface. The overall effect is less craft-fair and more apothecary shelf.
- Sweeter: Keep the classic grey body but make the potion top in a pale mint or soft lavender instead of sharp lime. Use shorter drip chains (Variation B) so nothing hangs too far. Sew small white bobble “sparkle” accents onto the potion surface using a single strand of yarn. If you want to push it further, add tiny rosy pink cheeks to the cauldron body in surface single crochet — it turns the whole piece from witchcraft to Halloween-cute. This version is good for mantel displays that need to coexist with non-Halloween decor for the whole month.
- The material choice matters more than you might expect here: a smooth DK cotton reads as polished and tidy; a slightly fuzzy or brushed yarn reads as older, more worn. For the creepier version, a matte cotton in dark shades is more convincing than acrylic.
Colourways
- Classic Apothecary: Charcoal gray body, deep forest green potion, black feet. Austere.
- Candy Witch: Pale lavender body, soft mint potion, lilac feet. Sits well with pastel Halloween palettes.
- Rust and Slime: Burnt orange-brown body (unusual but works), neon yellow-green potion. High contrast, very graphic on a shelf.
- Midnight Blue: Deep navy body, electric lime potion. The blue reads as unusual enough to stand out from standard gray cauldrons while still looking intentional.

After the Season
Store it in a small fabric bag or a lidded box, not a sealed plastic bag — amigurumi can develop a faint compressed smell in airtight storage. Tuck a sachet of cedar or lavender in with it to keep everything fresh. The lime yarn is slightly more vulnerable to fading over years if stored in direct light, so a dark drawer or closet shelf is better than a windowsill box. Bring it out at the start of October and it’ll look exactly the same as it did last year.
Pattern Notes
- The popcorn stitch in R4 of the feet creates a bumpy, textured look on the cauldron legs.
- The FLO row (R17) on the body creates a ridge that forms the cauldron’s rim detail.
- R18 uses half double crochet to flare the rim outward and give the cauldron its characteristic wide-mouth shape.
- The drip chains on the potion top can be made longer or shorter to adjust how far the potion appears to spill down the sides.
- A stitch marker at the start of each round is particularly useful in the straight section (R7–R14) where all rounds look identical.