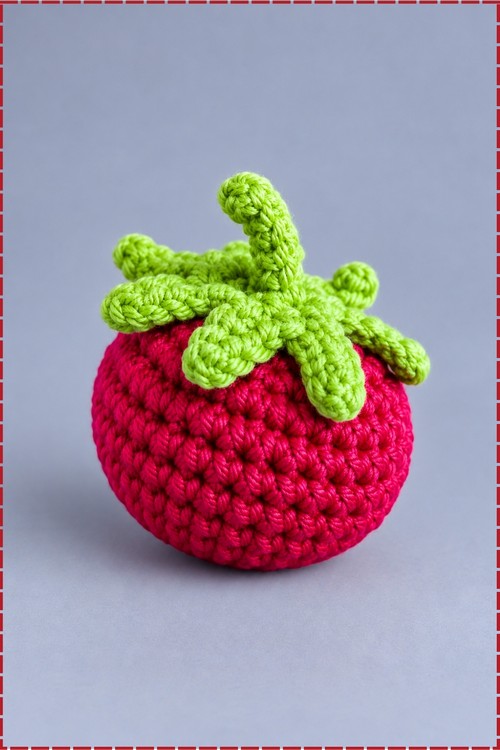
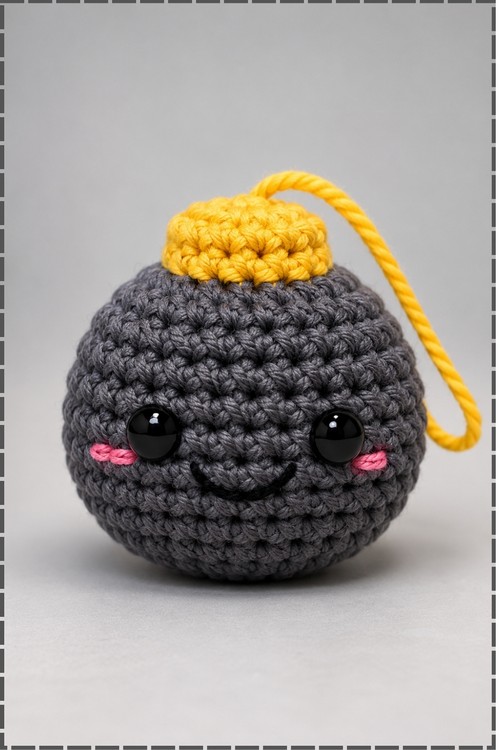
Free Pumpkin Gnome Amigurumi Crochet Pattern
The pumpkin shows up on the shelf sometime in late September and nobody questions it. A Pumpkin Gnome sits in that same window, part decor, part toy, completely at home between the real ones.
Pumpkin Gnome Amigurumi Crochet

Made as a gift, it lands well because it is seasonal without being loud about it. The hat does most of the personality work, and the round base means it stays wherever you put it without needing any help.
Countdown
- One gnome, start to finish: 3 to 4 hours for a maker who has done amigurumi before. The six flower petals are the time sink. Each one takes about 8 minutes including the border.
- A batch of twelve: 30 to 36 hours total, which is two weekends of solid sessions or three weeks of evenings.
- Latest safe start: 5 days out for two or three. Three weeks out for twelve. Yarn and hook are both fine gauge (2 mm yarn, 2.75 mm hook), so the pieces are small and tight, which means more time per unit than a worsted gnome of comparable height.
- Finished height is approximately 6 to 8 inches depending on yarn tension. [CHECK — final height not stated in source]
- Time per unit at pace, after the first three: roughly 2.5 hours.
- Yarn yardage for twelve: approximately 300 yards of body/flower colour, 100 yards white, 80 yards green, 30 yards beige. Add 10 percent for joins and waste. One standard 50 g skein of a 2 mm yarn carries roughly 170 yards, so plan on two skeins of your main colour per six gnomes, plus shared skeins for white, green, and beige across the full batch.
The Volume Case
Someone always needs more than two of these. A flower gnome at this scale is the right size for a gift tag alternative, a tray arrangement, or a bowl full of three or four together, and the piece count per unit, while higher than a simple amigurumi, repeats cleanly once you have internalised the order. The petals are the part that looks complicated and is not, once you realise they are just six identical flat rectangles worked into a pre-made ridge. Run all twelve bodies in the same sitting and the petals in a separate pass and the rhythm clicks in around the third gnome. From that point, each one goes faster than the last.
The body shape is particular here: it tapers from a wide dome at the base to a narrow closing round, and the stuffing note matters more than usual because the final silhouette depends on it. An over-stuffed body loses the taper. An under-stuffed one goes concave at the sides. Get it right on unit one and every subsequent body is a copy.
Pieces Per Gnome
- Flower head: make 1
- Petals, worked into the flower head: 6 per flower head
- Stem: make 1
- Gnome body: make 1
- Arms: make 2
- Beard: make 1
- Nose: make 1
Nine components, six of which come from the same yarn colour as the head and body. For batch efficiency, see the assembly-line running order after the pattern.
What You Need
- 2 mm yarn in your flower and body colour, roughly 25 yards per gnome
- 2 mm yarn in white for arms and beard, roughly 9 yards per gnome
- 2 mm yarn in green for the stem, roughly 5 yards per gnome
- A small amount of beige yarn for the nose
- 2.75 mm crochet hook
- Polyester fibrefill
- Yarn needle
- Stitch marker
- Hot glue gun and glue, optional for assembly
Abbreviations used here:
- sc = single crochet
- inc = 2 sc worked into one stitch
- dec = single crochet decrease
- ch = chain
- sl st = slip stitch
- MR = magic ring
- BLO = back loops only
- FLO = front loops only
Everything is worked in a continuous spiral unless a piece says otherwise. Do not join at the end of each round. Move your marker up as you go.
The Pattern
Flower Head
Worked in the flower/body colour.
- Round 1: 6 sc into a MR, pull tail to close (6)
- Round 2: inc in each stitch around (12)
- Round 3: [1 sc, inc] six times (18)
- Round 4: increase 6 stitches evenly around (24) [CHECK — source does not specify exact placement, evenly spaced gives [3 sc, inc] six times]
- Round 5: increase 6 stitches evenly around (30) [CHECK — same note; [4 sc, inc] six times]
- Rounds 6 to 8: 1 sc in each stitch around (30)
- Round 9: [4 sc, inc] six times (36)
- Rounds 10 to 11: 1 sc in each stitch around (36)
- Round 12: [5 sc, inc] six times (42)
- Round 13: working in BLO only, 1 sc in each stitch around (42). The unworked front loops remain free for the petals.
- Round 14: [6 sc, inc] six times (48)
- Rounds 15 to 16: 1 sc in each stitch around (48)
- Fasten off and weave in ends.
Shape check. After Round 5 this should be a flat disc, lying completely level on the table. Rounds 6 to 8 are where the edge starts to wall up into a shallow dome. If it is still flat at Round 8, your tension is too loose. The Round 13 BLO ridge should be a visible line sitting roughly two thirds of the way up the dome. The Rounds 14 to 16 section above the ridge is the flat top platform that the petal border will shape later.
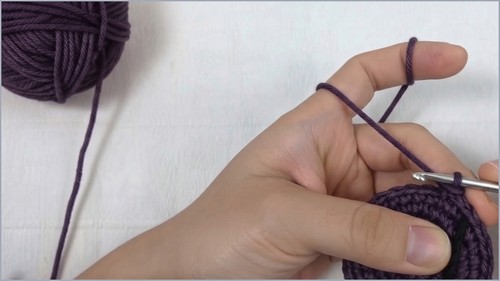
Don’t let crochet patterns intimidate you! If you’re a beginner, the video tutorial below makes it super easy to follow along!
Flower Petals
Worked flat into the free front loops of Round 13. Make 6 petals total, evenly distributed around the ridge. The front loops left by Round 13 divide into six groups of 7 stitches.
Each petal:
- Attach yarn to a front loop of Round 13
- Row 1: 7 sc across the next 7 front loops (7)
- Ch 1, turn
- Row 2: 7 sc (7)
- Ch 1, turn
- Row 3: dec, 3 sc, dec (5)
- Ch 1, turn
- Row 4: 1 sc in each stitch across (5)
- Ch 1, turn
- Row 5: dec, 1 sc, dec (3)
- Fasten off
Repeat for all six petals.
Petal border:
- Attach yarn in the loop between two petals
- Work 5 sc down one side of the petal, 3 sc across the top, 5 sc up the other side, then sl st into the loop between petals
- Repeat around all six petals
- Fasten off and weave in ends
Top shaping:
- Insert hook vertically into a stitch between two petals and work 11 sl st across the top of the flower head
- Secure and weave in ends

Shape check. Each petal before the border should be a flat rectangle narrowing to a blunt triangle, not curling at all if your tension is even. The border round is what defines the outer edge and gives the petal a rounded shape, so do not skip it. After the top shaping sl sts, the centre platform of the flower should pull inward slightly, like a button pressed into fabric.
Stem
Worked in green. This piece attaches to the underside of the flower head and the top of the body.
- Round 1: 6 sc into a MR (6)
- Rounds 2 to 7: 1 sc in each stitch around (6)
- Round 8: [ch 6, work 5 sc into the back bumps of the chain, sl st into the next stitch on the stem] repeated around to create leaf details [CHECK — source does not say how many leaf repeats to work; evenly placed across the round gives approximately 3 leaves]
- Fasten off, leaving a long tail if sewing, or leave a short tail and use hot glue
Shape check. The stem is a tight narrow tube, about the diameter of a pencil. If it is wider than that, go down a hook size for this section. Each leaf should lie flat against the stem base rather than sticking straight outward.
Gnome Body
Worked in the flower/body colour.
- Round 1: 7 sc into a MR (7)
- Round 2: inc in each stitch around (14)
- Round 3: increase 7 stitches evenly around (21) [CHECK — [2 sc, inc] seven times]
- Round 4: increase 7 stitches evenly around (28) [CHECK — [3 sc, inc] seven times]
- Round 5: working in BLO, 13 sc, inc, 13 sc, inc (30) [CHECK — the two-increase BLO round is unusual; stitch placement for the two increases is not specified in source]
- Round 6: [4 sc, inc] six times (36)
- Round 7: increase 3 stitches evenly (39) [CHECK — exact placement not specified]
- Round 8: increase 3 stitches evenly (42)
- Rounds 9 to 12: 1 sc in each stitch around (42)
- Round 13: decrease 3 stitches evenly (39) [CHECK — exact placement not specified]
- Round 14: decrease 3 stitches evenly (36)
- Rounds 15 to 16: 1 sc in each stitch around (36)
- Round 17: decrease 6 stitches evenly (30)
- Rounds 18 to 24: 1 sc in each stitch around [CHECK — source states work even until Round 24 but gives 12 sts as the count at the end of Round 24, which requires additional decrease rounds not listed. Most likely: decrease rounds were condensed in the source transcript. Work further evenly-spaced decrease rounds as needed to reach 12 sts before Round 25]
- Stuff the body lightly with fiberfill
- Round 25: dec six times (6)
- Fasten off

Shape check. After Round 4 this should be a flat disc like the flower head, but with a seven-based count instead of six, which makes it very slightly irregular. Rounds 5 to 8 transition it into a dome. Rounds 9 to 12 are the widest section, a barrel shape. The decreases from Round 13 taper it inward, and at Round 17 it should be noticeably narrowing. The final stuffed body should be a rounded cone, wide at the base and closing to a narrow dome at the top.
Arms, Make 2
Worked in white for the first section, switching to body colour.
- Round 1: 6 sc into a MR (6)
- Rounds 2 to 3: 1 sc in each stitch around (6). Work in white for these three rounds.
- Switch to body colour
- Rounds 4 to 9: 1 sc in each stitch around (6). Six more rounds in body colour.
- Fasten off
Shape check. This is a narrow tube, about the width of your little finger. It should not taper or widen at any point. The colour change sits a third of the way up the arm and forms a clean ring if the switch is made on the first stitch of the round.
Beard
Worked in white.
- Round 1: 6 sc into a MR (6)
- Round 2: increase 3 stitches evenly (9) [CHECK — [1 sc, inc] three times]
- Round 3: increase 3 stitches evenly (12)
- Round 4: increase 3 stitches evenly (15)
- Round 5: increase 3 stitches evenly (18)
- Rounds 6 to 10: 1 sc in each stitch around (18)
- Round 11: [1 sc, dec] six times (12)
- Round 12: 1 sc in each stitch around (12)
- Fasten off
Shape check. A beard that has worked correctly is oval rather than circular by Round 5, and the oval deepens through Rounds 6 to 10. The Round 11 decrease does not pull it into a sphere, it just closes the lower edge slightly into a flat oval base. It should not be stuffed, so it stays pliable.
Nose
Worked in beige.
- Round 1: 6 sc into a MR (6)
- Round 2: inc in each stitch around (12)
- Round 3: 1 sc in each stitch around (12)
- Round 4: dec six times (6)
- Fasten off, leaving a tail. Cinch or sew closed.
Shape check. A rounded button shape, roughly half the size of a large button. If it has pulled into a cone, your Round 4 decreases were spaced unevenly. If it is flat, you need a pinch of fibrefill before closing.
Eyes and Safety
This design has no eyes in the source pattern, which is the right call for anything being made in volume. Leave them out or embroider two French knots in black yarn, with the knot buried inside the beard before it is sewn on. If you do want to add plastic safety eyes, the only opportunity is while the body is still open in the upper rounds and before stuffing begins. Use the smallest eyes that read clearly, 4 mm at most, and seat them on the upper section of the body above where the beard will sit. For any gnome going as a gift, party favour, or into a set for children, skip plastic eyes and embroider.
Assembly
Sew in this order. Pin each piece before committing.
- Nose: to the top centre of the beard, sitting just above the beard’s upper edge
- Beard: sewn onto Round 18 of the body. Pin it, step back and check the proportion before sewing, because moving it later leaves holes.
- Arms: one each side of the body, roughly 3 stitches out from the beard edge
- Stem: glued or sewn to the top of the body
- Flower head: attached to the top of the stem, balanced so the platform sits level
Hot glue at the stem join is faster for batches and holds firmly. If the gnomes are for young children or for anything that will be handled frequently, sew instead.
Assembly-Line Running Order
- For a batch of twelve, work in phases rather than completing one gnome at a time. Each phase has a rhythm and switching mid-piece loses that.
- Phase 1: All twelve bodies. Work all the magic rings first, then all Round 1s, then carry each body through to fasten-off before moving to the next. Stuff each body before you close it and set all twelve aside.
- Phase 2: All twelve flower heads, through Round 16, fasten off, weave ends.
- Phase 3: All petals and borders. Six petals per flower head, twelve flower heads. This is 72 petals. Working the border on each petal immediately after the petal is finished rather than at the end is faster because you do not have to re-find your place.
- Phase 4: All twelve stems.
- Phase 5: All twenty-four arms. Six rounds each, fast.
- Phase 6: All twelve beards and twelve noses together, since both are in white and beige and the colour changes are minimal.
- Phase 7: Assembly pass. Nose to beard, beard to body, arms to body, stem to body, head to stem.
- Keeping all your pieces sorted by unit as you go is worthwhile even if it feels fussy. A dozen identical noses in a pile look the same but are not always the same size, and sorting them back to their original body at assembly avoids proportion mismatches.
Stuffing
- The body: lightly. The taper from Round 17 onward depends on the outer surface pulling inward without resistance, and a firmly stuffed body fights that. Press the stuffing to the lower half of the body and leave the upper third looser. Over-stuffing announces itself at the sides between Rounds 9 and 12, which splay outward and the gnome looks pregnant rather than gnome-shaped.
- The flower head: no stuffing. The petals and the top-shaping slip stitches do all the structural work.
- Arms and beard: nothing in either. The arms are narrow enough that stuffing would make them rigid, and a stuffed beard loses the drape that reads as a face below a hat.
Pushing the Design
For autumn use these stay recognisable across a range of palettes, and the petals are the design element that earns the most attention, which means the petal colour is the first decision.
Warmer and More Seasonal
- Swap the flower colour to pumpkin orange, rust, or terracotta. The round petals read as a sunflower in gold, a marigold in orange, or a chrysanthemum in dusty pink.
- Work the stem in an olive or sage green instead of a bright green. Less saturated reads as more botanical.
- Give the body the same colour as the petals. A monochrome gnome reads as a character rather than an accessory.
- Add a row of sc around the very top of the body, just below where the stem sits, in a contrast colour. It reads as a collar.
- For a more grounded look: muted plum body with cream beard. The nose stays beige.
Brighter and More Playful
- Contrast petals against a neutral body. White petals with a sage body. Yellow petals with a brown body.
- Work alternating petals in two colours. The petal repeat divides evenly into six so two colours alternate cleanly.
- Bright green stem in a stiffer yarn so it curves to the side rather than standing straight.
- Add a simple French-knot face above the beard: two eyes and a single straight stitch for a mouth.

Colourways
- Harvest Market. Pumpkin orange flower head and body, cream beard and arms, olive stem, camel nose. Reads as seasonal without leaning into Halloween.
- Dried Flowers. Dusty mauve flower, pale sage body, ivory beard, brown stem. The least obvious autumn palette and the one that photographs best in natural light.
- Sunflower Stand. Deep gold petals, warm brown body, cream beard, olive stem. Classic and works in any room that already has wood tones.
- Midnight Garden. Deep plum flower, charcoal body, white beard, dark green stem. Stays relevant from October into December without adjustment.
Where It Lives
Tiered tray, middle level. Wreath filler, wired to the back of the stem. Small woven basket, set upright with the flower showing above the rim. Gift bag, tucked inside so only the flower and hat show above the opening.
After the Season
A 2 mm yarn gnome stores well in almost any flat container as long as the petals are not crushed. Lay each one face up in a single layer or with nothing heavy on top of the flower, because petal borders that have been compressed for three months are tedious to reshape. A stack of sealed boxes works fine. A single soft bag for all twelve does not. If any petals have gone stiff or mis-shaped, a light press with a cool iron through a damp cloth fixes them in under a minute.
Quick Answers
Can I use worsted weight to make this faster? You can, and the body will come together much more quickly. Go up to a 4 mm hook and expect the finished gnome to be roughly twice as tall. The petals will be large enough to be quite prominent, which can work well for a standalone shelf piece. Yardage roughly doubles.
The body is losing its taper. What went wrong? Almost always over-stuffing, or stuffing pushed too high into the upper rounds. Pull some out through the open top before Round 25 and let the decreases do their job. The second cause is a hook that is too large for the yarn weight, which leaves a loose fabric that cannot hold a shape.
How long does the assembly-line approach actually save? On a batch of twelve, switching between phases rather than completing each gnome individually saves around 4 to 5 hours, mostly because you are not stopping to re-read each section repeatedly. The saving is highest on the petal phase, where the rhythm of 7 sc rows locks in fast and slows back down every time you have to re-find your starting stitch.
Credit
Construction adapted from a video tutorial available at http://www.youtube.com/watch?v=M1gORvx8JQI. The source transcript does not name the designer or channel. Please check the video page and credit the creator directly when you publish.