Crochet Mini Cherry Tomato Amigurumi Free Pattern
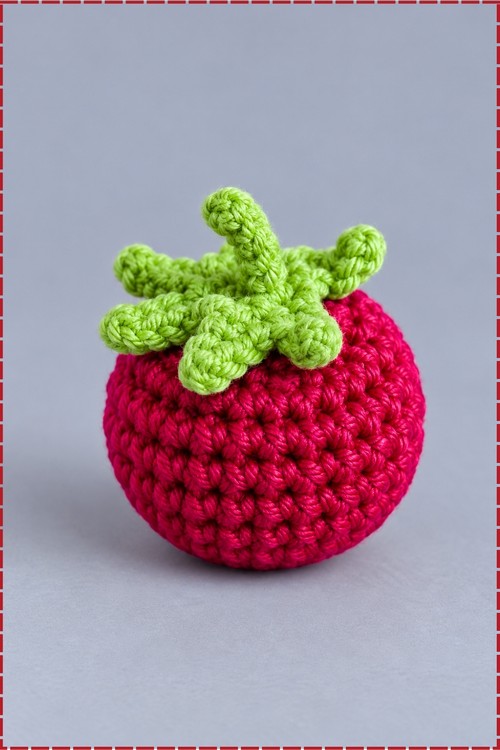
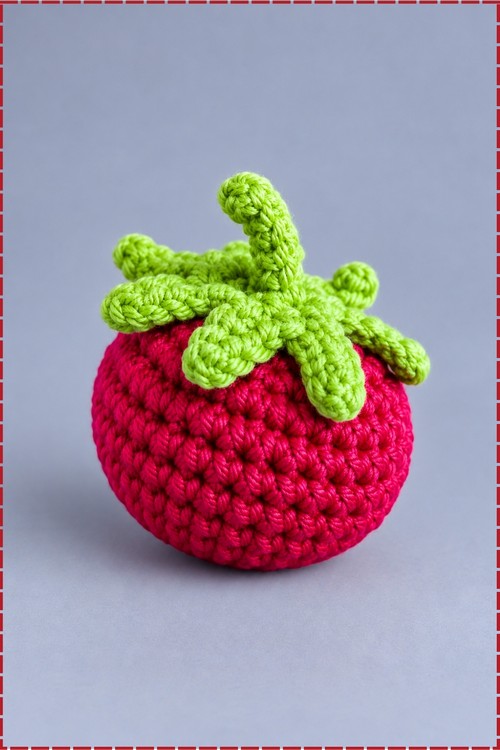
Toss the crochet mini cherry tomato amigurumi into a play kitchen basket and its deep red body and bright green star stem steal the show. Curly lime green leaf points give the cherry tomato a garden fresh look on a kitchen counter or a pretend farm stand.
Beginners who want something round and quick will get along with this Crochet Mini Cherry Tomato Amigurumi. No face, no limbs, nothing to sew on but the star top. Good for kids learning to stuff their own work, and good for anyone building a bowl of crochet produce one Crochet Mini Cherry Tomato Amigurumi at a time.
Crochet Mini Cherry Tomato Amigurumi

Ten rounds build the whole fruit, which means you go from a magic ring to a stuffed ball in one short sitting with no seams to join. Rounds here close with a slip stitch instead of spiralling, so your stitch counts stay easy to check at every stage. My crochet mini cherry tomato amigurumi came out in bright blue with a yellow calyx rather than the usual red and green, and the colour swap changes nothing about the construction. Cinching a tail from base to crown gives the body its dimple. Leaf points get chained separately and worked back down.
Materials And Tools
- Worsted or DK cotton in bright blue for the body
- Small amount of yellow for the stem and leaf points
- Crochet hook, 1.6 mm for the original yarn weight, or size down from your yarn’s recommendation so the fabric stays tight
- Fiberfill stuffing
- Tapestry needle
- Scissors
Difficulty And Time
Straightforward beginner project. You need a magic ring, increases, decreases, chains and slip stitches, and nothing else. Mine took roughly forty minutes from start to finish, with the calyx accounting for about half of that because of the chain work. Finished size on my hook came out around the width of a golf ball, but that shifts with yarn weight, so treat it as an estimate rather than a target.
Technique Notes And Tips
- Magic ring, written as MR, is an adjustable loop that pulls closed so no hole shows at the base. Pull it tight before you finish round one, since it is much harder to close once the ball is stuffed.
- Single crochet is written as sc, increase is written as inc and means two single crochet in one stitch, decrease is written as dec and means two stitches worked together, slip stitch is written as sl st, and chain is written as ch.
- Every round here joins with a slip stitch and starts with a chain 1. That chain does not count as a stitch, so do not work into it on the next round or your counts drift upward.
- Keep your tension tight enough that no stuffing shows through. If you can see white through the fabric, drop a hook size.
- Stuff at round nine, not later. Once round ten closes to eight stitches, the opening is too small to pack properly.
- Underfilling is the most common problem on a small ball like this. Push in more than looks right, then roll the piece between your palms to even it out.
- The cinch from base to crown is what makes the shape read as fruit rather than a ball. Pull firmly but stop before the fabric puckers.
- Work the calyx chains loosely. Tight chains curl the leaf points up off the body instead of letting them lie flat and splay outward.
The Pattern
Tomato Body
- Use blue yarn.
- Round 1: make a magic ring and work 8 sc into it, join with a sl st in the first stitch, ch 1, then pull the ring closed (8 sts). The centre should show no gap at all once tightened.
- Round 2: work 8 inc, join with a sl st in the first stitch, ch 1 (16 sts).
- Round 3: work (1 inc, 1 sc) eight times, join and ch 1 (24 sts). The disc should still lie flat here.
- Round 4: 24 sc around, join and ch 1 (24 sts). The sides begin turning upward from this round onward.
- Round 5: 24 sc around, join and ch 1 (24 sts).
- Round 6: 24 sc around, join and ch 1 (24 sts).
- Round 7: 24 sc around, join and ch 1 (24 sts).
- Round 8: 24 sc around, join and ch 1 (24 sts). You now have a straight sided cup ready to close.
- Round 9: work (1 dec, 1 sc) around, join and ch 1 (16 sts).
- Stuff firmly with fiberfill now, packing it into the base first so the bottom stays round.
- Round 10: work 8 dec around (8 sts).
- Slip stitch into the first stitch, ch 1, then cut the yarn leaving a long tail for shaping.
- Add a small extra pinch of stuffing through the opening if the piece feels soft.
Shaping The Body
- Thread the long tail onto a tapestry needle.
- Weave the needle through the front loops of all 8 remaining stitches and pull tight to close the hole completely.
- Push the needle down through the centre of the closed top, out through the centre of the base, then back up through the centre to the top again.
- Pull firmly to draw both ends inward, which creates the dimple at the crown and flattens the base so the piece sits without rolling.
- Secure the tail with a small stitch and bury the end inside the body.
Yellow Calyx And Stem
- Use yellow yarn.
- Make a slip knot and ch 6.
- Starting in the second chain from the hook, work 5 sl st back along the chain. That worked strip becomes the upright stem.
- Ch 1, then work 6 sc into the last loop at the base of the stem to form a small ring around it.
- Join with a sl st to the first stitch of that ring.
- For each leaf point: ch 4, then starting in the second chain from the hook work 1 sl st, 1 sl st, 1 sc back down the chain, then sl st into the next stitch of the central ring.
- Repeat the leaf point sequence 5 to 6 times around the ring until every stitch of the ring carries a point. Mine has six points spaced evenly, which gives the star shape a fuller look from above.
- Fasten off with a sl st, pull the loop through to the back, and leave a long tail for sewing.
Assembly
- Sit the calyx on the crown of the body with the stem standing upright in the centre of the dimple.
- Spread the leaf points outward so they lie against the curve rather than sticking straight out.
- Sew the calyx down with the yellow tail, catching each leaf point near its base and stitching through the centre ring as well.
- Take small stitches so the yellow yarn does not show against the blue.
- Weave all remaining ends into the inside of the body and trim close.

Yarn Substitution
Any smooth cotton or cotton blend works. Cotton holds the ball shape and keeps the stitch definition crisp, which matters on a piece this small. Acrylic is fine and cheaper, though it fuzzes with handling and softens the leaf points. Avoid fluffy or boucle yarns entirely, since the calyx shape disappears in the halo. If you move up to worsted, keep the same counts and just accept a larger finished fruit.
Customization Ideas
- Keep red and green for a realistic tomato, or use yellow, orange or deep purple for heirloom varieties.
- Work the body in green and the calyx in brown for a tomatillo look.
- Make a set of five or six in different colours and pile them in a bowl.
- Add a short chain loop under the stem to hang the piece from a hook or a bag zip.
- Skip the stuffing and fill with a small bell for a baby-safe rattle, sewing the base seam extra securely.
- Chain longer leaf points for a more dramatic star, keeping every point the same length.

FAQ
Why does my tomato look like a ball instead of a fruit? The cinching step is doing the shaping. Running the tail from the crown to the base and back, then pulling firmly, creates the dimple and flat bottom that make the shape read correctly.
My stitch counts keep going up. What am I doing wrong? The chain 1 at the start of each round is a turning chain, not a stitch. Working into it adds one stitch per round. Count at the end of rounds 3 and 9 to catch the drift early.
Can I work this in a continuous spiral instead of joining? Yes, and the surface looks smoother without the join seam. Use a stitch marker at the start of each round, since the joins are what keep your place in the written version.