Free Halloween Pumpkin Amigurumi Crochet Pattern For Beginners
Tiny stem, chunky body, and enough autumn energy to carry the whole season. This Crochet Pumpkin With Hat Amigurumi comes together faster than you’d expect and looks like it belongs in a Pinterest fall shelfie, because it does. No complicated stitches, no stress, just pure cozy crafting vibes. Your living room deserves this.
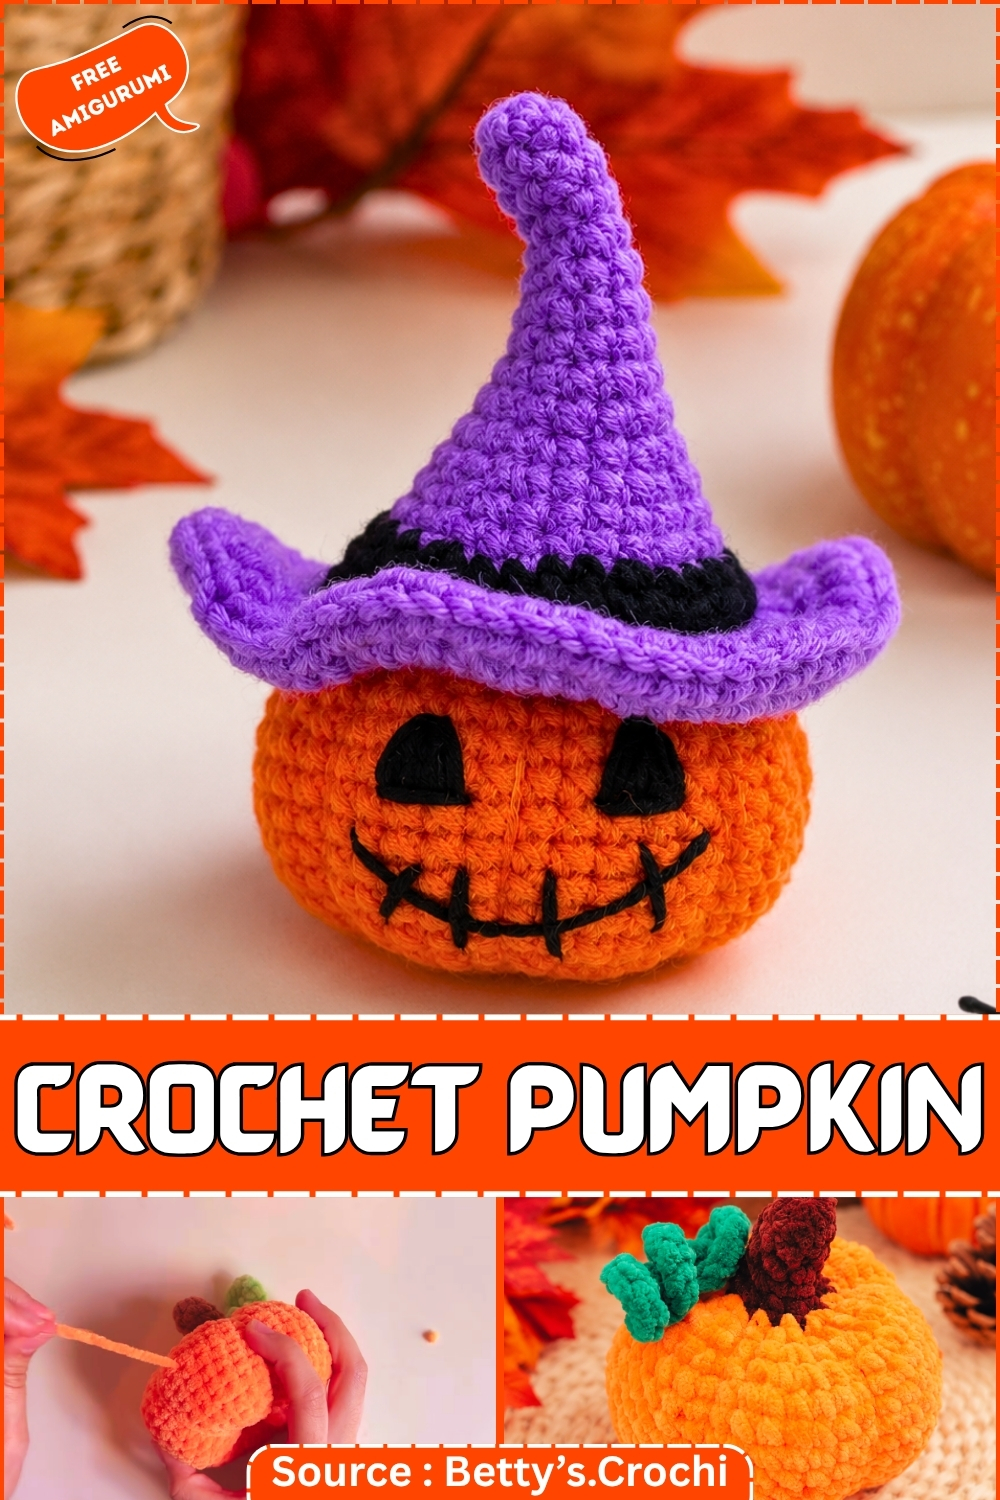
Jack-o-lantern amigurumi hit differently when the face is embroidered rather than appliquéd, and this halloween pumpkin amigurumi crochet pattern leans into that fully. The stitched triangle eyes and jagged smile give the finished piece that classic carved pumpkin look without any extra pieces to sew on separately.
Halloween Pumpkin Amigurumi
- One pumpkin — body, segmenting, and stem — runs about 1.5–2 hours. The segmenting step is fast but genuinely transforms the piece, so don’t skip it thinking you’ll do it later and then not do it. A batch of six sits around 9–12 hours total, less once the rhythm is in your hands.
- Starting from zero: this is a generous pattern for time. You can finish one pumpkin in a single evening with time to spare, and have six done comfortably with 3–4 days before Halloween.
What Makes This One Worth Making
- Most amigurumi pumpkins are orange spheres with a brown lump on top. This one earns its shelf space through the segmenting step — the technique of pulling yarn through the body from pole to pole to create the ribbed pumpkin silhouette. It’s not a difficult technique, but it’s the difference between a round orange ball and something that is immediately recognisable as a pumpkin from across a room. The effect is disproportionate to the effort, which is the best possible outcome in a craft project.
- The stem construction also deserves more credit than the pattern gives it. A chained stem worked in sc or slst back down its own length curls slightly and holds a natural curve — it reads as organic rather than constructed, which is the thing that makes or breaks a small decorative object at arm’s length.
Where Makers Usually Go Wrong on This One
- The segments. The ribbing yarn needs to be pulled firmly enough to actually indent the body — too loose and you get subtle lines that read as yarn tension variation, not pumpkin ribs. Pull until you see the surface compress visibly inward, then secure. Most people under-pull on the first pass and then can’t tighten it after the ends are woven in.
- Uneven rib spacing. Before pulling any segmenting yarn, divide the pumpkin visually into equal sections and mark each top-to-bottom line with a pin. Four ribs gives a rounder look; six gives a more realistic pumpkin proportion. Whatever you choose, mark all of them before pulling any of them — it’s impossible to add one later without it looking slightly off.
- The decrease rounds. The source transcript gives two decrease rounds without specifying starting stitch counts. See the
[CHECK]flags in the pattern — the body rounds build to 24 stitches, so the decrease rounds are written to match that, but verify your count at Round 10 before beginning. - Stuffing too late. The pumpkin needs to be firmly stuffed before the opening gets small. If you wait until the final round you’ll be pushing fiberfill through a 4-stitch hole with a pencil. Stuff generously after the even rounds, before the first decrease round.
- Stem placement. A stem sewn dead-centre on a perfectly level pumpkin looks artificial. Sew it very slightly off-true — a degree or two of tilt reads as natural. This is the detail that templates don’t produce and that people can’t quite articulate when they say one looks better than another.
Pieces List
- Pumpkin body × 1 (orange yarn)
- Segmenting yarn — worked post-construction, not a separate piece
- Stem × 1 (brown or green yarn)
Two crocheted pieces. The segmenting is a finishing technique, not a third element.
Materials
- Orange yarn for the body (any weight — hook size scales accordingly)
- Brown or green yarn for the stem (same weight as body yarn)
- Crochet hook sized for your yarn (2.0–3.5 mm for amigurumi weight)
- Polyester fiberfill
- Tapestry needle
- Scissors
- Needle pins (for marking segment lines before pulling ribs)
No safety eyes in this pattern. The base pumpkin has no face — see the Character Dial section for face options if you want to add one.
Abbreviations (US Terms)
MR — Magic Ring sc — Single Crochet inc — Increase (2 sc in same stitch) inv dec — Invisible Decrease (sc2tog through front loops) slst — Slip Stitch ch — Chain
The Pattern
Pumpkin Body
- Use orange yarn. Work in continuous rounds with a stitch marker.
- Rnd 1: 6 sc into MR. (6) Rnd 2: Inc in each st around. (12) Rnd 3: [1 sc, inc] × 6. (18) Rnd 4: [2 sc, inc] × 6. (24) Rnds 5–10: Sc in each st around. (24) — 6 rounds even.
→ Shape checkpoint: After Round 4, the circle should measure roughly 5–6 cm across and sit as a shallow dome — beginning to curve upward at the edges. If it’s ruffling, your tension is too loose; if it’s staying perfectly flat, tighten slightly. By Round 10, you should have a cylinder roughly 3–4 cm tall with a wide open top. This is where the pumpkin shape lives — the even rounds determine the final height-to-width ratio. If you want a taller, more slender pumpkin, add one or two extra even rounds here. For a shorter, rounder pumpkin, stop at Round 9.
- Stuff the body now, before the decrease rounds begin. Fill firmly — the rib-pulling step requires a well-packed body to hold the indentations. A loosely stuffed pumpkin will take the segments but won’t hold them under any handling.
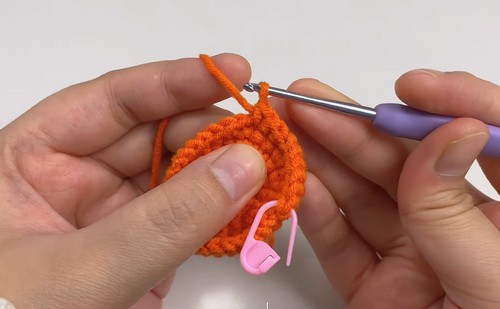
- Rnd 11: [2 sc, inv dec] × 6. (18) Rnd 12: [1 sc, inv dec] × 6. (12)
- Add a final pinch of stuffing if there are any soft spots at the top.
- Rnd 13: Inv dec × 6. (6)
[CHECK — the source transcript does not confirm Round 10 stitch count explicitly. The pattern as extracted builds to 24 at Round 4 and holds through Round 10, making the decrease sequence above consistent. Verify your stitch count is 24 before working Round 11.]
- Fasten off, leaving a long tail. Thread through the front loops of the remaining 6 stitches, pull closed, pass the needle into the body and out the side to hide the end.
→ Shape checkpoint: Finished body should be a firm, even sphere — wider than it is tall, which is the pumpkin proportion. Press gently on all sides; no soft spots. The bottom (magic ring side) is the base the pumpkin sits on and should be as flat as possible — if it’s doming downward, the body may have been over-stuffed. A small, firm pinch through the base to re-distribute filling usually corrects it.
If you’re still learning how to read crochet patterns, no stress! Follow the video tutorial below and use the written pattern below as you get more comfortable!
Segmenting (Rib Technique)
- This is the step that makes the pumpkin.
- Cut a length of orange yarn approximately four times the circumference of the body — generous enough to make multiple passes without running out mid-rib.
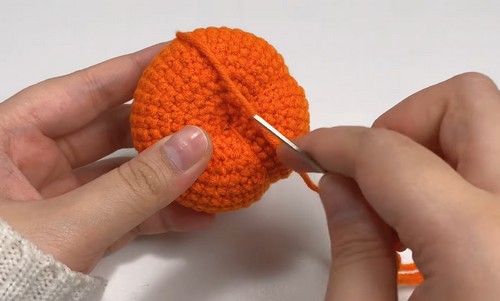
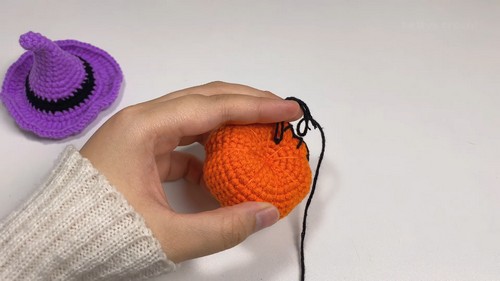
- Thread onto a tapestry needle. Insert the needle through the bottom centre of the body (the magic ring point) and push straight through to the top centre, pulling the yarn all the way through and leaving a short tail at the bottom to anchor later.
- Loop the yarn over the outside of the body, back down to the bottom centre, and insert the needle again — pulling firmly enough that the surface visibly indents where the yarn crosses. This is one rib.
- Before pulling any ribs, mark the body with pins at evenly spaced intervals around the circumference — 4 pins for 4 ribs, 6 pins for 6 ribs. Work each rib in sequence at its marked position. Four ribs gives a rounder, slightly cartoonish pumpkin; six ribs gives a more realistic proportion with narrower segments.
- Pull each rib firmly. If you can’t see an indentation, pull harder. Secure the yarn ends at the bottom, thread them into the body, and trim.
→ Shape checkpoint: After all ribs are pulled, the pumpkin should read immediately as a pumpkin — the segments should be clearly separated and the body should have a visibly faceted silhouette rather than a smooth sphere. Step back and look from arm’s length. If it still looks like an orange ball, the ribs need to be pulled tighter or there aren’t enough of them.
Stem
Use brown or green yarn.
- Leave a starting tail of about 10 cm. Ch 5–7 (adjust based on how tall you want the stem — 5 chains for a short stubby stem, 7 for a taller one).
- Working back down the chain from the hook: slst or sc in each ch back to the base. (The choice between slst and sc affects texture — slst gives a tighter, more compact stem; sc gives a slightly thicker one. Either works.)
- Fasten off, leaving a long tail for sewing. The stem will curl slightly on its own as the chain tension relaxes. Don’t try to straighten it.
→ Shape checkpoint: The stem should hold a gentle natural curve without being limp. If it’s flopping completely, the chain was too loose — redo with tighter tension or use slst instead of sc on the return pass.
Assembly
- Sew the stem to the top centre of the pumpkin body — where the rib yarns converge. The convergence point covers the small gap from closing, so the stem placement naturally hides the finish.
- Tilt the stem slightly before sewing. A perfectly vertical stem looks machine-made. A few degrees of lean reads as a real pumpkin. Pin it at the angle you want, look at it from the front, then sew.
- Use the long tail to work several passes through the stem base and into the pumpkin body. The stem takes more handling than any other part of the finished piece and needs secure attachment.
- Weave in all remaining ends.
Safety Eyes and Face Options
The base pattern has no face. For a plain decorative pumpkin, no eyes are needed.
- If you want to add a face: embroider features with black or dark brown yarn after the body is complete and the ribs are pulled. Stitched features are preferable to safety eyes here because the rib tension distorts the body surface slightly, making it harder to position a safety eye flat. A simple triangle for the nose, two small squared-off eye shapes, and a jagged smile in chain stitch are the classic carved pumpkin read. Work them between Rounds 6 and 9, roughly centred on one segment face.
- Safety eyes as an alternative: if you prefer safety eyes, attach them before Round 11, while the opening is still wide enough to press the washer on from inside. Position them on the same segment — the ribs will frame the face naturally if the eyes land within one segment rather than straddling a rib line.
- For anything going to a child under three, into a treat bag, or into a classroom: embroider all features. Safety eyes are not appropriate in those contexts.
The Character Dial
- Toward classic Halloween: keep the orange body, add a carved jack-o’-lantern face embroidered in black — jagged triangles for eyes and nose, a wide uneven smile. Work the ribs in darker orange thread rather than matching yarn so they show as a subtle shadow rather than a hard line. A brown stem. This version wants to be on a porch shelf.
- Toward elevated décor: swap the bright orange for a deep burnt sienna or terracotta yarn. Skip the face entirely. Pull the ribs in the same yarn so they blend rather than contrast. Use a green stem. This version sits on a mantel in November as naturally as it does in October — it reads as harvest rather than Halloween, which gives it more shelf life and more display flexibility.
- Toward sweet: pale cream or soft yellow yarn, no face, a green curled stem, light pink blush dabbed on the roundest part of each segment. The kind of pumpkin that belongs next to a tiny ghost and a bowl of candy corn on a child’s bedroom shelf.
- The face is where this pattern divides. A faceless pumpkin is a décor object. A faced pumpkin is a toy. Decide which one you’re making before you start, because the choice affects yarn colour, stem colour, and whether you add safety eyes — and it’s easier to decide it up front than to add a face to a finished piece and wish you’d planned for it.
Colourways
- Classic Patch — bright orange body, dark brown stem, black embroidered face. The standard. Works in any Halloween display.
- Harvest Gold — deep golden yellow body, green stem, no face. Pairs with rust and cream for a non-Halloween autumn display that lasts through November.
- Ghost White — cream or off-white body, pale green or ivory stem, light grey ribs, no face or two tiny grey embroidered dots for eyes. A white pumpkin. Sits in a bowl with other neutral decorations and confuses people until they pick it up.
- Midnight — very deep plum or aubergine body, black stem, no face or two small pale yellow eyes embroidered. Unexpected and genuinely striking on a dark shelf. Photographs almost better than orange.
Display Ideas
The segmented silhouette means this pumpkin reads clearly at a distance, which most amigurumi don’t. A group of three in different sizes (achieved by adjusting even rounds and hook size) on a mantel is a complete display without anything else around them. A single pumpkin in a small terracotta pot, stem up, sitting among other small plants or succulents, disappears into the arrangement in the best way — it takes people a second to notice it’s crocheted. In a bowl of real autumn gourds and mini pumpkins, the yarn version holds its own visually because the ribbing mimics the real thing closely enough. On a tiered tray, it belongs on the middle or lower tier where the round shape has something flat to sit against.

After the Season
Cotton and acrylic both store well, but the rib yarns can loosen slightly if the pumpkin is compressed under other decorations for months. Store it somewhere it won’t be sat on — a small box or a divided storage container is ideal. If a rib loosens after storage, re-thread a tapestry needle with matching yarn, follow the original line, pull taut, and re-secure at the base. It takes two minutes. The stem will hold its curl indefinitely once set.
Quick Answers
- How many ribs should I pull? Four reads as a rounder, more stylised pumpkin. Six reads closer to a real one. Both look good — it comes down to whether you want something that reads as Halloween decoration or something that reads as a miniature pumpkin. Four is faster. Six is more satisfying.
- Can I use a different yarn weight to make it bigger or smaller? Yes, and you don’t need to change any stitch counts. Heavier yarn with a larger hook gives you a bigger pumpkin; lighter yarn with a smaller hook gives you a smaller one. The proportions stay the same. A chunky version in a 5.0 mm hook and bulky yarn makes a pumpkin about the size of an actual small decorative gourd.
- The ribs won’t stay indented after I pull them. What’s wrong? Almost always under-stuffing. The rib yarn needs a firm interior to press against — a loosely stuffed body will compress when the rib is pulled but spring back when tension is released. Re-stuff through the stem attachment point before it’s sewn closed, or accept shallower ribs and pull harder on subsequent passes.
- My stem is completely straight and stiff. How do I get the curl? Work the return pass (sc or slst back down the chain) with looser tension than the chain itself. The differential tension between the chain and the return pass is what creates the curl. If yours came out straight, the return pass was too tight — redo with the hook one size up for the return pass only.