Crochet Brillo Amigurumi Pattern Free
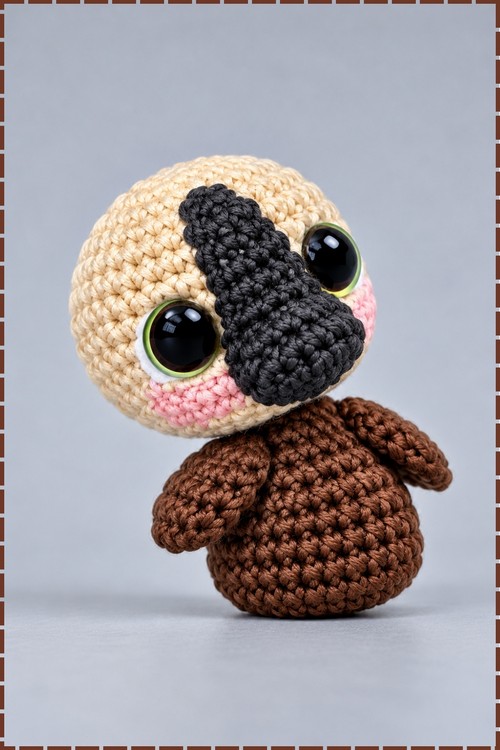
Neck shaping happens partway through a round in the crochet Brillo amigurumi, because head and body work as one continuous piece in 4 ply cotton. Folded wings sit on each side, and the whole bird takes around four to five hours on a 2.0 mm hook.
Shaping the beak is where the crochet brillo amigurumi holds your attention, since everything else waits on getting that angle right. The head goes quickly after. Wings and feet are small enough to finish in gaps. Sewing the brillo together is more placement than stitching, and it clicks once the beak sits.
Crochet Brillo Amigurumi

Head and body work as one continuous piece in this crochet Brillo amigurumi, which means the neck shaping happens mid-round rather than through a join seam. White and hazelnut brown swap back and forth across the head in the first eight rounds to build the facial patch, then white takes over completely for the lower face. Brown covers the body from round 16 downward. A folded flat wing on each side, a yellow beak with a small feather detail, and a tail built from the front loops left on round 22 all attach without a single major sewn seam. Green embroidered accents ring each safety eye.
Quick Facts
- Difficulty: intermediate
- Time: around four to five hours in my experience
- Hook: 2.0 mm
- Yarn weight: 4 ply cotton
- Safety eyes: 10 mm
Customization Ideas
- Swap the green eye accent embroidery for a gold or teal thread for a slightly different look.
- Add a thin white yarn loop tail at the back instead of the treble crochet version for a simpler finish.
- Scale up to 3.0 mm with DK weight for a larger Brillo that sits on a shelf rather than fitting in the palm.
- Skip the pink blush cheeks for a cleaner graphic look.
- Embroider a subtle darker patch over the facial brown section to deepen the contrast.
Materials and Tools
- 4 ply cotton yarn in cream or white for the head, lower face and wings
- 4 ply cotton yarn in dark hazelnut brown for the facial patch and body
- 4 ply cotton yarn in yellow for the beak
- 4 ply cotton yarn or embroidery thread in green for the eye accents
- 2.0 mm crochet hook
- Two 10 mm safety eyes
- Polyester fiberfill stuffing
- Tapestry needle
- Stitch marker
- Pins
- Pink blush or makeup for cheek colour, optional
Abbreviations
- MR means magic ring
- sc means single crochet
- inc means increase, 2 sc in the same stitch
- dec means decrease, invisible decrease recommended
- hdc means half double crochet
- dc means double crochet
- tr means treble crochet
- sl st means slip stitch
- ch means chain
- FLO means front loops only
- BLO means back loops only
- st or sts means stitch or stitches
The Pattern
Head and Body, One Continuous Piece
Head Colour note: change colours by pulling the new colour through on the last yarn over of the previous stitch. Do not cut the white yarn during rounds 3 to 8; carry it along the inside.
- Round 1: with white, work 8 sc into a MR [8 sts]
- Round 2: 8 inc, switching to hazelnut brown on the last stitch of this round without cutting the white [16 sts]
- Round 3: [1 sc, 1 inc] x 3 in brown, switch to white and work 1 sc, 1 inc, 1 sc, switch to brown and work 1 inc, [1 sc, 1 inc] x 3 in brown [24 sts]. The white section is a narrow vertical stripe and the brown covers most of the round at this point.
- Round 4: in brown work [3 sc, 1 inc] x 2, then 1 sc; switch to white and work 2 sc, 1 inc, 1 sc; switch to brown and work 2 sc, 1 inc, [3 sc, 1 inc] x 2 [30 sts]
- Rounds 5 to 8: repeat the colour sequence of 12 sc in brown, switch to white and work 4 sc, switch to brown and work 14 sc [30 sts per round]. These four straight rounds build the depth of the facial patch that defines the character. The white strip should sit centred on the front of the face across all four rounds.
- Round 9: cut the hazelnut yarn and join white. Work 30 sc in white only [30 sts]
- Rounds 10 to 12: 30 sc in white [30 sts per round]. Attach the safety eyes now between rounds 9 and 10, spaced 6 stitches apart. Then embroider a small green accent line around each eye using a tapestry needle and green yarn or thread.
- Round 13: [3 sc, 1 dec] x 6 [24 sts]
- Round 14: [1 sc, 1 dec] x 8 [16 sts]. Stuff the head firmly with fiberfill before the opening gets too small to reach inside.
- Round 15: 8 dec [8 sts]
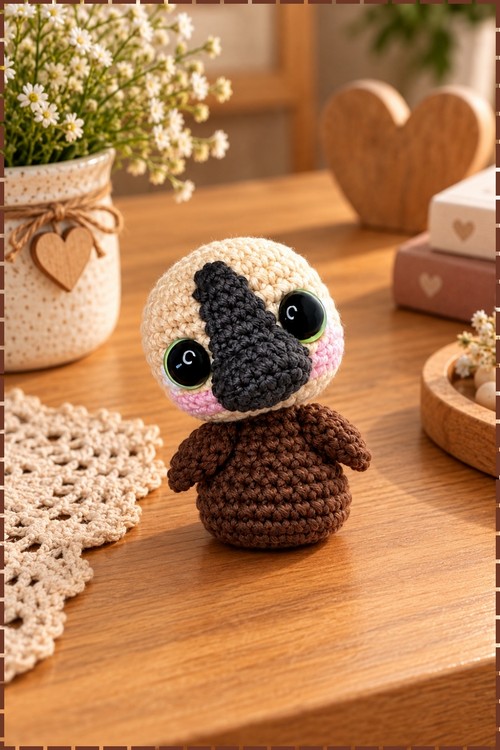
Body The body continues directly from the head in white.
- Round 16: in FLO only, work [1 sc, 1 inc] x 4 [12 sts]. Working in the front loops only here creates a visible ridge that marks the neck join and widens the piece smoothly into the body.
- Round 17: in full stitches, work [2 sc, 1 inc] x 4 [16 sts]
- Round 18: [3 sc, 1 inc] x 4 [20 sts]
- Round 19: 2 inc, 16 sc, 2 inc [24 sts]
- Round 20: [3 sc, 1 inc] x 6 [30 sts]
- Round 21: 30 sc around [30 sts]
- Round 22: 2 sc in BLO only, 26 sc through both loops, 2 sc in BLO only [30 sts]. The 4 BLO stitches leave their front loops exposed and these become the tail attachment points later, so mark them with a stitch marker as you pass them.
- Round 23: [3 sc, 1 dec] x 6 [24 sts]
- Round 24: [2 sc, 1 dec] x 6 [18 sts]. Stuff the body firmly now before the opening closes further.
- Round 25: [1 sc, 1 dec] x 6 [12 sts]. Fasten off leaving a yarn tail, thread it through the FLO of the remaining 12 stitches, pull tight to close, and weave the end in.
Tail
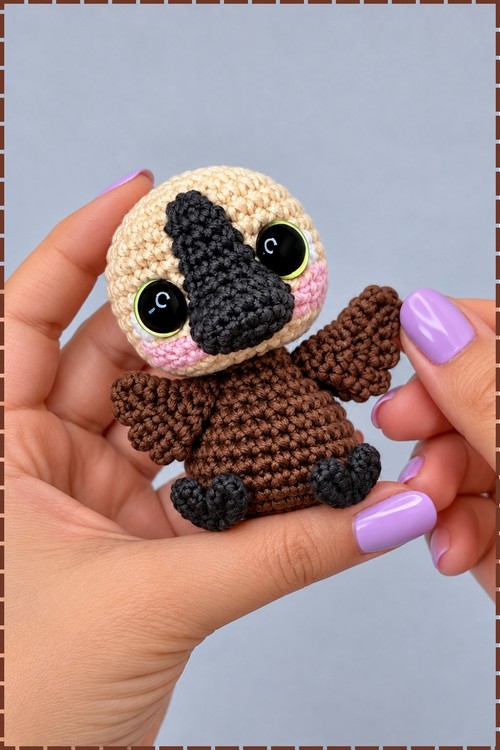
Worked into the 4 front loops left visible on round 22 of the body using white yarn.
- Loop 1: attach white yarn, ch 1, then work 1 sc into the same loop followed by 1 hdc into the same loop.
- Loop 2: work 1 dc into the loop followed by 1 tr into the same loop.
- Picot detail: ch 1, then sl st into the two front bars at the base of the chain.
- Loop 3: work 1 tr into the loop followed by 1 dc into the same loop.
- Loop 4: work 1 hdc into the loop followed by 1 sc into the same loop and then sl st in the same loop.
- Fasten off and weave in the ends. The tail fans out from the back of the body in a soft arc.
Beak
Worked in yellow throughout.
- Chain 4.
- Round 1: starting in the 2nd chain from the hook work 1 sc, 1 sc in the next chain, 4 sc in the last chain, then along the opposite side work 1 sc, 1 inc in the final chain [9 sts]
- Round 2: 1 inc in the first st, 8 sc around [10 sts]
- Round 3: 10 sc around [10 sts]. Sl st in the first stitch, ch 1, cut yarn.
- Upper beak feather detail: reattach yellow at the top centre of the beak. Ch 5, then starting in the 2nd chain from the hook work 4 sc back down the chain, then sl st into the next stitch on the main beak piece. Fasten off leaving a long tail for sewing. Position the beak on the face between and below the eyes and sew securely.
Wings, Make 2
Worked in white throughout.
- Round 1: 6 sc in a MR [6 sts]
- Round 2: 6 inc [12 sts]
- Round 3: [1 sc, 1 inc] x 6 [18 sts]. Fold the circle flat and work 9 sc across through both layers to seal the edge. Ch 1, fasten off leaving a long tail. Pin the wings on both sides of the body and sew into position.
Finishing
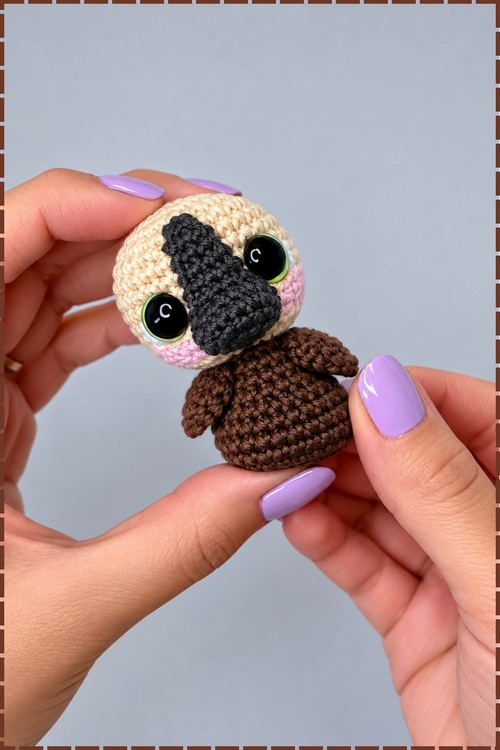
- Apply a small amount of pink blush on the cheeks below each eye using a brush or cotton swab for the subtle pink tint visible on my piece. This is optional but worth the fifteen seconds it takes.
Tips
- Mark the 4 BLO stitches in round 22 the moment you work them. Finding them again to attach the tail is much harder once the body is stuffed and closed.
- Keep the white yarn uncut during the colour change rounds of the head. Weaving in the ends of a carried yarn after the fact is faster and less visible than rejoining yarn for each short white section.
- Pin the wings at different heights before sewing either one, and step back to check the balance. Wings set too high make the body look narrow.
FAQ
Why does the facial patch look uneven after round 8? The colour change position drifts if the switch happens one stitch too early or late. Mark the switch stitch with a pin on the first colour change round and use it as your anchor for all the rounds that follow. Can I use a different shade for the body? Yes. My version uses dark brown to match the character, but any mid to dark neutral reads correctly from a distance. Lighter browns make the piece look softer and less graphic. Should I stuff the body through the neck before closing it at round 25? Yes. The neck opening from the FLO round 16 is the easiest access point. Top up the stuffing again at round 24 before the gap closes completely. Does the tail need to be exact? The tail sequence uses four specific loops and specific stitch heights per loop, so follow the order. The picot in the middle is what gives it its slightly raised midpoint shape.