Crochet Snow White Doll Free Pattern Amigurumi
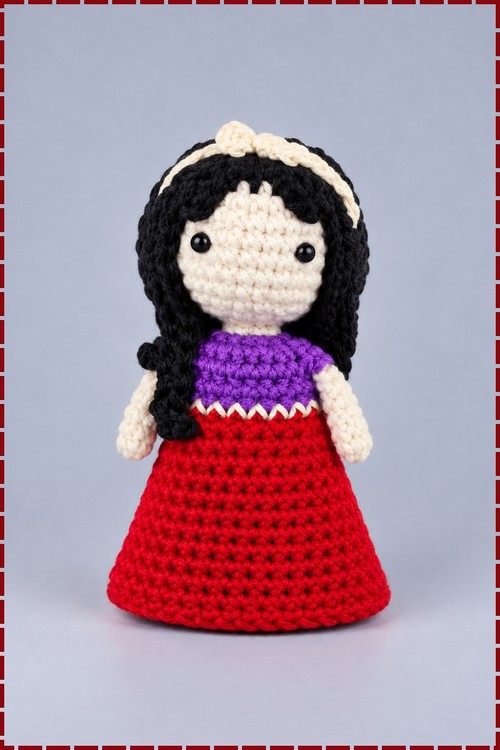
Black hair, red skirt, pink heart in both hands, the Crochet Snow White Doll needs no introduction on a shelf. Suits fairy tale fans and gift makers. Pieces are simple. Assembly does the heavy lifting. Make it once and the shaping makes sense for every princess doll after it.
Crochet Snow White Doll
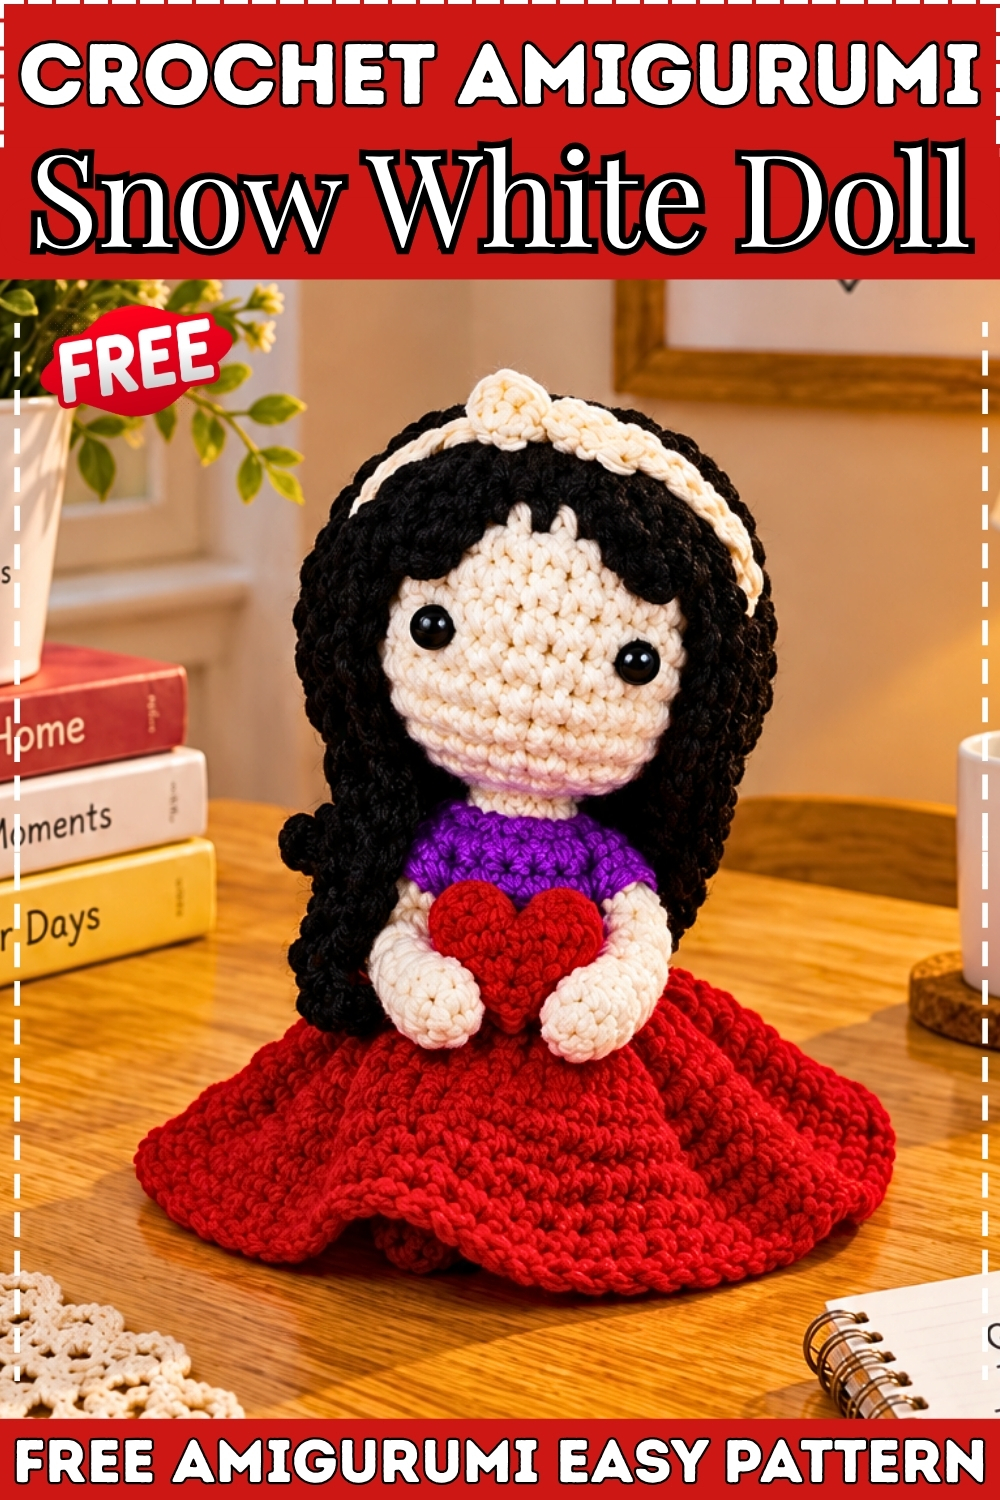
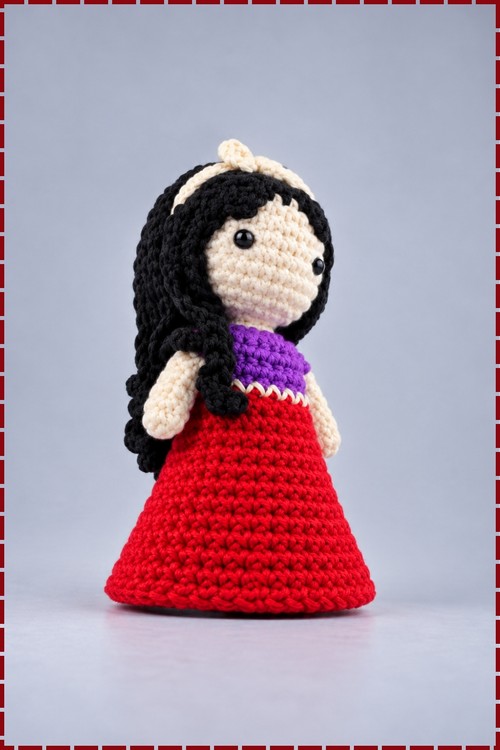
Five separate pieces make up this crochet Snow White doll: a skin tone head, a purple and red dress body, a black hair cap with long flowing strands, a small cream bow, and two arms sewn at the shoulders. The dress grows from a tight magic ring at the base and flares outward round by round, giving the skirt its stable standing cone shape. My version dresses her in a deep purple bodice and bright red skirt with a cream picot trim at the join, matching the classic Snow White palette. Long black hair falls past her waist on both sides.
Materials and Tools
- Worsted weight yarn in skin tone, deep purple, bright red, black and cream
- 3.5 mm crochet hook for the head, hair and arms
- 4.0 mm crochet hook for the dress
- Pair of black safety eyes
- Fiberfill toy stuffing
- Tapestry needle, stitch markers and scissors
The Pattern
Abbreviations
- MR means magic ring
- sc means single crochet
- inc means increase, which is 2 sc worked into the same stitch
- dec means decrease using the yarn-under invisible method
- ch means chain
- sl st means slip stitch
- BLO means back loops only
- FLO means front loops only
Head in Skin Tone Yarn, 3.5 mm Hook
- Round 1: make a MR, ch 1, then work 6 sc into the ring. [6 sts]
- Round 2: work 2 sc in each st around. [12 sts]
- Round 3: work (1 sc, 1 inc) around. [18 sts]
- Rounds 4 to 9: sc in each st around for six rounds. [18 sts] These straight rounds build the tall rounded head shape visible on my doll.
- Round 10: work 3 sc, then work 2 FLO decreases using the yarn-under technique. [24 sts] The FLO decreases sit at the lower front of the face and shape the chin.
- Rounds 11 and 12: sc in each st around. [12 sts]
- Insert the safety eyes below round 7 spaced 5 stitches apart, then stuff the head firmly with fiberfill before the opening closes further.
- Round 13: work (1 FLO decrease, 1 sc) around. [8 sts] Fasten off and leave a long tail for sewing.

Arms in Skin Tone Yarn, 3.5 mm Hook, Make Two
- Work a magic ring and increase outward for two rounds using the same pattern as the head until the arm tube is wide enough to stuff lightly.
- Work straight rounds in single crochet until each arm reaches a length that sits in proportion to the dress body when sewn on at the shoulder.
- Fasten off each arm leaving a long sewing tail, stuff lightly and leave the open end unsewn for attachment.
Dress Body in Purple then Red Yarn, 4.0 mm Hook
- Round 1: make a MR, ch 1, then work 8 sc into the ring. [8 sts] This tight base is what lets the finished doll stand flat on a surface without tipping.
- Round 2: inc in every st around. [16 sts]
- Round 3: work (1 sc, 1 inc) around. [24 sts]
- Round 4: sc in each st around. [24 sts]
- Round 5: working in BLO only, sc in each st around. [24 sts] The free front loops left behind this round are used to join the head later. Fasten off purple yarn and weave in the end.
- Round 6: join red yarn into any stitch, ch 1, then sc in each st around. [24 sts] Add a round of cream picot trim or a row of cream sc at this colour join if you want the white band visible on my doll between the bodice and skirt. Work the trim into the stitches at the join before continuing, using the general method of your choice.
- Round 7: sc in each st around. [24 sts]
- Round 8: work (2 sc, 1 inc) around. [32 sts] The skirt begins to flare visibly from this round.
- Rounds 9 to 17: sc in each st around for nine rounds. [32 sts] Fasten off and weave in the end neatly.
Bow in Cream Yarn, 3.5 mm Hook
- Form a slip knot and ch 6.
- Yarn over, insert the hook into the 2nd chain from hook, pull up a loop, yarn over and pull through 2 loops, then repeat in the same stitch to complete a cluster puff stitch.
- Ch 2, then work another cluster stitch into the same space.
- Ch 4, cut the yarn and fasten off. The finished bow sits small and flat at the top of the hairline on my doll.
Hair Cap in Black Yarn, 3.5 mm Hook
- Round 1: make a MR, ch 1, then work 6 sc into the ring. [6 sts]
- Round 2: inc in every st around. [12 sts]
- Round 3: work (1 sc, 1 inc) around. [18 sts]
- Round 4: sc in each st around. [18 sts]
- Bangs and short front strands: work 1 sc into the next base stitch, ch 4, then sc back down from the 2nd chain from hook through the next 2 chains for 3 sc, then sc into the next 3 base stitches.
- Ch 4, sc back down the chain, then sl st into the next base stitch. Repeat to build the bang fringe across the front hairline.
- Long side strands: ch 15, sc back from the 2nd chain from hook through the next 13 chains for 14 sc, then sl st into the base stitch. Repeat across the sides and back of the cap to build the long flowing hair strands visible on my doll, letting them fall to waist length or longer.
Assembly
- Align the 8 remaining inner bump loops on round 5 of the dress with the 8 sts at the base of the head and stitch the head securely into the dress opening through both sets of loops.
- Sew one arm to each side of the dress at shoulder height, with the open end of each arm tucked inside the join so only the stuffed tube shows.
- Place the hair cap over the head and sew it down around the hairline, letting the long strands fall freely to each side as they do on my doll.
- Sew or glue the cream bow to the top of the hairline centred between the two sides of the parting.
Tips
Stuff the dress body through the neck opening before sewing the head in, since it is impossible to add fiberfill once the head is stitched closed over the gap. Keep the long hair strands loose as you work them and do not pull the return sc rows tight, or the strands will kink instead of hanging straight. Pin the arms in place on both sides before sewing to check the height matches before committing.

FAQ
- Why does my doll lean forward instead of standing straight? The base of the dress needs to be stuffed firmly enough to act as a counterweight for the head. Add more fiberfill through the neck opening before attaching the head.
- Can I use a different colour for the dress? Yes. The round assignments stay the same regardless of colour. Any two contrasting yarns work in place of purple and red.
- How do I stop the hair strands from tangling? Work each strand individually and fasten off before starting the next one. Leaving the strands loose during construction and only arranging them after assembly keeps them from knotting around each other.