Bull Terrier Dog Crochet Plushie Pattern Free
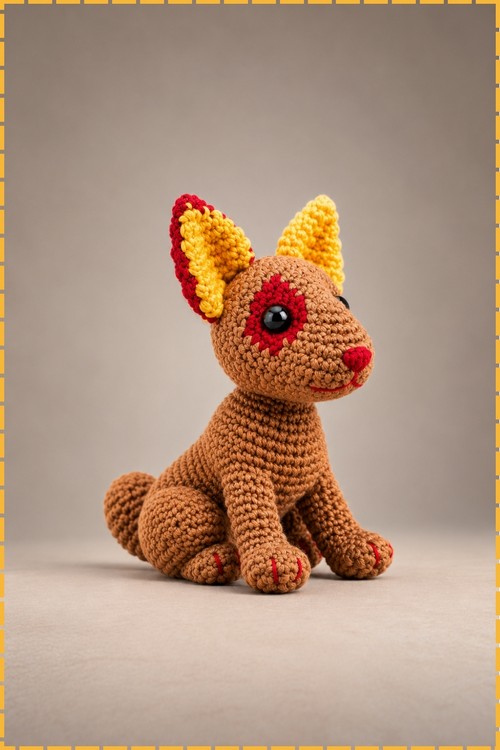
Joining the front legs straight into the hind legs sets the crochet bull terrier dog plushie in a sitting pose, and the head and body then continue as one piece. Tan brown yarn on a 2.0 mm hook covers most of him, with yellow inner ears inside red outer edges.
That red ring around one eye gives the crochet bull terrier dog plushie the look of something caught mid mischief. The upright posture says otherwise. Paws stitched in red like it stepped in something. Anyone building a shelf of characters with a bit of attitude will want this terrier sitting on it.
Crochet Bull Terrier Dog Plushie
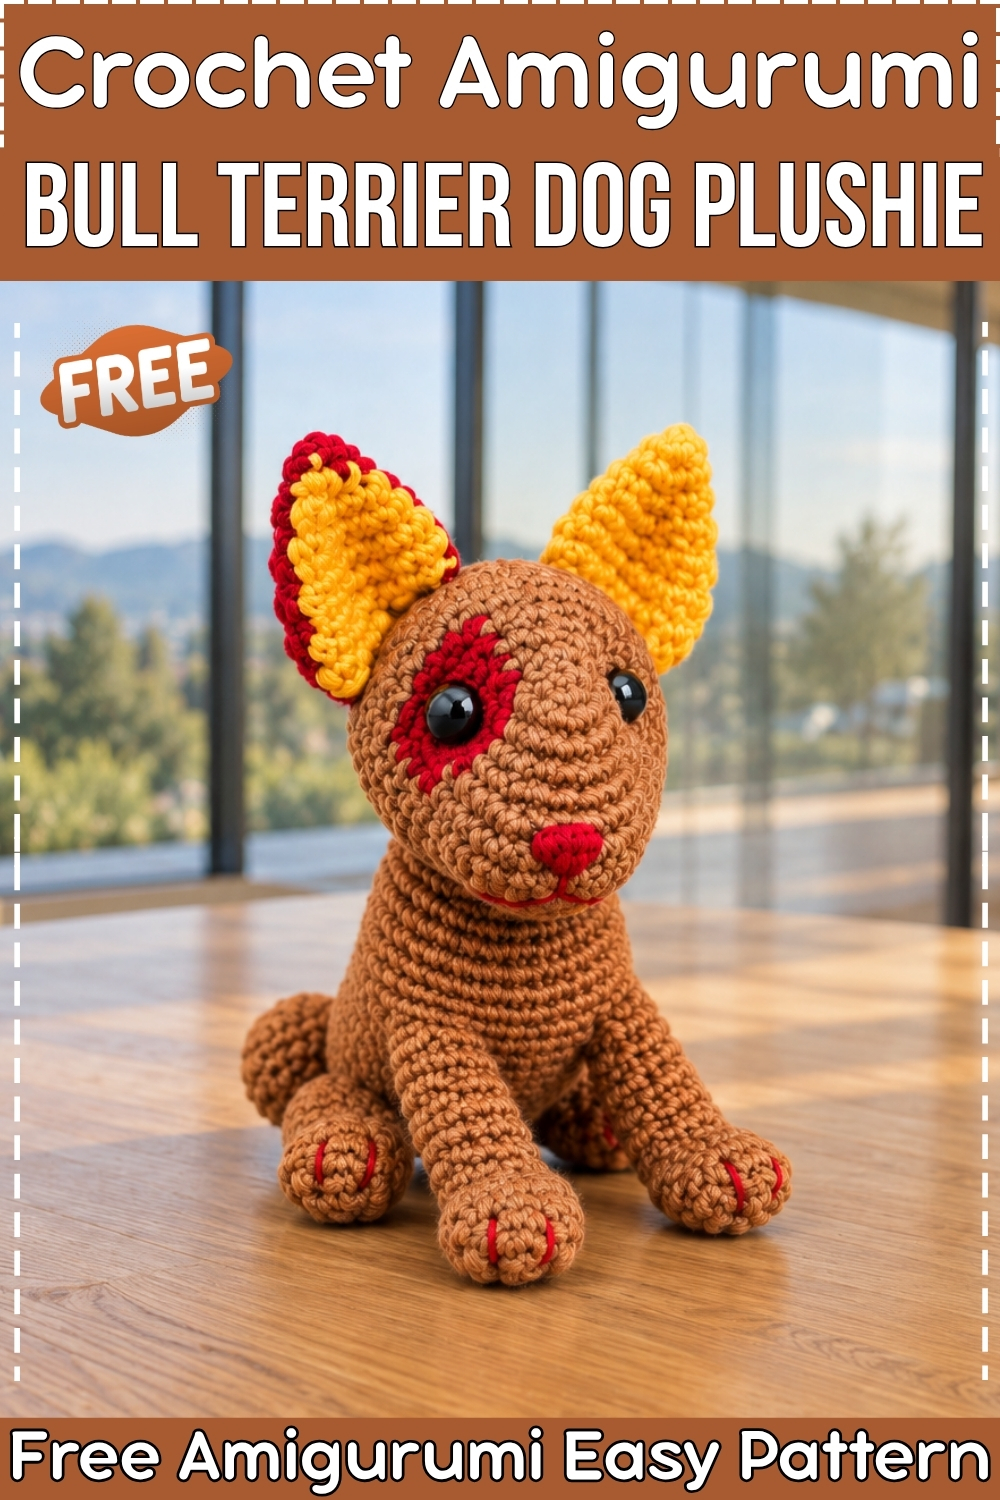
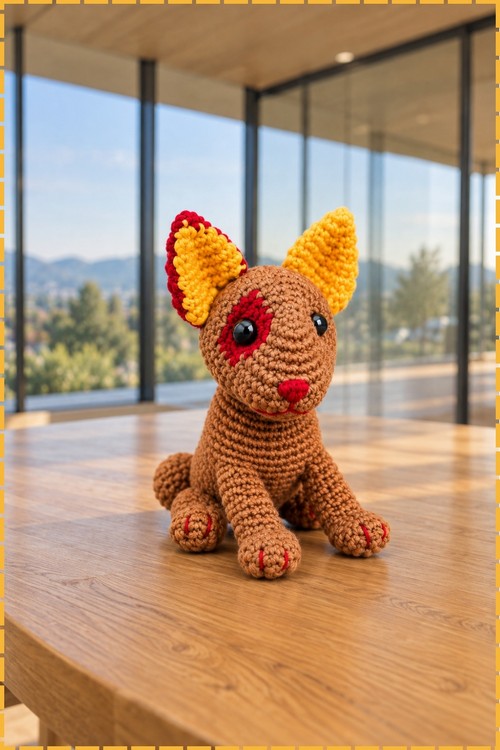
Building the front legs first and then joining them directly into the hind legs gives this crochet bull terrier dog plushie its sitting posture without a separate body assembly step. Head, muzzle and body all continue in one piece from the snout down through the torso, and the hind legs attach mid-body during the main rounds rather than being sewn on afterwards. Tan brown covers most of the body, red marks the eye patch and claw lines, and yellow fills the inner ear against a red outer ear. Black safety eyes and a small red embroidered nose finish the face.
Materials and Tools
- Sport or fingering weight yarn in tan brown for the body, roughly one skein
- Small amounts of red yarn for the eye patch, ear outer colour and claw detail
- Small amounts of yellow yarn for the inner ear
- Black yarn or embroidery floss for nose and facial detail
- 2.0 mm crochet hook
- Two 8 mm black safety eyes
- Polyester fiberfill stuffing
- Tapestry needle
- Stitch markers
Difficulty and Time
This is an intermediate to advanced build. The muzzle is worked from a foundation chain oval rather than a magic ring, the colour changes in the head rounds require attention, and the leg joining rounds need careful stitch placement. In my experience the full piece takes six to eight hours across a few sessions. Having the front legs finished and on hand before starting the head keeps the joining steps from stalling mid-round.
Beginner Technique Notes
- The muzzle begins as a foundation chain oval, not a magic ring. Chain the specified number, work stitches along one side down to the end, work corner stitches, then work back along the opposite side to close the oval. This is worth practising on scrap yarn if you have not done it before.
- Colour changes mid-round should happen on the last yarn over of the stitch before the new colour begins. Draw the new colour through that final loop so the change lands cleanly at the right stitch position.
- dec3 means single crochet three stitches together into one. Insert your hook through the next three stitches in sequence, draw a loop through each, then yarn over and pull through all four loops at once.
- FLO means front loop only. Work into the loop closest to you. BLO means back loop only. Work into the loop furthest away.
Abbreviations
- MR means magic ring
- ch means chain
- sc means single crochet
- hdc means half double crochet
- sl st means slip stitch
- inc means increase, 2 sc in the same stitch
- dec means decrease, sc 2 stitches together
- hdc inc means half double crochet increase, 2 hdc in the same stitch
- hdc dec means half double crochet decrease
- dec3 means 3 stitch decrease, sc 3 stitches together into 1
- FLO means front loop only
- BLO means back loop only
The Pattern
Front Legs, Make 2
Worked entirely in tan brown.
- R1: MR, 5 sc (5)
- R2: 5 inc (10)
- R3 to R4: 10 sc (10)
- R5: [3 sc, 1 dec] x 2 (8)
- R6: [2 sc, 1 dec] x 2 (6). Stuff slightly with fiberfill, then fasten off and leave a short tail. The leg should be a small rounded cylinder, pinched gently at the top.
Hind Legs and Thighs, Make 2
Worked in tan brown. The front leg joins into this piece partway through.
- R1: MR, 6 sc (6)
- R2: 6 inc (12)
- R3: [1 sc, 1 inc] x 6 (18)
- R4: [2 sc, 1 inc] x 6 (24)
- R5: [3 sc, 1 inc] x 6 (30). The piece should be a flat disc at this point.
- R6: [3 sc, 1 dec] x 6 (24)
- R7: 4 sc, [1 sc, 1 dec, 1 sc] x 4, 4 sc (20)
- R8: 6 sc, 4 dec, 6 sc (16). The leg is beginning to fold upward and take on the thigh shape.
- R9: 5 sc, 1 dec, attach Front Leg by working 3 sc through both the leg and the body simultaneously, 1 dec, 4 sc (14). Keep the front leg pointed downward and forward before locking it in place with that first stitch.
- R10: 3 sc, 1 dec, 1 sc, work 3 sc on the remaining loops of the Front Leg, 1 dec, 3 sc (12). Stuff lightly and shape flat, then fasten off.
Head and Main Body
Muzzle and Snout Colour changes between tan brown and red appear in rounds 3 and 4.
- R1: ch 6, starting in the 2nd ch from hook work 4 sc, then 3 sc in the last ch to turn the corner, then along the opposite side work 3 sc, 1 inc (12)
- R2: 1 inc, 3 sc, 3 inc, 3 sc, 2 inc (18)
- R3: 1 sc, 1 inc, 4 sc in red yarn, 1 inc in tan brown, [1 sc, 1 inc] x 2, 3 sc, [1 sc, 1 inc] x 2 (24). The red section at this point forms the base of the eye patch region.
- R4: 2 sc, 1 inc, 5 sc in red yarn, 1 inc in tan brown, [2 sc, 1 inc] x 2, 3 sc, [2 sc, 1 inc] x 2 (30)
- R5: 4 sc in tan brown, 5 sc in red and mark the 4th red stitch for safety eye placement, 21 sc in tan brown (30). The red section now reads as a clear oval patch on the side of the muzzle, exactly where the eye will sit.
- R6 to R11: 18 sc, 6 hdc, 24 sc (48). The half double crochets sit at the bridge of the muzzle and give it the slight upward slope of a bull terrier snout.
- R12: 6 sc, [1 sc, 1 dec] x 11, 9 sc (37)
- R16: 8 sc, 1 dec3, 14 sc (23). Insert the safety eyes now at round 5 on the marked stitch positions, pressing the washers on from the inside until they click.
Body and Leg Joining
- R27: 6 sc, ch 5, skip 5 sts, 7 sc, ch 5, skip 5 sts, 13 sc (36). The two chain arches create the armhole openings where the front legs sit against the body.
- R28: 6 sc, 5 sc across the chain, 7 sc, 5 sc across the chain, 13 sc (36)
- R37: Join Hind Leg 1 by working 5 sc through both leg and body simultaneously, 8 sc across the belly, then join Hind Leg 2 by working 5 sc through both leg and body, 4 sc (36). Pin both hind legs in place before beginning this round so they sit symmetrically.
- R38: 7 sc around the remaining stitches of Hind Leg 1, 8 sc, 7 sc around the remaining stitches of Hind Leg 2, 4 sc (36)
- R39 to R40: 36 sc (36). Stuff the body firmly and weave the bottom edges closed using a needle.
Ears, Make 2
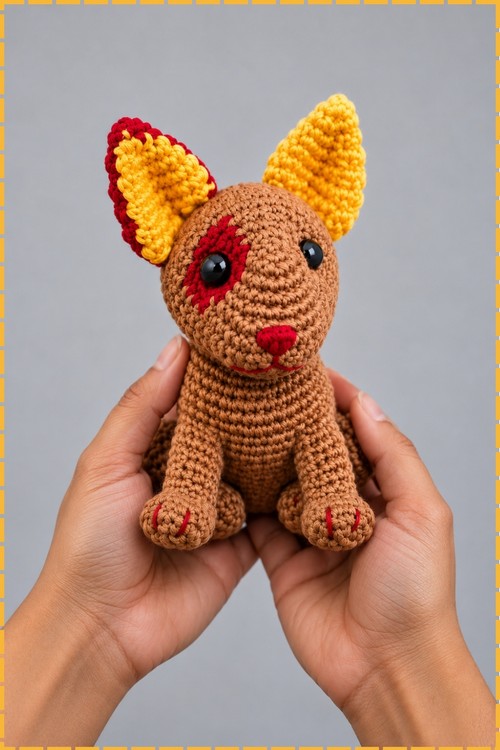
Worked with colour changes between tan brown, red and yellow. My version uses red for the outer section and yellow for the inner section.
- R1: ch 2, starting in the 2nd ch from hook work 1 sc, 1 inc (3)
- R2: 3 sc (3)
- R3: 4 sc in yellow, 3 sc in red, 1 sc in yellow (8). The colour split at this point sets up the two tone inner and outer ear visible on my piece.
- R4: 1 hdc, 1 hdc inc, 1 sc, 1 inc in yellow, 2 sc, 1 inc in red, 1 hdc, 1 hdc inc in yellow (12)
- R5: 2 hdc, 1 hdc inc, 2 sc, 1 inc in yellow, 2 sc, 1 inc in red, 2 hdc, 1 hdc inc in yellow (16)
- R8: [3 hdc, 1 hdc dec] x 3 (12). Fold the base flat and sew onto the top of the head with the yellow section facing forward and the red facing outward, matching the ear placement in my photo.
Assembly and Details
- Embroider the nose as a small red oval across the tip of the muzzle, matching the red nose visible on my piece rather than a black nose.
- Add facial contours and the red eye patch outline around the eye region using a tapestry needle and red yarn, building the patch edge with short stitches that follow the curve of the eye.
- Embroider short red claw lines across the top of each paw, as visible on my finished dog.
- Attach a tail at the rear centre by joining yarn, chaining until the cord reaches your preferred length, and slip stitching back down the chain.
Tips
- Complete both front legs before starting the head. Round 9 of the hind leg calls for the front leg to be ready and on hand, and stopping mid-build to make it breaks concentration at a technically demanding point.
- Mark the eye stitch at round 5 with a locking stitch marker the moment you pass it. The red patch rounds are quick and the marked stitch disappears fast into the fabric.
- Keep the muzzle foundation chain loose. A tight chain pulls the oval into a narrow lozenge rather than the wide egg shape the bull terrier snout needs.
- Shape the hind legs flat before fastening off, since they are much harder to flatten once the fiberfill has settled.
- Steam block the ears lightly after sewing them to the head if they curl forward. Velvet or plush yarn in particular needs a moment of heat to hold its position.
- Embroider the nose last, after the eyes are set, so you can judge the spacing between the two features on the actual finished face rather than working from the pattern placement alone.
Yarn Substitution
Any smooth sport or DK weight yarn works at this hook size. Cotton gives sharper stitch definition and holds the seated shape well under the weight of the stuffing. A cotton acrylic blend is easier on the hands over a long build and produces a nearly identical result. Avoid fluffy or textured yarn entirely, since the colour change patches at the eye and ears read as blurred smudges rather than clean shapes when the pile obscures the stitch line.

Customization Ideas
- Swap the red eye patch for a brown or black patch to make a more traditional bull terrier colouring.
- Leave the ear entirely in one colour for a simpler build.
- Add a small collar embroidered or tied around the neck in a contrast colour.
- Work the claw lines in brown instead of red for a subtler finish.
- Adjust the tail length by adding or removing chains until it sits at the angle you want.
FAQ
Why does the sitting pose matter for the leg joining order? The front legs join inside the hind leg rounds before the body begins, which means the seated angle is built into the structure rather than arranged after assembly. Getting that R9 join right decides whether the dog sits squarely or leans to one side permanently. How do I keep the red eye patch clean at the colour change? Change colour on the final yarn over of the stitch before the red begins, not on the first stitch of the red section. Changing one stitch too late leaves a tan loop at the edge of the patch that does not cover cleanly. My muzzle oval is too narrow. What went wrong? The chain was almost certainly worked too tightly. The corner stitches at each end of the foundation chain also need to be generous: three stitches at one end and two increases at the other. A missing corner stitch pinches the oval into a football shape. Can I use a larger hook and heavier yarn? Yes. Moving to a 3.5 mm hook with DK weight produces a noticeably larger dog, roughly one and a half times the size of mine. The stitch counts stay the same, but the finished piece will be looser and softer. Should I stuff the front legs before joining? Yes, lightly. Fully stuffed legs are rigid and resist the folding that happens in rounds 9 and 10 of the hind leg. A small amount of fiberfill, enough to give shape without firmness, is enough.