Crochet Amigurumi Burger Free Pattern
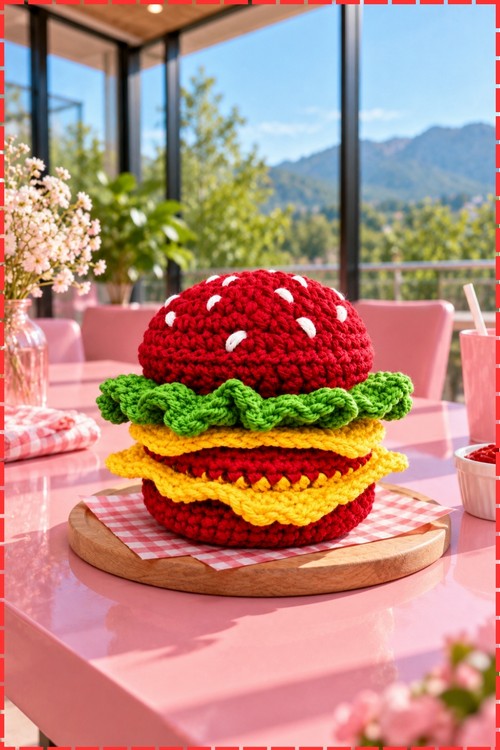
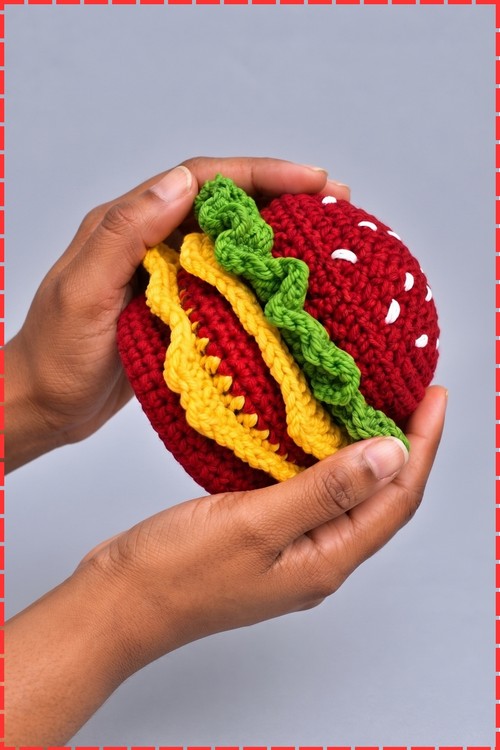
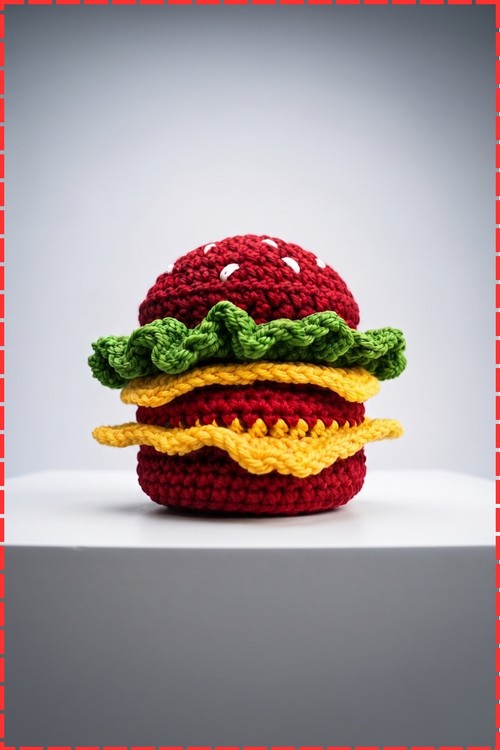
Slipped over a jar about two inches high, the crochet burger container cover hides glass or plastic behind crimson buns, green lettuce and golden cheese corners. Fourteen rounds turn a flat base into a wall at round seven, and white dots get embroidered on the dome last.
Sesame dots and two ruffled trims mean the Crochet Burger Container Cover splits neatly into a calm part and a fussy part. The dome flies by, almost meditative. Then the trims demand counting. Finishing this burger container cover feels like two different projects stitched onto each other.
Crochet Burger Container Cover
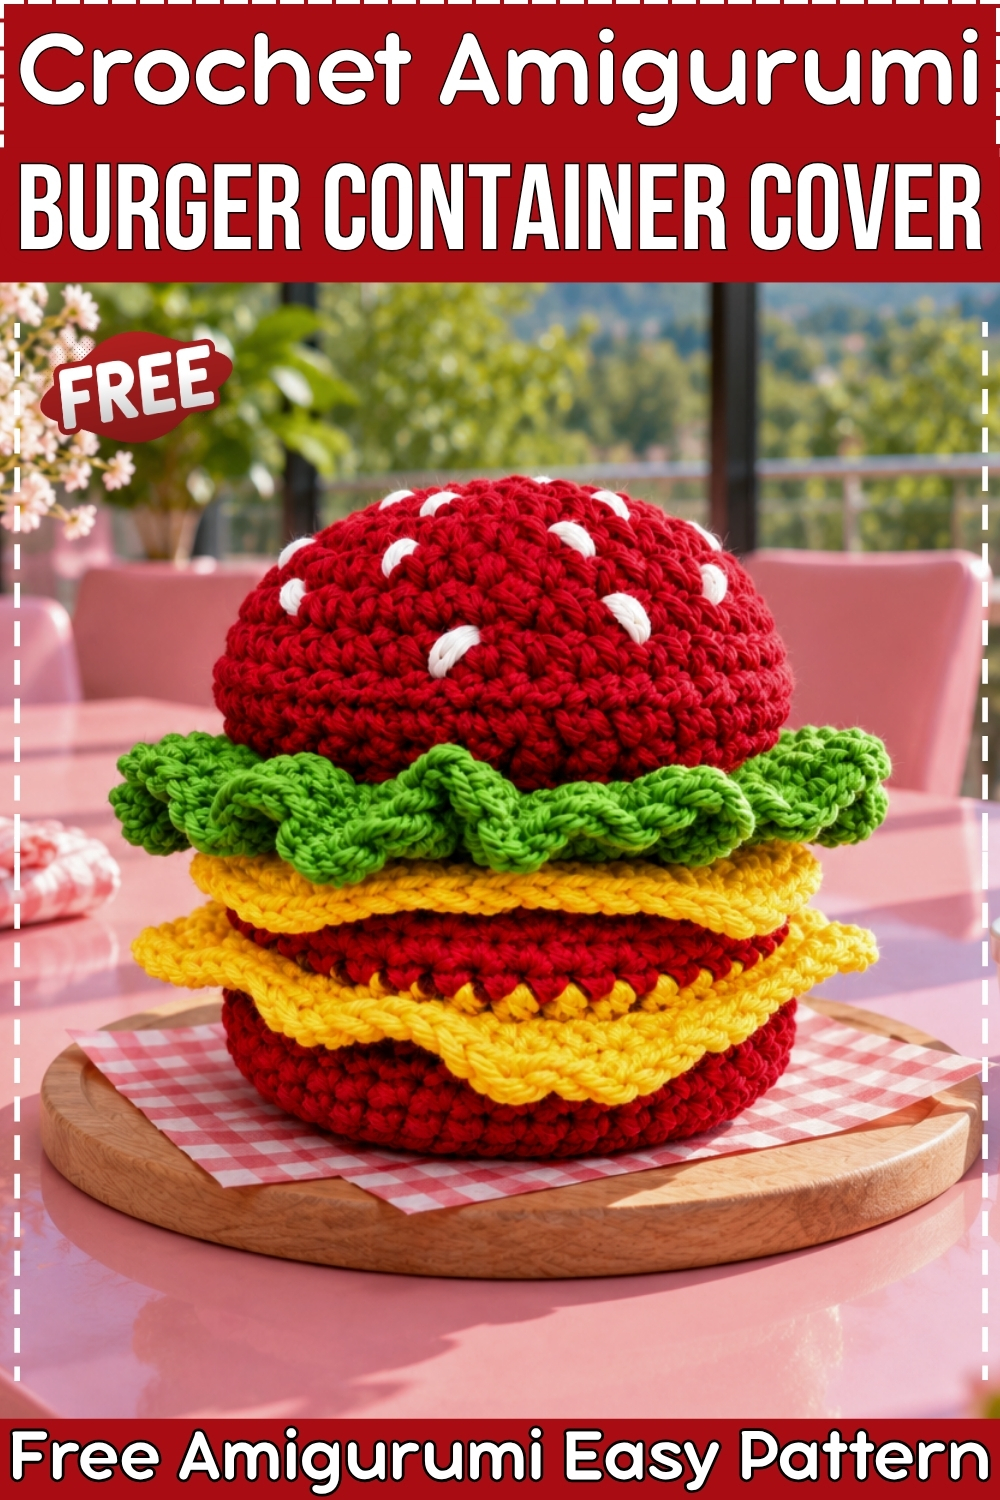
Fourteen rounds worked over a small glass or plastic jar build this crochet burger container cover from a flat circular base up through every filling layer. The back loop only ridge on round seven is the turn point that lifts the flat circle into a wall, and every filling layer after that uses the same front loop and back loop split to stack cleanly without any sewing between them. My version uses deep crimson for both buns, bright green lettuce, and golden yellow cheese, with white surface detail dots embroidered on the top dome. The whole piece fits over a jar roughly two inches high.
Quick Facts
- Difficulty: Intermediate. The FLO and BLO layer switching needs attention, but every individual stitch is beginner level.
- Time: Around two to three hours from my own experience, including all the colour changes and weaving in ends.
Customisation Ideas
Swap the deep crimson bun for any colour to change the whole mood: tan or light brown makes a realistic burger, navy and cream gives it a graphic art feel, and black with yellow reads like a novelty Halloween jar. The cheese corners always work best in a high contrast colour to the bun so they read clearly. Replacing the lettuce with a ruffle in a different colour, such as teal or lavender, turns the piece into a fantasy burger. Embroider the white dots in any colour or leave them off entirely for a cleaner look.
Materials and Tools
- Deep crimson or burgundy yarn for the bun base and bun top
- Deep crimson or burgundy yarn for the burger patty rounds (same colour as the bun in my version)
- Bright green yarn for the lettuce layer
- Golden yellow yarn for the cheese layer
- White yarn or thread for the embroidered surface dots
- Glass or plastic jar approximately 2 inches high with a 2-inch diameter base
- 3.0 mm or 2.5 mm crochet hook
- Stitch marker, yarn needle, and scissors
The original pattern uses orange or light brown for the bun and dark brown for the patty. My version uses deep crimson throughout the bun and patty rounds, which gives the burger a bolder, more dramatic look while the green and yellow layers still read clearly as the fillings. All stitch counts are identical.
THE PATTERN
Base and Bun Wall (Rounds 1 to 8, Deep Crimson)
- Round 1: Make a magic circle and work 6 single crochet (sc) into the ring, pull the tail to close tightly, slip stitch (sl st) into the first sc to join, then chain (ch) 1 [6 sts].
- Round 2: Work 2 sc in every stitch around (increase in each stitch), sl st to the first stitch, ch 1 [12 sts]. An increase means 2 sc in the same stitch.
- Round 3: Work (1 sc, 1 increase) 6 times around, sl st to the first stitch, ch 1 [18 sts].
- Round 4: Work (2 sc, 1 increase) 6 times around, sl st to the first stitch, ch 1 [24 sts].
- Round 5: Work (3 sc, 1 increase) 6 times around, sl st to the first stitch, ch 1 [30 sts].
- Round 6: Work (4 sc, 1 increase) 6 times around, sl st to the first stitch, ch 1 [36 sts]. After round 6 the base should lie completely flat and cover the bottom of your jar.
- Round 7: Work 1 sc in the back loop only (BLO) of every stitch around, sl st into the first stitch using both loops, ch 1 [36 sts]. This BLO round creates the ridge that turns the flat disc into the start of the jar wall. The unworked front loops left here will be used for the cheese corners in round 12.
- Round 8: Work 1 sc in both loops of every stitch around, sl st to the first stitch, ch 1, cut crimson yarn and fasten off [36 sts].
Burger Patty (Rounds 9 to 10, Deep Crimson)
- Round 9: Attach deep crimson yarn to the last stitch of round 8 and work 1 sc in every stitch around, sl st to the first stitch, ch 1 [36 sts]. In my version the patty is the same deep crimson as the bun, so the colour sits flush with the wall below it.
- Round 10: Work 1 sc in every stitch around, sl st, ch 1, cut yarn and fasten off [36 sts].
Cheese Base Layer (Round 11, Yellow, Back Loops Only)
- Round 11: Attach golden yellow yarn into the back loop only of every stitch of round 10 and work 1 sc in each, sl st to the first stitch, cut yarn and fasten off [36 sts]. Working in BLO here leaves the front loops free for the cheese corner round that follows.
Cheese Corners (Round 12, Yellow, Front Loops Only)
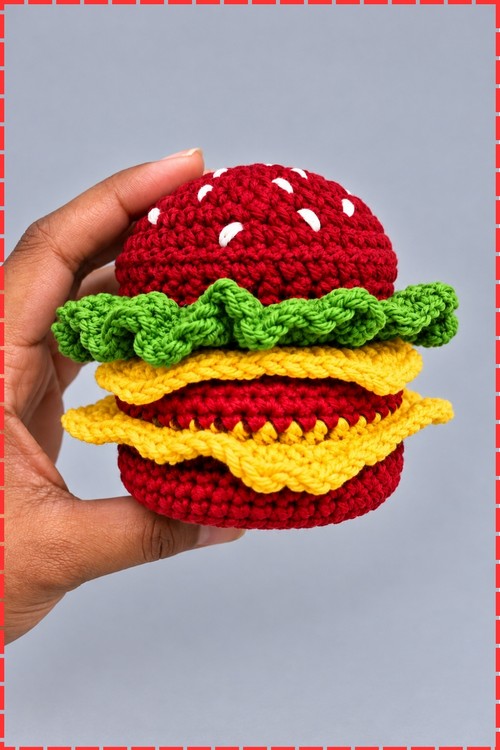
- Round 12: Join yellow yarn in the first front loop left free from round 11. Work the first corner as follows: ch 2 (counts as 1 double crochet (dc)), 1 dc in the same loop, ch 2, then 2 dc in the same loop. Work 1 half double crochet (hdc) in the next stitch, then 6 sc across the next 6 stitches, then 1 hdc in the next stitch. Work the second corner as (2 dc, ch 2, 2 dc) in the next stitch, then 1 hdc, 6 sc, 1 hdc. Repeat two more times to complete the third and fourth corners in the same way. Sl st into the top of the starting ch 2, cut yarn and fasten off. The four corners flare outward at the sides of the container and match the square cheese slice shape clearly in my photo.
Tomato and Lettuce Layer (Rounds 13 to 14, Bright Green)
- Round 13: Attach bright green yarn into the back loops behind the cheese layer, the loops left unworked from round 10. Work 1 sc in every stitch around, sl st to the first stitch, ch 1 [36 sts]. In my version this round is bright green rather than red, since my piece uses green for the lettuce layer instead of a tomato.
- Round 14: Work 1 sc in every stitch around, sl st to the first stitch, ch 1, cut yarn and weave in all loose ends [36 sts].
Surface Detail
- Using white yarn or thread and a yarn needle, embroider small round dots on the upper surface of the top dome if you are also making the upper bun to cap this piece. My photo shows white dots evenly spaced around the dome surface, which add a decorative detail visible from above.
Tips
- Sit the jar inside the base after round 6 to check the fit before working round 7. The BLO ridge locks the diameter in, so confirming the jar fits at that point saves unravelling the wall rounds later.
- Count to 36 stitches before every slip stitch join on rounds 7 through 14. A missed stitch in the wall rounds pulls the container slightly oval, which only becomes visible when the jar sits inside.
- Work the cheese corner round slowly and count each section before moving to the next corner. Four corners into 36 stitches means 9 stitches per corner section, and miscounting one section shifts all the others.
FAQ
Do I need a specific jar size? The pattern is built around a jar approximately 2 inches high with a 2-inch diameter base. Check the fit after round 6 before working the wall rounds, since different yarn weights and hook sizes change how many rounds are needed to reach the right height.
Why does round 7 use back loops only? That single BLO round creates the ridge visible around the base of the container, which looks like the bottom edge of a bun. More importantly, it also turns the flat base circle into a wall by changing the working angle of subsequent rounds.
Can I use cotton yarn? Yes, and cotton is actually a good choice for a jar cover since it holds its shape without stretching and washes easily. Go down to a 2.5 mm hook from 3.0 mm so the fabric stays dense enough to cover the jar cleanly.
What if my cheese corners do not lie flat? Cheese corners that curl upward usually mean the ch 2 at each corner was pulled too tight. Block the corners lightly by pressing under a damp cloth, or work the corner chains with a slightly looser tension on your next piece.