Crochet Christmas Lights Free Pattern
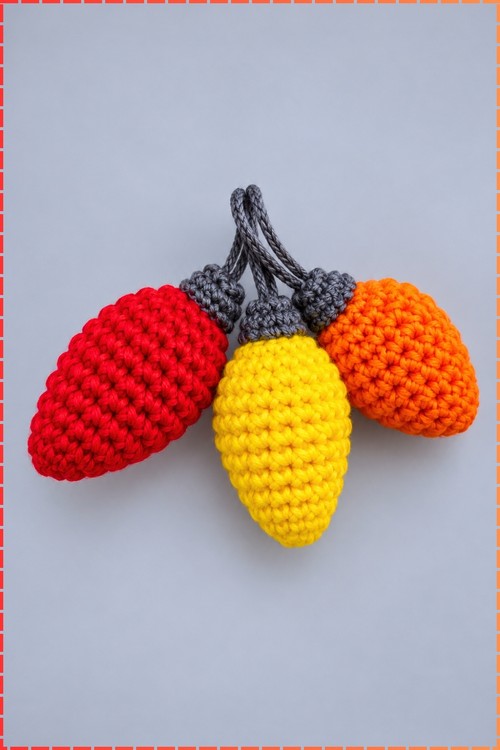
Red, yellow and orange teardrop bulbs with ridged grey caps make these crochet Christmas lights a quick stash project, since each bulb uses only a scrap of yarn. You work every light in one piece on a 3.0 mm hook, so no sewing is needed.
Three bulbs sit in one palm, and crochet Christmas lights hang from chain loops ready for the tree. Each one is worked in a single piece. Crochet Christmas lights suit anyone wanting garland that lasts past the season.
Crochet Christmas Lights

Teardrop bulbs in red, yellow and orange hang from grey caps, each one topped with a chain loop for hanging. The shape tapers to a rounded point at the bottom, exactly like the old fashioned bulbs on a string. Each light is one piece worked in the round, the bulb first, then the colour change to grey for the ridged cap, then the cord loop chained and joined at the top. Stuffing goes in before closing. No sewing of separate parts at all, which keeps the whole thing beginner friendly. Make one to learn the shaping, then repeat in every colour you have.
Materials
- Small amounts of cotton or light acrylic yarn in red, yellow and orange for the bulb bodies
- Grey yarn for the bases and the hanging cord
- Crochet hook in 3.0 mm
- Fiberfill stuffing
- Stitch marker
- Yarn needle and scissors
One bulb uses only a small scrap, so this is a stash project. The grey for the bases and cord needs a bit more length since all three bulbs share the same cord in my version.
The Pattern
Abbreviations
- st and sts mean stitch and stitches
- MR means magic ring
- sc means single crochet
- hdc means half double crochet
- inc means increase, two single crochet in the same stitch
- dec means decrease, single crochet two together
- BLO means back loop only
- US crochet terms throughout
- Work in continuous spiral rounds and move a stitch marker up each round

Bulb Body, One Bulb Colour Per Bulb
- Round 1: Start with a magic ring and work 5 sc into the ring, then pull tight to close [5 sts]
- Round 2: Work 2 sc into every stitch around, which is 5 increases [10 sts]
- Round 3: Work 1 sc in each stitch around [10 sts]
- Round 4: Repeat 1 sc then 1 inc five times around [15 sts]
- Round 5: Work 1 hdc in each stitch around [15 sts]. The taller half double crochet pushes the widest part of the bulb outward in a single round, which is faster than working two increase rounds
- Round 6: Repeat 2 sc then 1 inc five times around [20 sts]
- Rounds 7 to 11, five rounds: Work 1 sc in each stitch around [20 sts]
- Round 12: Repeat 2 sc then 1 dec five times around [15 sts]
- Round 13: Repeat 1 sc then 1 dec five times around [10 sts], and pause here to stuff the bulb firmly before the opening gets too small to reach inside
Grey Base
- Join grey yarn on the last stitch of Round 13 by pulling the new colour through on the final step
- Round 14: In back loop only, work 1 sc in each stitch around [10 sts]. Leaving the front loops free here creates the raised ridge that mimics the threaded collar of a real bulb, and it is the one detail that makes these read as light bulbs rather than just teardrops
- Round 15: Working through both loops, repeat 1 sc then 1 dec around, finishing with 1 sc [7 sts]
Closing And Cord
- Cut the yarn leaving a tail of about 20 to 25 cm
- Thread the tail onto a tapestry needle and weave through the front loops of the remaining stitches, then pull tightly to cinch the top fully closed
- Knot and secure the yarn at the top centre
- For the hanging cord, use grey yarn and chain until the cord reaches the length you want, then fold it back and slip stitch along the chain to make a doubled, firmer cord. On my version all three bulbs share one cord that branches into three separate drops, so each bulb gets its own shorter drop attached to a common trunk
- To hang multiple bulbs together, knot each bulb cord at the desired drop length and gather the cords at the top into a shared knot before trimming

Tips
- Keep your tension tight from Round 1. A loose magic ring on a small project like this leaves a visible hole that stuffing pushes through.
- Stuff before Round 14, not after. Once the grey base rounds begin the opening is too narrow to pack the tip evenly.
- Make all the bulbs first, then cut the cord to length. Laying them out on a flat surface and deciding on drop lengths before you knot saves unpicking.
Customisation
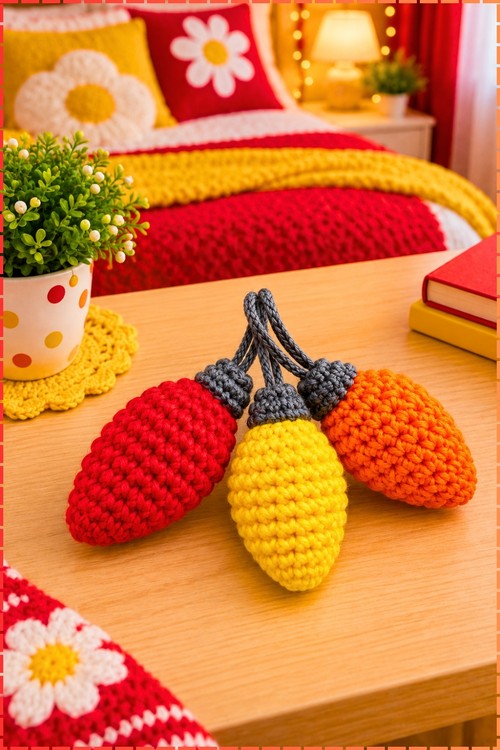
Make the full colour range of classic Christmas lights by adding blue, green and purple bulbs alongside the warm tones. A single bulb on a short cord becomes a gift tag, a package tie or a keychain. Inserting a small LED fairy light through the base opening before closing the top makes the bulb glow, though the stuffing needs to stay loose enough to let light through.
FAQ
How many bulbs should I make for a garland? Ten to fifteen reads well strung along a mantel or across a wall. Each bulb uses under 10 g of yarn, so a set of twelve sits well within a single ball of each colour.
Can I use a larger hook and chunkier yarn? Yes, and the shape holds. The finished bulb will be larger and the ridge on Round 14 will be more pronounced. Keep both the bulb and base yarn at the same weight.
Do I need to use a magic ring? No. Ch 4 and slip stitch into the first chain to form a ring instead. Pull the starting tail tight once Round 1 is complete to close any gap.