Crochet Christmas Ornaments Free Pattern
Yellow and grey bobble stripes wrap a stuffed ball in these crochet Christmas ornaments, and safety eyes, black feet and a stitched smile turn each one into a little amigurumi bee. Bulky yarn finishes a 10 cm ornament in under three hours.
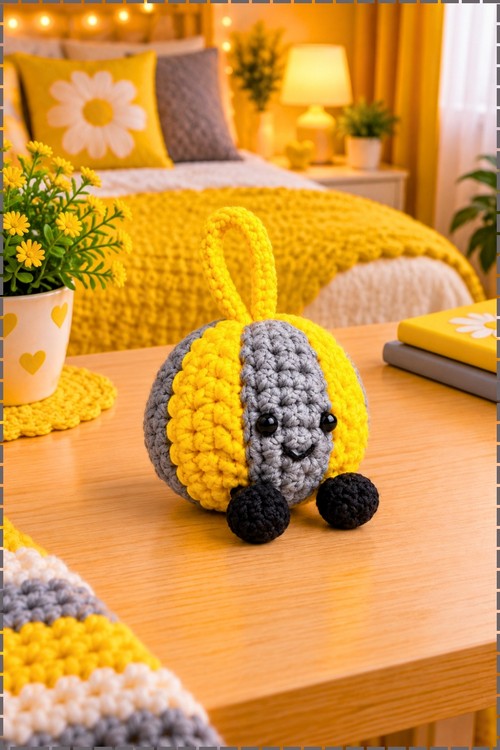
Hands stay busy in the best way with crochet Christmas ornaments like this bobble bee. The texture rounds are satisfying to work, each bump popping out under the hook. Stuffing and shaping the sphere feels quick. Crochet Christmas ornaments turn into the kind of project you finish one of, then immediately start another.
Crochet Christmas Ornaments

Bobble stripes in yellow run around a grey ball body, giving this bee ornament a ridged texture you can feel through the hand. Safety eyes and a stitched smile sit on the front, black legs hang below, and a worked loop at the top slips straight onto a branch. Parts are simple. One stuffed sphere, two small round legs, the loop, and the face details sewn on last. The bobble rounds are the only section needing attention since you carry both colours through them. Everything else is plain rounds, so a stack of ornaments builds up quickly once the first one is done.
Quick Facts
- Difficulty: easy, with one tricky moment at the side seam
- Time: around two and a half to three hours from my own build, including the feet and the face
- Finished size: roughly 10 cm across the ball, based on my tension with bulky yarn
- Skills used: back loop only work, colour changing, whip stitch seaming, simple embroidery
Materials And Tools
- Bulky or plush yarn in yellow and grey for the striped body
- Black yarn for the two feet, held doubled
- Yellow yarn for the hanging loop, held doubled
- Crochet hook in 6.0 mm for the body and the loop
- Crochet hook in 4.0 mm for the feet
- Two black safety eyes
- Black yarn for the embroidered smile
- Fiberfill stuffing or clean yarn scraps
- Scissors, yarn needle, stitch marker and pins for face placement
Colour notes for my version. The original uses white and red with brown feet and French knot eyes. Mine runs yellow and grey stripes with black feet and inserted safety eyes, which gives a sharper face. Every stitch count stays exactly as written.
Customization Ideas
Change the two stripe colours to anything you like, since the panel does not care which colours sit where. Green and cream reads as a traditional bauble, while grey and dusty pink works year round. French knot eyes in black yarn replace the safety eyes if the ornament is going to a small child. Swapping the crocheted hanging loop for a length of ribbon or baker’s twine is faster and suits a more rustic tree. Making three or four in graduated colours turns them into a matched set for a garland.
The Pattern
Abbreviations
- Ch means chain
- Sl st means slip stitch
- Sc means single crochet
- Hdc means half double crochet
- Dc means double crochet
- Tr means treble crochet
- BLO means back loop only
- Inc means increase, two single crochet in the same stitch
- Dec means decrease, two single crochet worked together
- US crochet terms throughout
Main Body Panel, First Colour
Use the 6.0 mm hook and yellow yarn for the first stripe in my version.
- Make a slip knot and Ch 15
- Row 1: Starting in the 2nd chain from the hook, Sc in the next 3 ch, Hdc in the next 8 ch, then Sc in the last 3 ch [14 sts]. The taller half double crochet block in the middle is what makes the panel bow outward and become a sphere later
- Row 2: Ch 1 and turn, then Sc 3, Hdc 8, Sc 3 working through both loops [14 sts]
- Row 3: Ch 1 and turn, then Sc 3, Hdc 8, Sc 3 [14 sts], and on the last single crochet do not finish the stitch in the old colour, pulling through with the new colour instead. Changing on the final pull through keeps the join invisible from the front
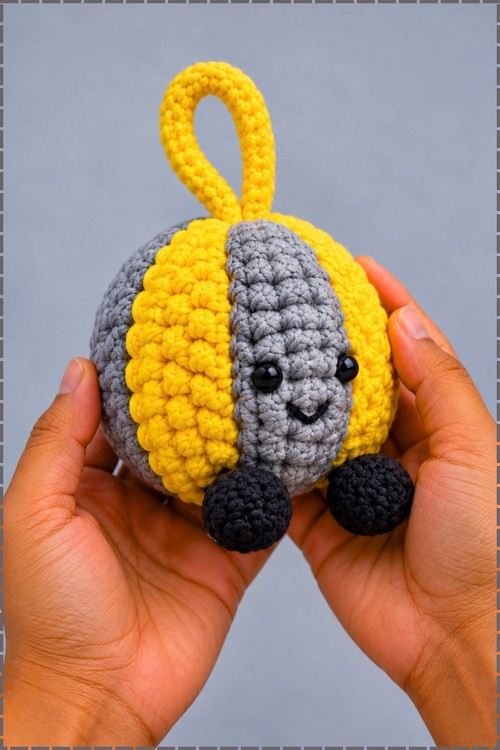
Striping Sequence, Repeat For Every Colour Change
- Cut the yarn tail of the colour you just finished
- Row 1: Ch 1 with the new colour and turn, then work Sl st across in back loops only for all 14 stitches [14 sts]. The slip stitch row in back loops only is what creates the clean ridge line between stripes, and skipping it leaves a blurred colour change
- Row 2: Ch 1 and turn, then work BLO Sc 3, BLO Hdc 8, BLO Sc 3 [14 sts]
- Row 3: Ch 1 and turn, then work Sc 3, Hdc 8, Sc 3 through both loops [14 sts]
- Row 4: Ch 1 and turn, then work Sc 3, Hdc 8, Sc 3 through both loops [14 sts], switching to the next colour on the final pull through of the last single crochet
- Repeat these four rows for each alternating stripe until the panel is long enough to wrap into a sphere, which measured around 27.5 cm by 11 cm in the original. Lay the strip around your fist as you go to judge when it will meet, since too short leaves an oval and too long leaves a saggy middle
- Leave a long yarn tail for assembly when you finish the final stripe
Assembly And Stuffing
- Thread the long tail onto your tapestry needle
- Fold the panel in half with right sides together and whip stitch the two side edges closed to form a tube. Line up the stripe ends before you sew or the colour bands will step out of alignment at the seam
- Weave the needle in and out around the stitches of the bottom opening, then pull tightly to gather the hole closed
- Secure the gather with a knot and weave the end inside
- Turn the work right side out so the seam sits inside
- Stuff firmly with fiberfill or yarn scraps, pushing stuffing into the sides so the ball stays round rather than flattening front to back
- Thread a new length of yarn around the top rim, cinch it tightly closed, knot securely and hide the tail inside the body
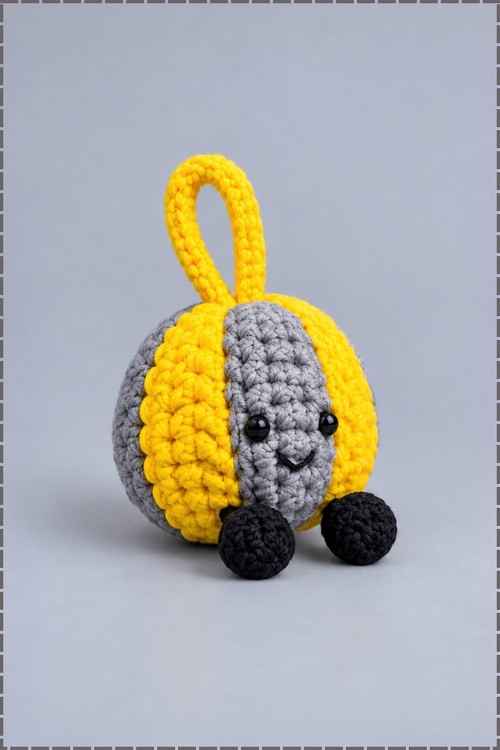
Feet, Make 2
Use the 4.0 mm hook and black yarn held doubled. The original works these in brown scrap yarn.
- Start with either a magic circle, or Ch 5 and sl st into the 1st chain to form a ring if you prefer to skip the magic ring
- Round 1: Into the ring work Sc 3, Hdc 1, Dc 1, Tr 2, Dc 1, Hdc 1 [9 sts], then Sl st into the first stitch and place a stitch marker. The rising and falling stitch heights shape the curve of the foot, so keep them in the order given
- Round 2: Sc 4, then Inc in the next 4 stitches for 8 single crochet, then Sc 1 into the slip stitch [13 sts]
- Round 3: Sl st in the next stitch and place a marker, then BLO Sc 3, then BLO Dec 5 times across [8 sts]. Working in back loops only here pulls the top of the foot inward and creates the rounded dome you see in my photo
- Round 4: Sl st in the next stitch and place a marker, then Sc 4, then work a front loop only Dec 2 times [6 sts], and stuff lightly at this point. A light stuff keeps the foot plump without making it hard, which matters since it has to sit flush against the body
- Flatten the opening and Sc 3 across through both sides to close the top of the foot
- Turn and Sc 3
- Turn, Sc 2, then Sl st 1
- Turn, skip the first stitch and Sc 2, which creates the angled edge that lets the foot sit flat against the ball
- Fasten off leaving a tail for sewing
Face And Finishing
- Position the two feet at the bottom of the ball, spaced slightly apart and angled outward, then sew them securely with the yarn needle. On mine they sit low on the front so the ornament looks like it is standing rather than hanging
- Mark the eye positions with pins on the front panel and check they are level before committing
- Insert the two black safety eyes at the marked points and secure the backings from inside before the stuffing settles. If you prefer French knots, insert the needle from behind, wrap the yarn around the needle 4 times, re insert near the same spot and pull through to form each knot
- Stitch a small curved line in black yarn below and between the eyes for the mouth, then anchor the middle of the curve downward with a tiny catch stitch so the smile holds its shape. Mine is a short wide smile rather than a deep one, which keeps the face calm
- For the hanging loop, use the 6.0 mm hook and yellow yarn held doubled, then Ch 15 to 20 or work a twisted cord until the loop reaches the length you want
- On my version the loop is worked as a long crocheted strip rather than a thin chain, which gives the thick standing arch in the photo, so keep working rows along your chain until the strap feels sturdy enough to hold its own shape
- Attach both ends of the loop to the top centre of the ornament, tie off securely and weave the ends inside

Tips And Troubleshooting
- Check the panel length against a round object before seaming. Once the side seam is sewn, adding a stripe means unpicking the whole edge.
- Cinch the bottom before you turn the work right side out, and the top after stuffing. Doing both at the end leaves you fighting a full ball with a needle.
- Sew the feet on before the face. If the ornament ends up leaning, you can shift the feet and then place the eyes to match the new front.
Yarn Substitution
Bulky plush yarn gives the soft rounded stitches in my photo and hides any uneven tension. A smooth worsted cotton also works and shows the stripe ridges more sharply, though you will need more rows to reach the same panel length and the ball will finish smaller. Keep both stripe colours in the same weight, since a mismatch makes one stripe stand proud of the other. For the feet, doubling a medium yarn is what gives them their density, so do not substitute a single strand.
FAQ
How many stripes should I make? As many as it takes for the panel to wrap into a ball. The original measures around 27.5 cm by 11 cm, and that is the target rather than a fixed stripe count, since yarn weight changes everything.
Can I make this without safety eyes? Yes. French knots worked in black yarn sit in exactly the same positions and are the safer choice for a child or a pet friendly home.
Why is my ornament oval instead of round? Usually the panel is too short, or the stuffing has gone into the centre rather than the sides. Push stuffing outward against the seam before closing the top.
Will the hanging loop hold the weight? It will if you double the yarn and work the strap with enough rows to stiffen it. A single chain loop tends to stretch and let the ornament sag against the branch.