Free Crochet Zombie Amigurumi Pattern – For Halloween With Brain & Scar Details
Nobody expected the most charming thing at the Halloween party to be a tiny crocheted zombie shuffling across the craft table, and yet here we are. This Crochet Zombie Amigurumi pattern is equal parts creepy and completely irresistible, tattered little details, that signature vacant stare, and just enough personality stitched in to make everyone who sees it immediately ask if you can make them one too which, fair warning, you absolutely will end up doing. The pattern is beginner friendly and works up in a single cozy evening, which means you have absolutely no excuse not to add this guy to your Halloween lineup this year. Dusty greens, muted grays, and a little splash of red if you’re feeling brave and this is the kind of project that makes your whole spooky season shelfie come together in the best possible way.
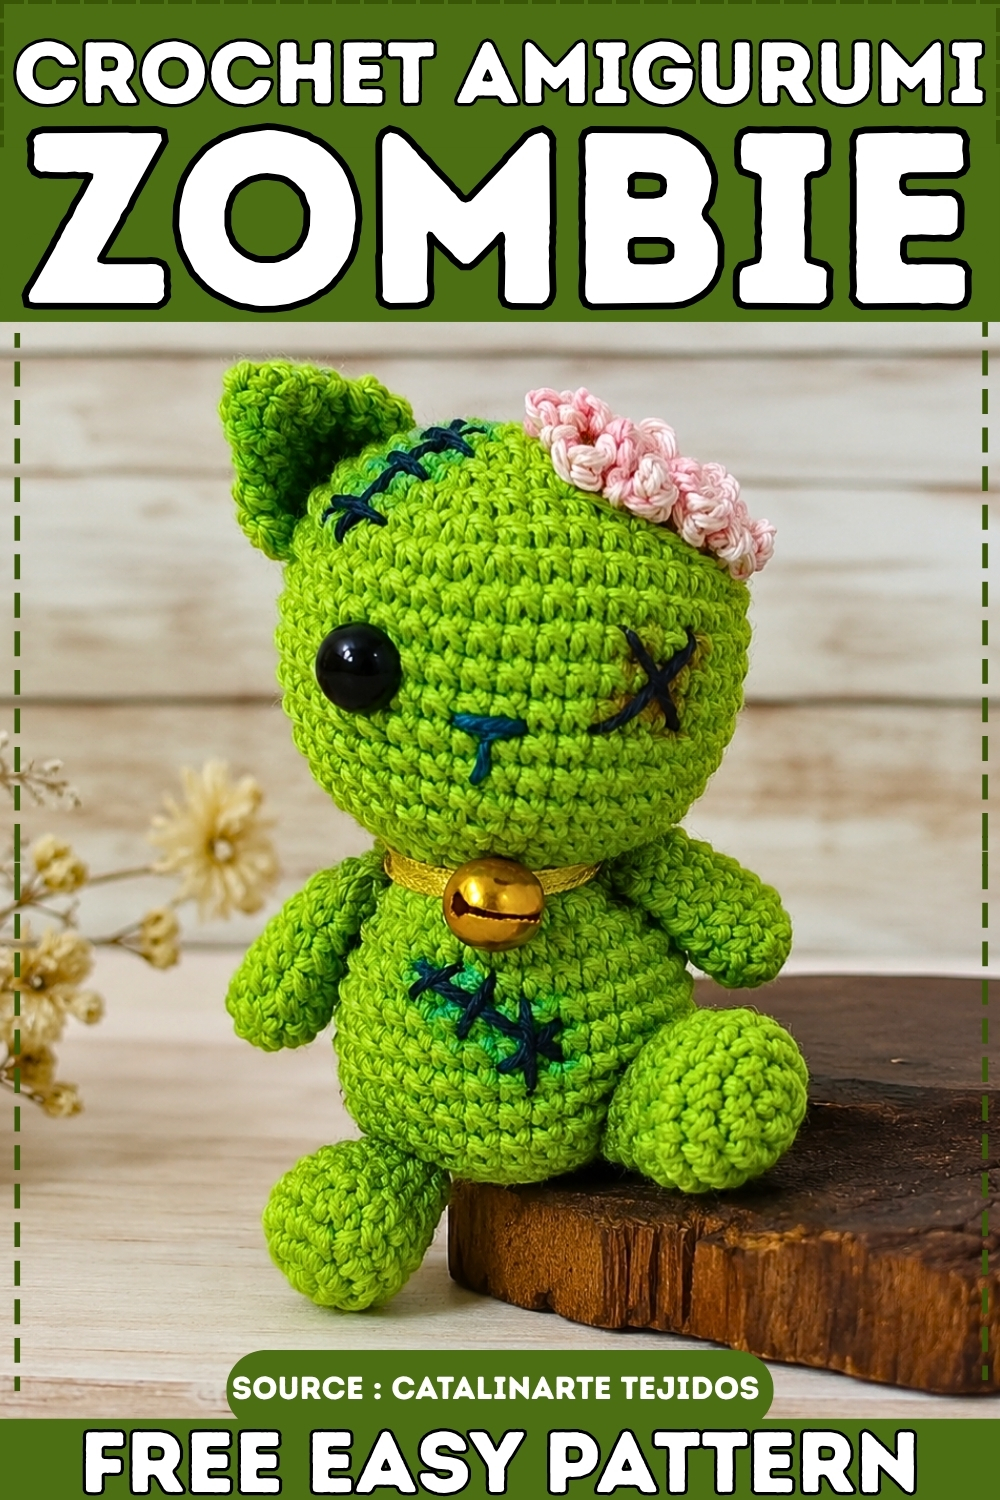
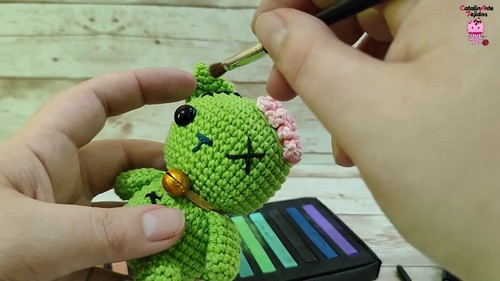
Halloween amigurumi gets a lot more interesting when the design commits to a character rather than just adding a ghost or pumpkin prop to a standard body shape. This crochet zombie cat amigurumi does exactly that, the green yarn, dark embroidered scar stitches, single oversized safety eye, and pink flower crown all work together to make something that reads as a complete concept. The gold bell collar adds one more detail that keeps it from looking like a generic spooky toy.
Crochet Zombie Amigurumi
Pieces List
- Body and head (continuous piece): 1 per doll
- Ear: 1 per doll
- Tail: 1 per doll
- Hind legs: 2 per doll
- Arms: 2 per doll
- Brain piece (chained curtain): 1 per doll
Total pieces per doll: 8, including the brain strip.
Materials
- Main yarn in zombie green or your chosen body colour
- Small amount of dark teal or petrol green yarn for the nose
- Black yarn for embroidering scars and cross-stitch eye detail
- Crochet hook sized to your yarn weight
- Safety eyes with backings
- Fiberfill stuffing
- Tapestry needle for sewing and embroidery
- Dry pastel pencils or pressed eyeshadow in red, dark green, and black for shading
- Ribbon and a small bell (optional collar)
Safety Eye Timing
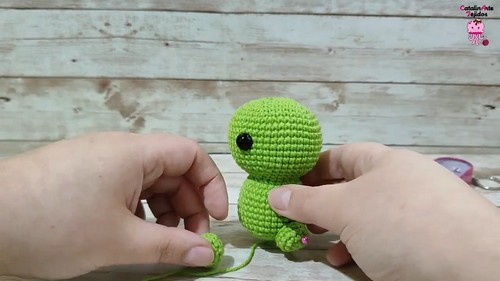
Safety eyes go in between Rounds 9 and 10 of the body/head piece, with an 8-stitch gap between them. This is before the piece narrows and long before it is stuffed or closed, so do not skip past this point without placing them. Once the decreases begin in Round 14, inserting eyes becomes genuinely difficult.
For any doll going to a child under three, or into a treat bag, party favour, or classroom gift situation, replace safety eyes with embroidered eyes worked in black yarn after assembly is complete. The cross-stitch eye detail already built into this pattern’s finishing stage means the embroidered version is consistent with the design, not a compromise.
The Character Dial: Creepier vs. Sweeter
This cat has enough going on structurally that both directions are genuinely available without changing a single round.
- Creepier: Use a desaturated grey-green body colour rather than bright zombie green. Make the brain piece in a deep burgundy or dried-blood red instead of matching body colour, and embroider the outline border in black rather than green. Extend the scar embroidery across the face and around the eyes — mismatched scar lengths read more disturbing than symmetrical ones. Apply the dry pastel shading heavily around the eye area and at the base of the brain piece. Leave the bell off the collar entirely. A matte yarn reads significantly more unsettling than a yarn with any sheen.
- Sweeter: Swap the zombie green for a pale mint or soft sage. Use a lavender or pastel yellow brain piece — the structural detail reads as a decorative ruffle rather than exposed anatomy at that point. Embroider the scars as small neat crosses rather than long jagged lines. The dry pastel shading can become rosy blush on the cheeks instead of red trauma tones. Add the bell on the collar. This version reads Halloween-adjacent rather than Halloween-specific, which extends its shelf life past October 31.
- The odd detail about this particular doll: the single ear placement is the element that reads strangest from across a room. Two ears and it’s a cat. One ear and something is clearly wrong. That asymmetry is worth preserving regardless of which direction you push the rest.
The Pattern
Abbreviations
- sc — single crochet
- inc — increase (2 sc in same stitch)
- dec — decrease (sc2tog over 2 stitches)
- ch — chain
- MR — magic ring
- st(s) — stitch(es)
- sl st — slip stitch
Work in continuous rounds unless otherwise noted. Use a stitch marker at the start of each round.
Part 1: Body and Head (Continuous Piece)
This piece begins with a foundation chain and works in an oval, expanding outward to form the head shape, then transitions directly into the body below. It is one continuous piece — no seam between head and body.
Foundation
- Make a slip knot and ch 6.
- Starting in the second ch from the hook, sc 4 across the chain.
- In the last available ch, work 3 sc into the same stitch (triple increase to turn the corner).
- Continue working along the opposite side of the foundation chain.
- Work an increase in the last strand to close the round. (12 sc total)
Expanding the Head — Rounds 2–6
- Round 2: Inc, sc 3, inc 3 times at the corner, sc 3, inc twice. (18 sc)
- Round 3: [Sc 1, inc], sc 3, [sc 1, inc] 3 times at the corner, sc 3, [sc 1, inc] twice. (24 sc)
- Round 4: [Sc 2, inc], sc 3, [sc 2, inc] 3 times at the corner, sc 3, [sc 2, inc] twice. (30 sc)
- Round 5: [Sc 3, inc], sc 3, [sc 3, inc] 3 times at the corner, sc 3, [sc 3, inc] twice. (36 sc)
- Round 6: [Sc 5, inc] repeated around. (42 sc)
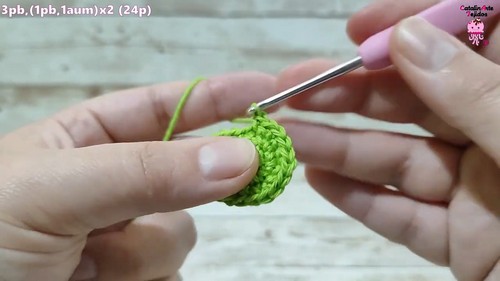
Shape Checkpoint — After Round 6: The piece should be a clear oval — longer than it is wide, with defined corners at each narrow end. Lay it flat and check that neither end is pulling or cupping. If it looks like a circle, the corner increases may not be landing consistently — go back and check Round 2.
Straight Rounds — 7 to 13
- Rounds 7–13: Sc in each stitch around, 7 rounds total. (42 sc per round)
Safety Eyes: Place between Rounds 9 and 10, with 8 stitches of separation between them. Do this now.
If you’re new to reading crochet patterns, don’t worry, just follow along with the video tutorial below and use the written pattern as a reference!
Decreasing the Head — Rounds 14–17
- Round 14: [Sc 5, dec] repeated around. (36 sc)
- Round 15: [Sc 3, dec], sc 3, [sc 3, dec] 3 times at the corner, sc 3, [sc 3, dec] twice. (30 sc)
- Round 16: [Sc 2, dec], sc 3, [sc 2, dec] 3 times at the corner, sc 3, [sc 2, dec] twice. (24 sc)
Begin stuffing the head firmly at this point. The oval shape needs to be maintained — stuff the corners of the oval so they hold their definition rather than rounding off.
- Round 17: [Sc 1, dec], sc 3, [sc 1, dec] 3 times at the corner, sc 3, [sc 1, dec] twice. (18 sc)
Shape Checkpoint — After Round 17: The head should now be clearly closed to a small oval opening. It should feel solid and hold its shape when set down. If it collapses to one side, add more stuffing to the corners before continuing.
Transitioning to the Body — Rounds 18–19
- Round 18: [Sc 2, inc] repeated 6 times. (24 sc)
- Round 19: [Sc 1, inc, sc 1, inc] repeated around. (36 sc)
Straight Body Rounds — 20 to 26
- Rounds 20–26: Sc in each stitch around, 7 rounds total. (36 sc per round)
Shape Checkpoint — After Round 26: The body cylinder should be noticeably wider than the head section above it. The neck transition between Round 17 and Round 19 should be visible as a slight narrowing point. If the body looks the same width as the head, check your Round 18–19 increases.
Decreasing the Body — Rounds 27–31
- Round 27: [Sc 4, dec] repeated around. (30 sc)
- Round 28: [Sc 3, dec] repeated around. (24 sc)
Begin stuffing the body at this point. Continue adding stuffing gradually as the remaining rounds close the base.
- Round 29: [Sc 2, dec] repeated around. (18 sc)
- Round 30: [Sc 1, dec, sc 1, dec] repeated around. (12 sc)
- Round 31: Dec 6 times around. (6 sc)
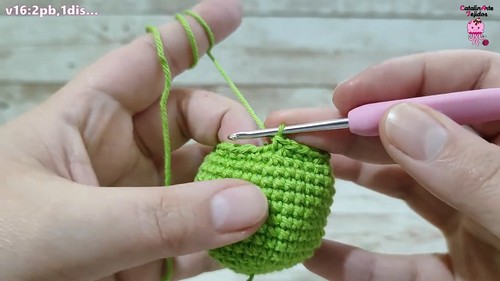
Fasten off using a tapestry needle to thread through the front loops of the remaining 6 stitches. Pull tight to close completely. Weave in the end.
Part 2: Ear — Make 1
This doll has one ear only. The asymmetry is part of the zombie design — do not make two.
- MR with 4 sc loosely. Pull tight.
- Round 2: [Inc, sc 1] twice. (6 sc) Turn the piece right-side out before continuing.
- Round 3: [Sc 1, inc] 3 times. (9 sc)
- Round 4: [Sc 2, inc] 3 times. (12 sc)
- Round 5: [Sc 1, inc] repeated around. (18 sc)
- Closing: Flatten the opening across both layers and sc 8 across to close flat. Leave a long tail for sewing.
Shape Checkpoint: The finished ear should be a small flat half-circle. If it’s cupping inward or not lying flat after the closing row, pull the tail more firmly as you work across the closing sc.
Part 3: Tail — Make 1
- MR with 6 sc. Pull tight.
- Rounds 2–11: Sc in each stitch around, 10 rounds total. (6 sc per round)
- Closing: Flatten the top across both layers and sc across to close. Leave a long tail for sewing.
Part 4: Hind Legs — Make 2
- MR with 6 sc.
- Round 2: Inc in every stitch around. (12 sc)
- Round 3: Sc in each stitch around. (12 sc)
- Round 4: Sc in each stitch around. (12 sc)
- Fasten off with a sl st. Leave a long tail for sewing.
These are not stuffed. They attach flat against the base of the body so the doll can sit independently.
Part 5: Arms — Make 2
- MR with 5 sc.
- Round 2: Inc in every stitch around. (10 sc)
- Rounds 3–7: Sc in each stitch around, 5 rounds total. (10 sc per round)
- Do not stuff the arms.
- Closing: Flatten the top across both layers and sc 4 across to close flat. Leave a long tail for sewing.
Part 6: Brain Piece — Make 1
This is a chained curtain strip that wraps across the top of the head in a zigzag pattern. It is the most distinctive element of this doll.
- Make a slip knot and ch 2. Work 1 loose sc into the first ch to create the first point.
- Ch 2 again. Work 1 sc into the first ch of this new chain to create the next point.
- Repeat until you have 30 points total.
- Leave a long tail for sewing. [CHECK — 30 points is given in the source; adjust length to fit your specific head size before fastening off, as head dimensions may vary with yarn weight]
Assembly and Finishing
Assembly Order
- Attach the hind legs first. Position them flat against the base of the body so the cat sits upright on its own — test this before sewing them down permanently. The doll’s ability to sit without support depends on leg placement.
- Attach the arms to the upper sides of the body just below where the neck narrows, positioned laterally.
- Attach the tail to the lower back. Test balance again — the tail weight can shift the doll’s centre of gravity. Adjust placement until it sits level before finalising.
- Attach the single ear to one side of the head, aligned over the eye on that side.
- Wrap the brain piece across the top of the head in a zigzag pattern and sew it down at multiple points along the strip.
- Using matching green yarn, embroider an outline border around the entire brain piece to mimic exposed skin.
Face and Scar Embroidery
- Embroider the nose in dark teal or petrol yarn below the eye line.
- Embroider a cross-stitch eye using black yarn (for the damaged eye detail).
- Embroider scars across the head, belly, and back using black yarn. Keep scar lengths uneven for a more natural result.
Shading with Dry Pastels
Apply with a dry brush. Red tones go around the brain piece and eye area. Dark green and black shading go around the limbs, ears, and at scar edges. Build up in light layers rather than applying heavily at once — it is much easier to add than remove. [Note: dry pastel shading is purely surface application and is not suitable for dolls that will be washed or handled heavily by children.]
Collar
Tie a ribbon around the neck and attach a small bell. Optional, but it adds a finished quality to the piece that photographs well.
Assembly-Line Running Order for a Batch of Twelve
Work across all twelve dolls at each stage before moving to the next. Do not finish one doll completely before starting the next.
- Stage 1 — All bodies and heads: Complete Rounds 1–31 across all twelve. Stuff and close each one as you go. This is the longest stage per unit.
- Stage 2 — All small pieces: Work through all ears, tails, hind legs (×2), and arms (×2) across all twelve dolls. Keep matched pairs together with a stitch marker or rubber band.
- Stage 3 — All brain strips: Make all twelve brain pieces. Keep them with their corresponding body — they may vary slightly in finished length.
- Stage 4 — All assembly: Legs first across all twelve, then arms, then tails, then ears.
- Stage 5 — All embroidery and shading: Do all nose embroidery, then all scar work, then all dry pastel shading in a single session. Set up your pastel colours once and work through the batch without stopping to reorganise.
- Stage 6 — All brain attachment and borders: Wrap and pin each brain piece, then embroider the outline border across all twelve before sewing any down permanently.
- Stage 7 — Collars: Tie all twelve ribbons and bells last.
Yarn estimate for twelve dolls: Approximately 400–500m of main body colour per twelve dolls, depending on yarn weight. Small amounts of teal and black are negligible across a batch this size. [CHECK — this estimate is based on standard amigurumi worsted weight; adjust for 5-ply or DK.]
Stuffing Notes
The head wants to be the firmest part of the doll — the oval shape collapses without adequate stuffing in the corners specifically. The body should be moderately firm, soft enough that the embroidery thread doesn’t pull through the surface stitches when you work the scars. Arms and hind legs are left unstuffed entirely, which is correct — unstuffed limbs hang and position more naturally and save batch time.

Colourways
- Classic Undead: Zombie green body, white brain strip, red pastel shading. The default, and it works.
- Swamp Rot: Olive drab body, ecru brain strip, heavy black pastel shading. More muted and more unsettling than the bright green version.
- Cotton Candy Zombie: Pale lilac body, blush pink brain strip, soft rose pastel shading. The contradiction between cute palette and exposed-brain detail is exactly the point.
- Midnight Lab: Charcoal grey body, neon green brain strip. Graphic and high contrast. The neon reads under warm artificial lighting in a way most Halloween palettes don’t.
Display Ideas
On a desk or shelf, this doll sits upright independently, which is a genuine advantage over floppy-limbed amigurumi that need propping. In a tiered tray, it works as the tallest element on the top tier. A row of twelve along a mantel is genuinely striking once the brain details are all visible from the front.
After the Season
The dry pastel shading is the only fragile element here. Store each doll individually wrapped in tissue rather than stacked or loose in a box — the pastel can transfer between surfaces over twelve months of storage. A sealed bag inside the box is enough protection. Check the shading before putting them on display next year; a light pass with the brush refreshes it in a few minutes.
Quick Answers
- How long does the brain piece take per doll in a batch? Once the chain-and-sc-into-first-chain rhythm is established, about 20 minutes per strip. In a batch, do all of them in a single session while watching something — it is the most repetitive part and the most meditative.
- Can I skip the dry pastel shading? Yes, and the doll still reads clearly as a zombie without it. The shading adds depth but isn’t structural. For a batch of twelve, finishing without shading saves roughly 30–45 minutes of total time.
- Does the single ear look like a mistake? Every single person who sees this doll asks that before they look more closely. Once they notice the brain and the scars, it stops looking like a mistake and starts looking intentional. That’s the whole effect.