Crochet Axolotl Amigurumi Free Pattern With Pink Chenille Yarn
Bobble gills in blue and a red heart make this crochet axolotl amigurumi plush read clearly from across a room. The heart sews on. The gills sit in pairs. Good for anyone who wants a finished toy without a long parts list to keep track of.
Crochet Axolotl Amigurumi Plush
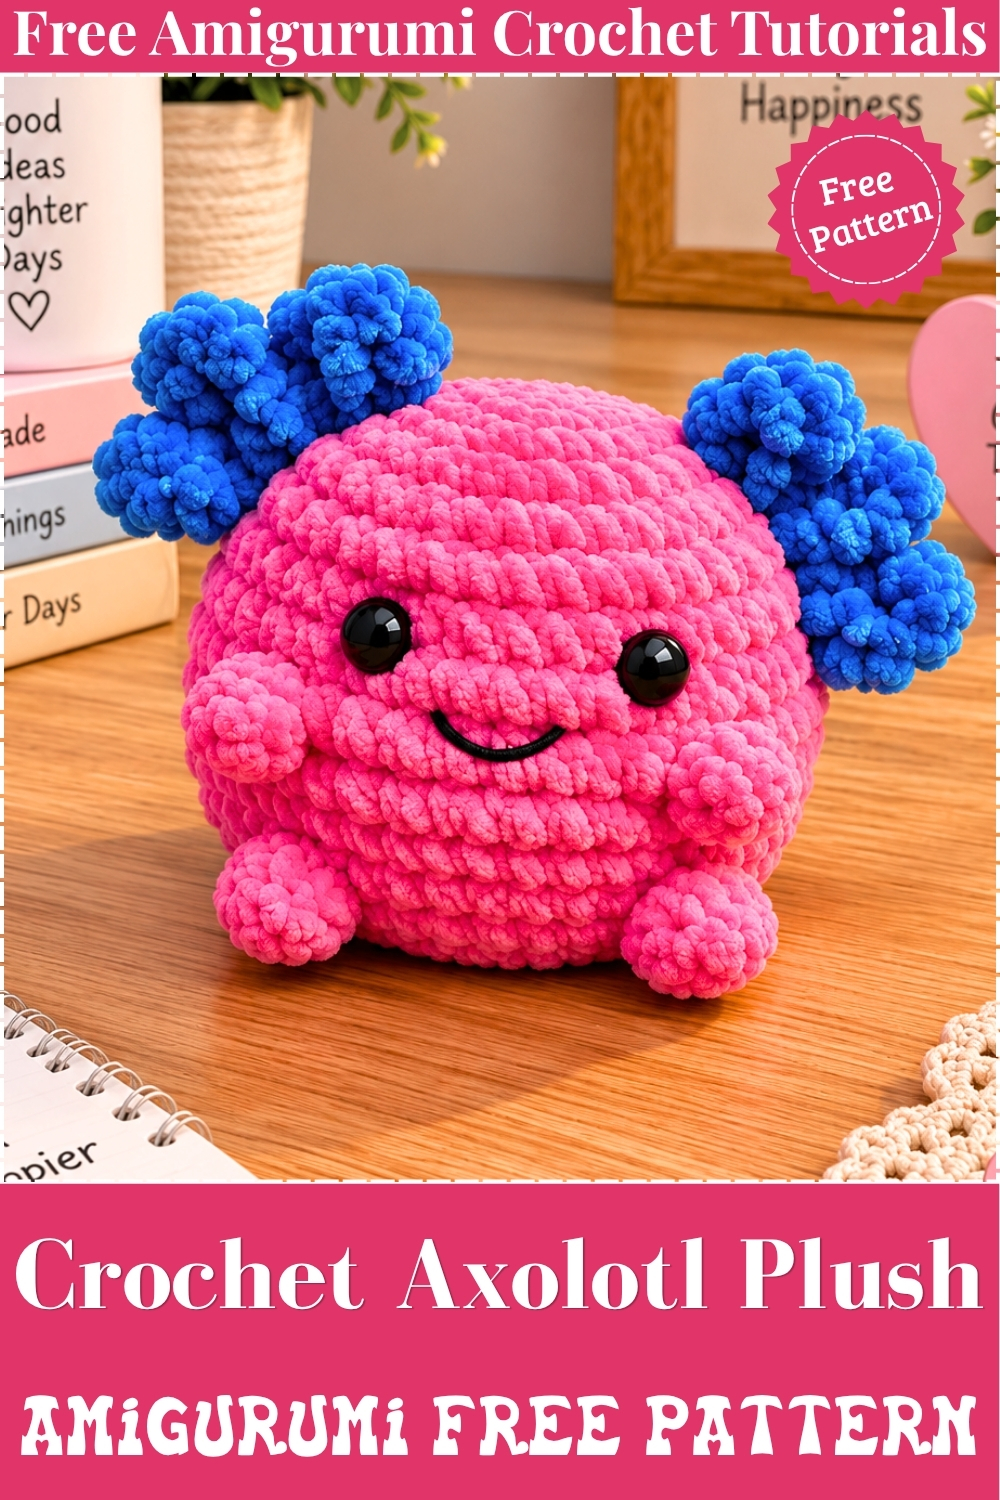
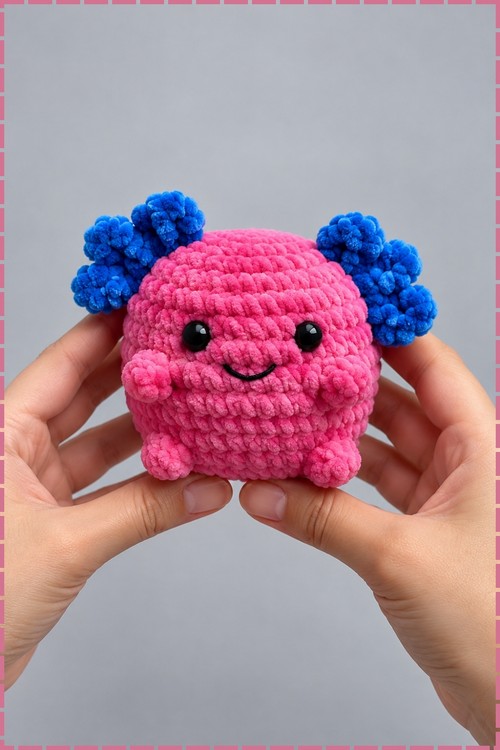
Six separate gill pieces sewn onto the sides of the head give this crochet axolotl amigurumi plush its signature feathery silhouette before a single round of the body even begins. Head and body run as one unbroken spiral, so the only seam on the finished figure is where the gills attach. My version uses bright pink chenille for the body and bold blue for the gills, which makes both colors read clearly against each other even in the soft texture of the yarn. Sitting cupped in two hands it fills them completely.
Materials and Tools
- Chunky chenille yarn in hot pink for the body.
- Chunky chenille yarn in bright blue for the gills.
- 5.0 mm crochet hook.
- Two 10 to 12 mm safety eyes with backings.
- Polyester fiberfill stuffing.
- Stitch marker, yarn needle, and scissors.
THE PATTERN
External Gills in Blue, Make Six
- Round 1: Magic ring (MR), work 4 single crochet (sc) into the ring. [4 stitches]
- Round 2: Work 1 sc then 1 increase (inc, meaning 2 sc in the same stitch), repeated 2 times. [6 stitches]
- Round 3: Single crochet in each stitch around. [6 stitches] Fasten off leaving a tail for attaching. Each gill piece is a small rounded oval. Three will go on each side of the head.

Head and Body in Pink
- Round 1: Work 6 sc into a MR. [6 stitches]
- Round 2: Work 1 inc in each stitch around. [12 stitches]
- Round 3: Work 1 sc then 1 inc, repeated 6 times around. [18 stitches]
- Round 4: Work 2 sc then 1 inc, repeated 6 times around. [24 stitches]
- Rounds 5 to 8: Single crochet in each stitch around for 4 rounds. [24 stitches per round]
Eyes and Gills Placement
- Insert the safety eyes between Rounds 5 and 6, about 4 to 5 stitches apart. Press the backings on firmly from inside before the opening narrows further.
- Attach 3 gill pieces to each side of the head, centred around Rounds 4 to 6. On my figure the three gills on each side cluster together and fan outward from the head, filling the space above and beside each eye. Pin all six in position before sewing any of them down so both sides match.
Head Shaping and Body Transition
- Round 9: Work 2 sc then 1 decrease (dec, meaning sc 2 stitches together), repeated 6 times around. [18 stitches]
- Round 10: Work 1 sc then 1 dec, repeated 6 times around. [12 stitches] Stuff the head firmly with fiberfill at this point so the dome holds its shape through the body rounds.
- Round 11: Single crochet in each stitch around. [12 stitches]
- Round 12: Work 1 sc then 1 inc, repeated 6 times around. [18 stitches]
- Rounds 13 to 15: Single crochet in each stitch around for 3 rounds. [18 stitches per round]

Legs and Body Completion
- Round 16 front legs: Work 3 sc, work a 4 double crochet bobble into the next stitch for the first front leg, work 8 sc, work a 4 double crochet bobble into the next stitch for the second front leg, work 5 sc. [18 stitches] The bobble pushes outward on its own to form a small rounded leg nub at each side of the lower body.
- Round 17: Single crochet in each stitch around. [18 stitches]
- Round 18 back legs: Work back legs in the same way as Round 16, aligned with the front legs. [18 stitches] Stuff the body lightly before the opening closes further.
- Round 19: Work 1 sc then 1 dec, repeated 6 times around. [12 stitches]
- Round 20: Work 6 dec. [6 stitches]
Tail
- Rounds 21 to 24: Work 6 sc around for each round, gradually decreasing to form a tapered tail tip. Fasten off and weave in ends.
Tips
- Chenille yarn splits easily if you insert the hook without looking. Slow down on the gill pieces where the stitch count is low and each stitch matters more.
- Pin all six gills before sewing any. Getting the cluster shape symmetrical on both sides takes a moment of adjusting, and it is much easier before the needle goes in.
- Stuff the head before Round 10 rather than at the very end. The narrow neck between head and body makes it almost impossible to push stuffing into the head dome once the body has grown.

FAQ
- What yarn weight makes the figure this size? Chunky chenille on a 5.0 mm hook produces a figure that fills two cupped hands, roughly 12 to 14 cm across. Worsted weight on a smaller hook gives a noticeably smaller result with the same counts.
- Do the gills need to be stuffed? No. Each gill piece is small and dense enough to hold its rounded shape from the yarn alone. Stuffing them would make them too stiff to sew flat against the head.
- Can I use regular acrylic instead of chenille? Yes. The figure works in any yarn at the right weight, though regular acrylic will show the stitch texture more clearly and the finished piece will look less plush. The bobble legs read more distinctly in regular yarn, which some makers prefer.