Crochet Deer Amigurumi Free Pattern With Sleepy Eyes
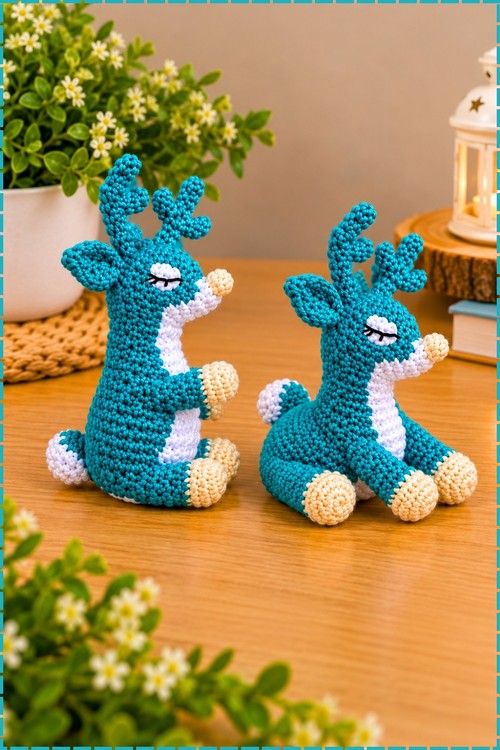
Teal yarn, a white chest stripe and cream hooves shape this crochet deer amigurumi free pattern with sleepy eyes stitched in black. The seated deer finishes just over 15 cm tall in roughly five hours, and you shape the branching antlers your own way.
Gift makers who want something woodland reach for the crochet deer amigurumi first. It suits nursery shelves, new baby boxes, and anyone with a soft spot for forest animals. Older kids like posing it. The crochet deer amigurumi also lands well with friends who collect handmade animals rather than buy them.
Crochet Deer Amigurumi
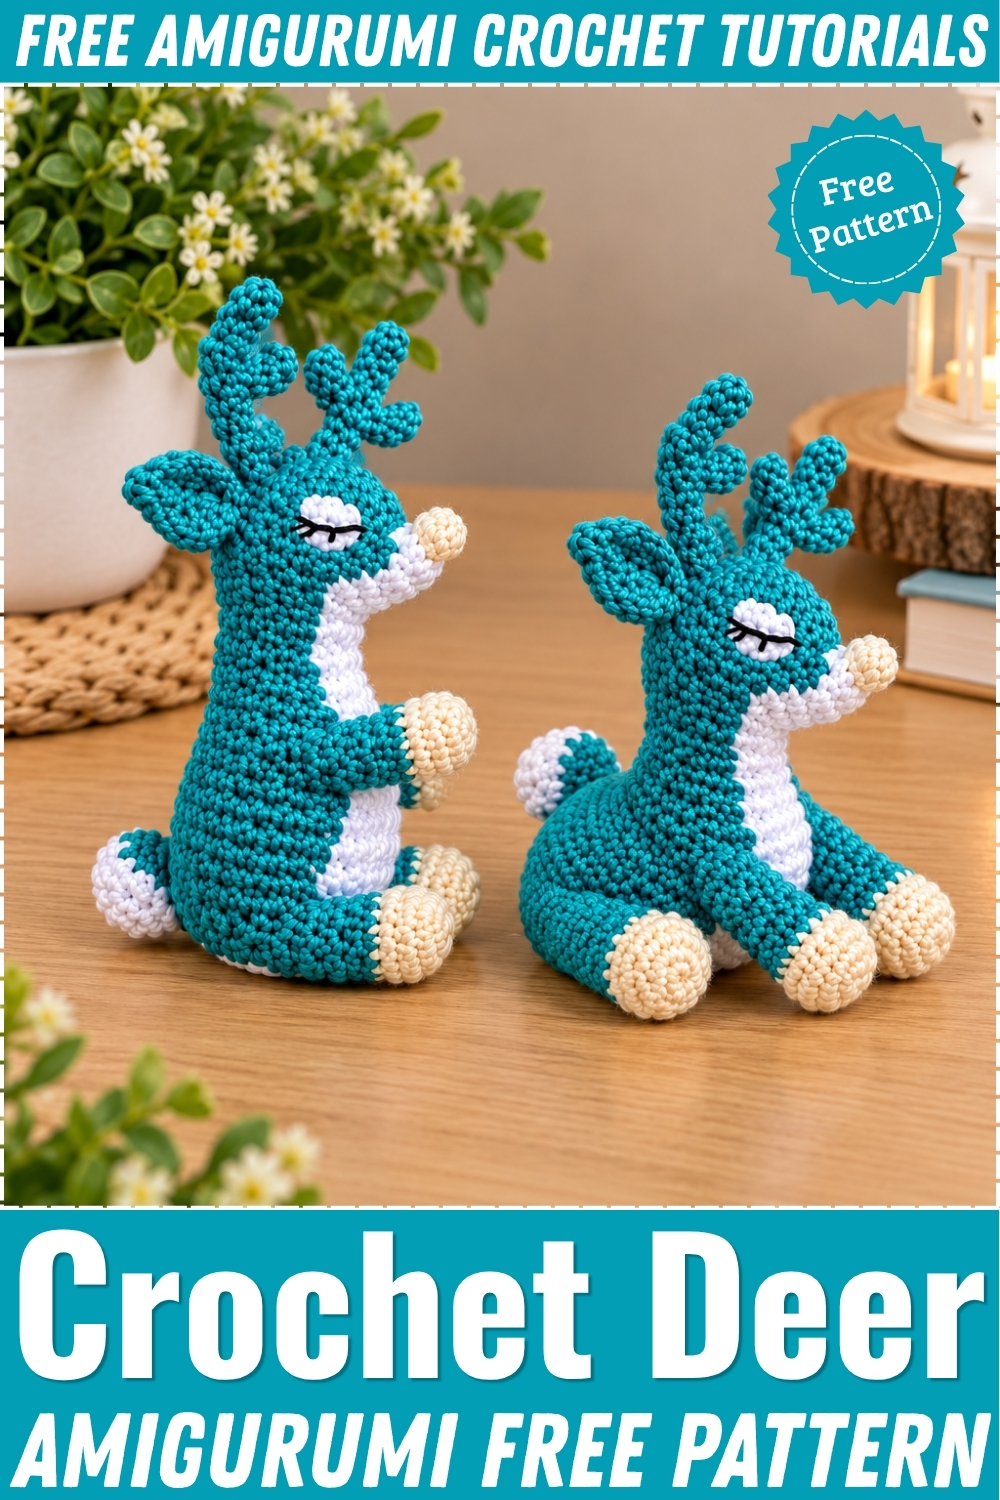
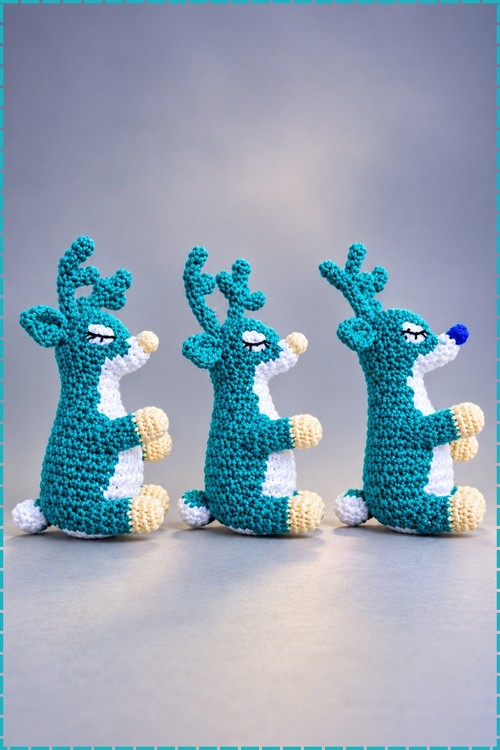
Branching antlers rise from the head in teal, and closed eyes stitched in black give the face a sleepy look. The belly and inner ears are white, while the hooves and muzzle are worked in cream. It sits upright on folded legs with both front hooves lifted near the chest. Pieces include the head, body, antlers, ears, front and back legs, and a small tail. Most of it is worked in the round with colour changes at the belly and hooves. The antlers take a bit of patience since each branch is shaped separately and joined. Everything else is straightforward sewing and shaping.
Materials And Tools
- Teal cotton or acrylic yarn for the body, neck, head, antlers and ears
- White yarn for the chest stripe, belly, tail underside and the small leg patches
- Cream or pale beige yarn for the hooves and the muzzle
- Black embroidery thread for the closed eyes and lashes
- Crochet hook to suit your yarn, usually 2.5 mm to 3.0 mm for amigurumi tension
- Tapestry needle
- Fiberfill stuffing
- Sewing pins for symmetrical placement
- Stitch marker
Colour notes for my version. The written pattern uses brown, white, black and beige. Mine uses teal wherever brown appears, cream wherever black hooves appear, and teal for the antlers instead of beige. White stays white. Every stitch count below is unchanged.
Difficulty And Time
Easy intermediate. The stitches are basic, but the colour changes come thick and fast in Rounds 8 to 13 and the eye embroidery needs a steady hand. From my own build this took roughly five hours spread over two sessions, and the finished deer stood a little over 15 cm seated, though yarn weight will shift that.
Technique Notes And Tips
Work in continuous spirals after the joined foundation ring and keep a marker in the first stitch of each round. Carry the unused colour loosely behind the work rather than cutting it every time, since Rounds 8 to 13 alternate constantly and cut ends multiply fast. Change colour on the last yarn over of the previous stitch so no old colour flecks into the new one, which matters most along the white chest line where any bleed shows immediately.
Count at the end of every increase round. Round 4 and Round 7 both place their increases across the front of the body only, so the back stays flat and the chest pushes forward. Getting those increases on the wrong side gives you a deer that leans backward and will not sit.
Stuff in small pinches as you close the body, not all at once at the end. The neck is narrow and fiberfill pushed in from the bottom bunches at the shoulder. Firm stuffing through the chest keeps the deer upright, while the very base can stay softer so it sits flat.
For the eyes, pin both endpoints before you sew a single stitch. Shifting an eye by two stitches changes the whole expression, and unpicking black thread from teal leaves fuzz. Let the thread drape rather than pulling it taut, since the gentle sag is what reads as a closed sleeping eye.
Sew the legs on last, after the body is fully stuffed and the head is attached. Pin all four first and sit the deer on a flat surface to check it balances before any stitching goes in.
The Pattern
Abbreviations
- Ch means chain
- Sl St means slip stitch
- Sc means single crochet
- Dc means double crochet
- Inc means increase, two single crochet in the same stitch
- Dec means decrease, two single crochet worked together using an invisible decrease
- BLO means back loops only
- US crochet terms throughout
Body And Neck
- Using teal yarn, make a slip knot and Ch 12, then join with a Sl St into the first chain to form a ring
- Round 1: In teal, Sc 5 into the ring, change to white and Sc 3, change back to teal and Sc 4 [12 sts]. The white block sits at the front and becomes the chest stripe, so keep it centred as you work upward
- Round 2: Teal Sc 6, white Sc 3, teal Sc 3 [12 sts]
- Round 3: Teal Sc 6, white Sc 3, teal Sc 3 [12 sts]. You should now have a narrow straight neck tube with a clean white line running up the front
- Round 4: In teal, Sc 4, then Inc 6 times across the front, then Sc 2 [18 sts]. All six increases go in the front section only, which pushes the chest outward while the back stays straight
- Rounds 5 to 6: Sc 18 in teal in each round [18 sts]
- Round 7: In teal, Sc 5, Inc 1, then repeat Sc 1, Inc 1 five times, then Sc 2 [24 sts]. The spaced increases spread across the front and give the seated body its rounded belly
- Round 8: Sc 12 teal, Sc 5 white, Sc 7 teal [24 sts]
- Round 9: Sc 12 teal, Sc 6 white, Sc 6 teal [24 sts]
- Round 10: Sc 12 teal, Sc 7 white, Sc 5 teal [24 sts]
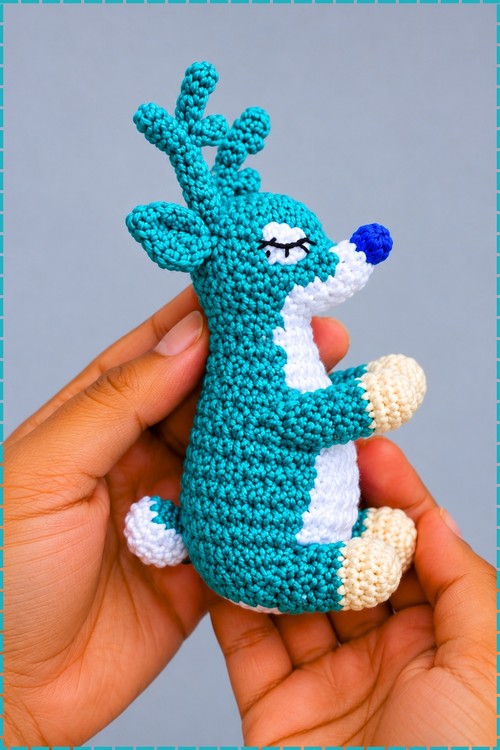
- Round 11: Sc 12 teal, Sc 7 white, Sc 5 teal [24 sts]. The white panel is at its widest here, matching the broad belly patch visible in my photo
- Round 12: Sc 13 teal, Sc 6 white, Sc 5 teal [24 sts]
- Round 13: Sc 14 teal, Sc 5 white, Sc 5 teal [24 sts], then change to white at the end of this round. The white taper closes the belly patch into a rounded base rather than a blunt edge
- Round 14: In white, repeat Sc 2, Dec across the round, decreasing every third stitch
- Round 15: In white, repeat Sc 1, Dec across the round, decreasing every second stitch
- Round 16: In white, Dec in every stitch across
- Sl St to the first stitch and cut the yarn leaving a long tail
- Stuff the body firmly with fiberfill, packing the chest well so the deer holds its upright seated posture
- Use the long tail to weave the bottom opening closed, then sew the white top of the neck to the white section of the head so the chest stripe runs unbroken into the muzzle
Legs, Make 4
- Round 1: Using cream yarn, make a double magic circle, Ch 1 and work 5 Sc into the ring, then pull tight to close [6 sts]. Cream replaces the black hoof colour in my version, and the double circle stops the hoof tip from gaping
- Round 2: In back loops only, Sc 6 in cream, changing to teal at the end of the round [6 sts]. Working in back loops only creates the crisp ridge that separates the hoof from the leg
- Round 3: In back loops only, Sc 6 in teal [6 sts]
- Round 4: In both loops, Sc 6 in teal [6 sts]
- Round 5: Teal Sc 2, white Sc 2, teal Sc 2 [6 sts]. The small white patch faces outward on the finished deer and sits just above the hoof
- Round 6: Teal Sc 3, white Sc 2, teal Sc 1 [6 sts]
- Round 7: Fold the leg flat and work through both sides at once, Sc through the 1st and 6th stitches together, Sc through the 2nd and 5th stitches together, then Sc through the 3rd and 4th stitches together. Closing flat gives a seam that disappears against the body when sewn
- Ch 1 and fasten off leaving long tails of both teal and white for sewing
- Stuff each leg only lightly before closing, since the legs are short and overstuffing makes them splay outward
Tail
- With the deer facing away from you and held upside down, attach white yarn around the top of a stitch at the back colour boundary line
- Row 1: Ch 2 to count as the first Dc, Dc 2 into the same stitch, then Dc 3 into the next stitch, then turn
- Row 2: Ch 1, Dc 4 beginning in the 3rd chain from the hook, then Sl St into the last stitch to fasten off, leaving a long tail. This white piece is the underside of the tail and should flare slightly
- Attach teal yarn directly above the white tail, working around the post of the stitch
- Row 1: Ch 2 to count as the first Dc, Dc 2 around the same post, Dc 3 around the next post, changing to black on the last stitch, then turn. My upper tail is teal instead of brown, and the black tip is optional since it barely shows on a teal deer
- Row 2: In black, Ch 1, Sc 4 across, then Sl St in the last stitch to finish
- Sew the white and teal tail layers together using the white yarn tail so the two sit as one thick flap
Antlers And Ears
- Work the antlers in teal to match the body rather than beige
- The written pattern gives no rounds for the antlers, so make them your way, working a narrow tube and splitting or joining short branches until each antler reaches the height you want, then repeat the same shape for the second one
- My antlers each carry a main upright branch with two shorter forward points, which is what gives the profile in my photo
- Make the ears in teal as flat rounded shapes, pinched at the base before sewing

Assembly And Face
- Pin all four legs symmetrically to the body and sew them on with the yarn tails, placing the front pair high against the chest and the back pair low so the deer sits with its hooves forward
- Attach the antlers to the top of the head between the ears, angled slightly backward
- Sew the ears low on the sides of the head, just below and outside the antlers, tilting them outward
- Mark both eye positions with sewing pins to keep them level
- Pass black embroidery thread back and forth between the two eye points, letting the thread drape gently under the pins so it forms a soft downward curve
- Repeat the pass several times to thicken the line into a solid closed eyelid
- Anchor the curved line with tiny securing stitches through the head so it cannot slide
- Stitch three or four short individual threads angling down and outward from the outer end of each eye line to form lashes, which is the detail that gives my deer its sleeping expression
- Leave the muzzle plain in cream with no embroidered nose or mouth, as in my photo
Yarn Substitution
I used a smooth cotton, which keeps the colour boundaries sharp. That matters here more than on most projects because the chest stripe shifts by one or two stitches every round and a fuzzy yarn blurs the line into a smudge. Acrylic works fine if it is a tight ply. Skip anything brushed or with a halo. Keep all four colours in the same weight or the hooves will bulk out against the legs.
Customization Ideas
Revert to brown, white, black and beige for a realistic fawn, or try grey with a cream belly for a winter version. Open safety eyes at the same pinned positions turn the sleeping expression into an alert one. A small ribbon or bell around the neck suits the seated pose. Working the antlers shorter and blunter reads as a young fawn, while longer branching antlers give an adult stag.
FAQ
Can I make this deer without colour changing mid round? Not without losing the stripe. The white chest and belly are built into the rounds themselves. You could work the whole body in one colour and surface stitch or applique a belly patch afterward, but the result sits flatter.
Why does my deer tip over backward? Almost always because the Round 4 or Round 7 increases went in the wrong section. Those increases belong across the front only. If the back has stretched too, the base will not meet the surface evenly.
How do I stop the closed eyes from looking uneven? Pin both endpoints and check them from directly in front before sewing. Sew the first pass of both eyes before thickening either one, so you can adjust while the thread is still loose.