Mini Crochet Sunflower Amigurumi Pattern Free
A crochet sunflower amigurumi on a desk gets asked about by everyone who walks past it. The domed centre is what lifts the petals, and the pot takes firm stuffing so nothing tips forward.
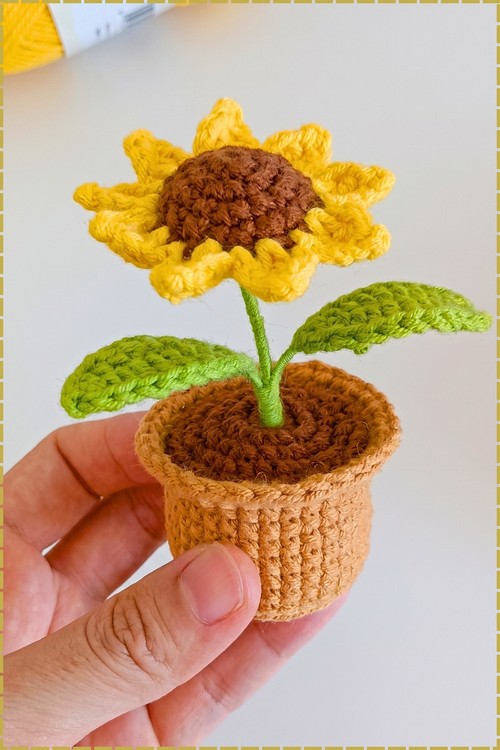
The centre is a stuffed brown dome rather than a flat disc on this mini crochet sunflower amigurumi pattern free, which is what lifts the yellow petals outward instead of letting them lie flat. Petals work as a ring of pointed shapes around the base of the dome. Two green leaves attach along a wrapped stem, and the pot is a small tapered cylinder with a rolled rim and a brown soil disc. Stuff the pot base firmly so the whole thing stands upright.
Crochet Sunflower Amigurumi
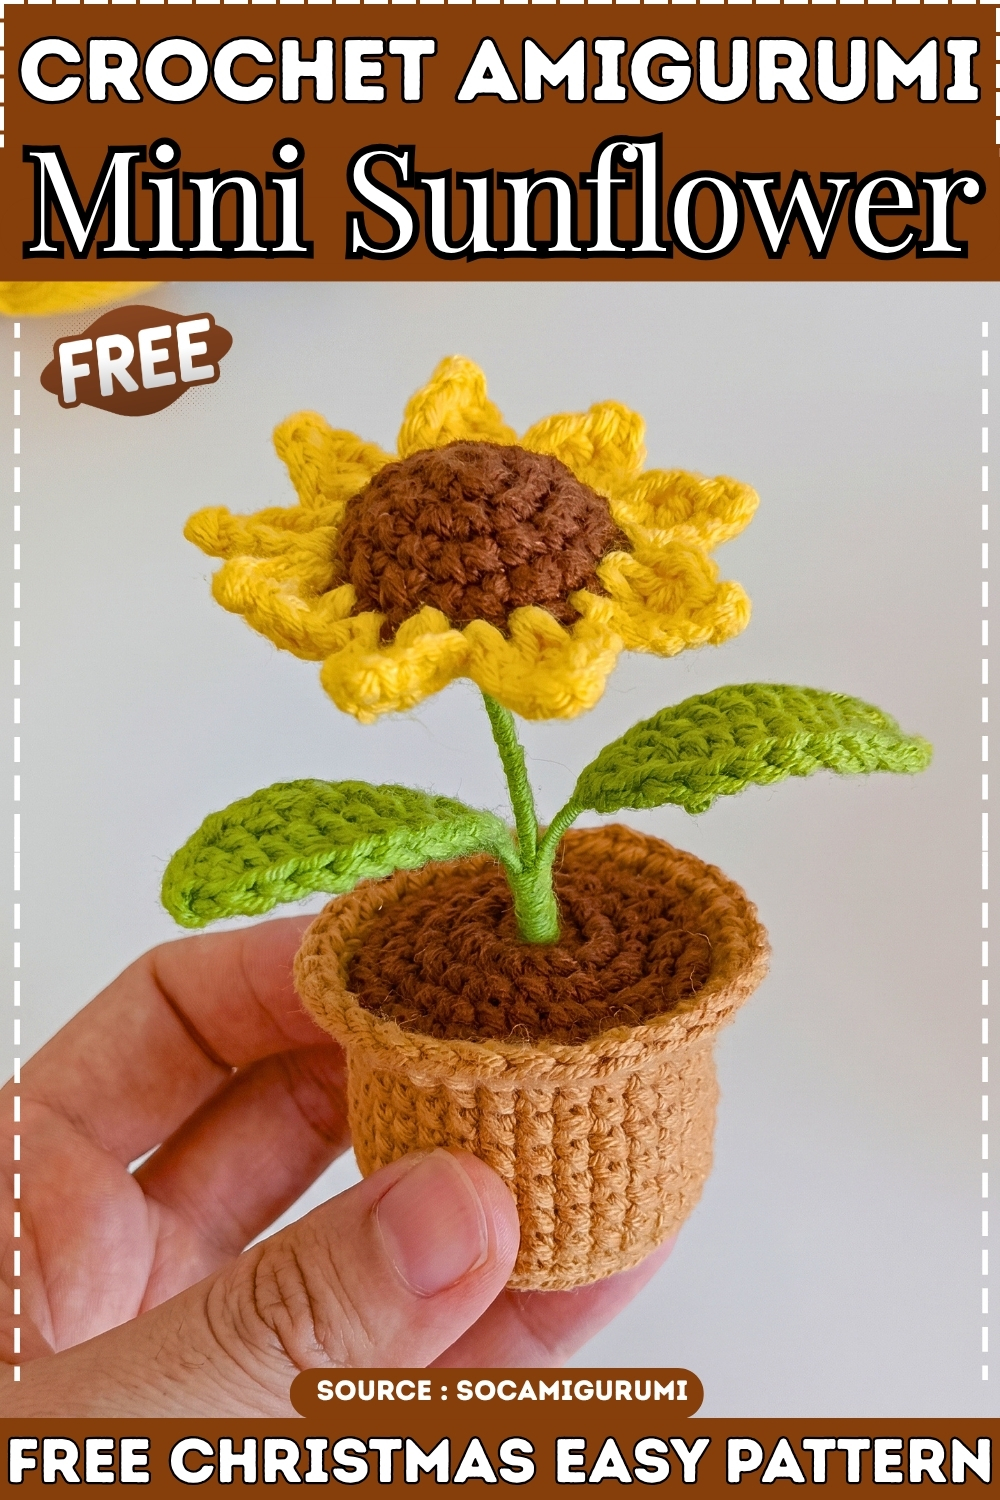
Few things land better at a kids’ party table than something that looks like a real plant but is obviously not one. This mini potted sunflower sits in a crocheted terracotta-style pot, has a proper wire stem wrapped in yarn, two flat leaves, and nine petals worked around a stuffed centre. It holds its shape because the wire does that work. Children understand immediately that it is a flower in a pot, not just a round toy, and that recognition is what makes them want to hold it. Adults tend to quietly keep one for their own desk.
Safety First: Wire, Stuffing and Small Parts
This is the most important section in the post. The wire stem is what makes this design work, and it is also what makes it unsuitable for young children without modification.
- Wire safety. The pattern uses craft wire bent and inserted through the flower centre and wrapped up the stem. A properly finished wire end that is folded and coiled flat inside the pot base is not exposed. But wire can work loose, especially if a child tugs the flower repeatedly out of the pot. For children under five, or for any child who handles toys roughly, skip the wire entirely and replace the stem with a tightly stuffed chain-stitch tube or a piece of pipe cleaner sealed inside yarn wrapping with both ends firmly tucked. Check the wire ends every time the toy is handled if you do use them. A bent wire tip that pokes through yarn is a puncture risk.
- Small parts. The petals are worked as part of the flower structure and are not detachable, which is good. The pot and flower separate, which is less ideal for children who might put small components in their mouths. For under-threes, sew the flower stem firmly into the pot and do not allow it to be removed.
- Stuffing. Polyester fibrefill in a crocheted toy is not a choking risk by itself, but a seam that opens releases it. Reinforce all closing seams with a second pass of yarn before giving the toy to a child.
- Washing. The wire stem makes machine washing impossible. Spot-clean the yarn surfaces only with a damp cloth. If you want a fully washable version, remove the wire as described above and replace with a stuffed tube.
Making These for a Group
- A classroom set of twenty or a birthday party favour of twelve sounds like a lot. With this design it is genuinely manageable because the pieces are small and most of the time goes into the pot, which is the most repetitive and therefore the most easily batch-produced part.
- For twelve sunflowers, make all twenty-four pots and soil pieces first before touching a single flower centre. Then all twelve flower centres and green bases together. Then petals. Then leaves. Then stems. Assembly takes the longest per unit because of the wire wrapping, so allow a full day just for that stage.
- For name-tagging party favours: a small paper tag tied around the stem with ribbon works better than anything stitched, because it does not disturb the yarn wrapping and can be swapped out if you need to reuse the flowers.
- Estimated time per unit, once you have made the first one and are working from pattern memory: about two and a half to three hours per complete flower. A batch of twelve is roughly thirty hours of hooking plus four to six hours of assembly.
Countdown Before You Start
- One sunflower potted plant, start to finish: three to four hours the first time, closer to two and a half once you know the pattern.
- A batch of twelve for a party: budget three weeks at an hour a night, or plan for two solid weekend days of hooking plus a full day of assembly.
- Latest start for one: four days out at a relaxed pace.
- Latest start for a batch of twelve: three weeks minimum. The stem assembly cannot be rushed without the wire ends becoming a problem.
Pieces You Will Make
- Flower pot: one
- Soil disc: one
- Sunflower centre: one
- Green base: one (same size as the sunflower centre, made separately)
- Petals: nine, worked around the joined centre and base pieces
- Leaves: two, worked flat on a wire foundation
- Stem: one, assembled from wire wrapped in yarn
What You Will Need
- Yarn in golden yellow for the flower centre and petals, brown or dark centre colour for the inner circle, terracotta or orange-brown for the pot, green for the stem, leaves and base, and soil-brown for the soil disc.
- Crochet hook in a size that matches your yarn weight. The source does not specify a hook size but the stitch count suggests a 3.0mm to 4.0mm hook for light worsted or DK weight yarn.
- Craft wire, approximately 0.6mm to 0.8mm gauge. Florist wire works well. You need enough for the stem height plus the coil that sits flat inside the pot base.
- Yarn needle.
- Hot glue or extra yarn for wrapping and securing the stem.
- Small stones or a little extra fibrefill for weighting the pot.
- Polyester fibrefill for the flower centre.
The Pattern
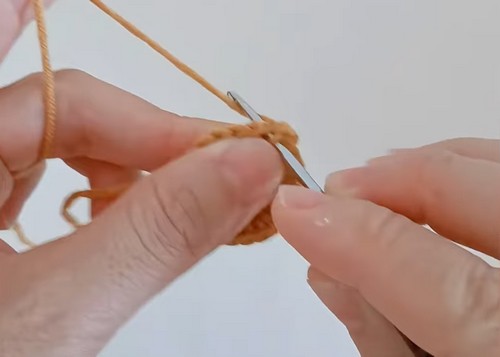
Ch1 at the start of a round does not count as a stitch throughout this pattern.
Flower Pot (Make 1)
- Start with a magic ring. Round 1: 8 sc into the ring, pull tight, sl st to first st. (8)
- Round 2: 2 sc in every st around. (16)
- Round 3: [1 sc, 2 sc in next st] repeat 8 times. (24)
- Round 4: [1 sc, 2 sc in next st, 1 sc] repeat 8 times. (32) Checkpoint: a flat disc about the size of a large button. It should lie completely flat with no rippling or curling at the edges.
- Round 5: 32 sc in the back loops only. (32) Checkpoint: the back-loop-only round pulls the sides upright. The piece should now stand as a shallow open cup rather than lying flat.
- Rounds 6 to 11: 1 sc in each st around. (32)
- Round 12: 32 hdc in the front loops only. (32) Checkpoint: the front-loop hdc round creates the rim of the pot, which flares slightly outward. It should look like a proper terracotta rim, not a continuation of the straight sides.
- Fasten off and leave a long tail for sewing the soil disc in later.
Soil Disc (Make 1)
- Work rounds 1 to 4 exactly as the flower pot. (32 at end of round 4) Checkpoint: a flat circle that should fit snugly inside the pot opening, sitting level with or just below the rim.
- Fasten off with a long tail for sewing.
Sunflower Centre (Make 1)
- Start with a magic ring. Round 1: 6 sc into the ring, pull tight, sl st to first st, ch1. (6)
- Round 2: 2 sc in every st around. (12)
- Round 3: [1 sc, 2 sc in next st] repeat 6 times. (18)
- Round 4: 18 sc. (18) Checkpoint: a small flat disc, slightly smaller than the soil disc. This becomes the front of the flower face.
- Fasten off with a long tail.
Green Base (Make 1)
- Work rounds 1 to 4 exactly as the sunflower centre. (18 at end of round 4) Checkpoint: same size as the sunflower centre. These two pieces will be held together wrong sides facing, so they should match precisely.
- Fasten off with a long tail.
Petals (Make 9, worked continuously around the joined pieces)
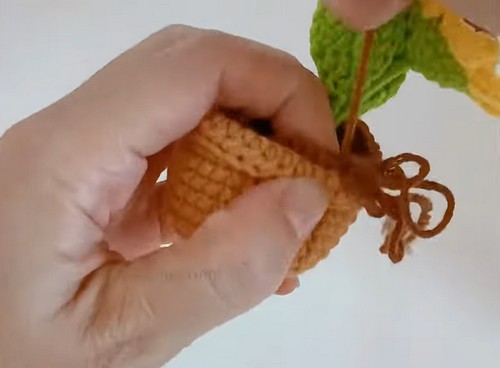
Before working the petals, prepare the wire: fold a piece of craft wire in half and bend the tip to blunt it. Insert it through the centre of the joined fabric so it becomes the stem core.
Hold the sunflower centre and green base wrong sides together.
- Insert hook into any stitch through both layers, ch3.
- 1 dc in the next stitch.
- Ch2 for a picot, then 1 dc in the same stitch as the dc just worked.
- Ch3, then sl st into the next stitch.
- Repeat this sequence around the joined edge until 9 petals are complete. Checkpoint: each petal should stand out from the centre disc as a small pointed loop, not lie flat. If they are collapsing inward, the ch3 turning chains may be too loose; if they are rigid and pointing straight out, the tension is right.
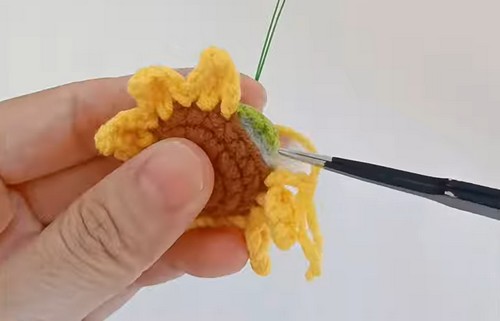
- Leave a small opening before completing the last petal for stuffing. Add a small amount of fibrefill between the two disc layers, then close fully.
- Fasten off and secure.
Leaves (Make 2)
Each leaf is worked on a wire foundation that gives it its shape.
- Ch11 with wire laid alongside (or insert wire after chaining). Starting in the second ch from the hook:
- 1 sc in first ch.
- 1 dc in each of the next 5 ch. (5 dc)
- 1 hdc in each of the next 2 ch. (2 hdc)
- 1 sc in the next ch, ch2, then 1 sc in the same ch. Checkpoint: this is the leaf tip. The ch2 space creates the point. The stitches should get progressively taller from the base to the middle and then shorter again as you reach the tip.
- Work down the opposite side of the foundation chain in the mirror image of the above, ending at the start of the chain.
- Fasten off and wrap the remaining yarn tail tightly around the wire base to secure.
Stem Assembly
- Wrap yarn around the wire stem from the flower base downward to the desired height, using yarn and hot glue or tight wrapping to keep it smooth.
- Attach the two leaves as you wrap, positioning them partway down the stem on opposite sides.
- Insert the completed stem through the soil disc and into the pot.
- Fold the excess wire inside the pot base and coil it flat, keeping the coil level with the bottom so the pot sits steady.
- Add small stones or additional fibrefill to weight and stabilise the pot interior.
- Sew the soil disc across the top of the pot using the yarn tail and yarn needle, enclosing the wire coil and filling inside.
The Character Dial
The sunflower is a summer flower, which makes it easy to push in either direction depending on whether this is going to a summer party or a general gift.
- Toward bright and garden-fresh. Classic golden yellow petals, a warm brown centre, a clean white or cream pot, and leaves in a saturated grass green. Keep the petals slightly spread by working the picot chains tight so they stand up. Add a small embroidered smiley face on the flower centre in contrasting thread if the recipient is young — two French knots for eyes, a curved backstitch mouth. It reads as a sunflower wearing an expression, which children find immediately funny.
- Toward naturalistic and botanical. Muted gold or ochre petals, a very dark brown or near-black centre, a pot in aged terracotta (a brownish-orange with a little grey in the tonal value), and leaves in an olive or sage green rather than bright grass. Skip any face embroidery. Wrap the stem more densely so the yarn surface looks rounder, like a real stem. This version sits on an adult’s desk without looking like it came from a children’s party.
- The odd maker observation that is genuinely useful: the stem height changes the whole read of the finished piece. A very short stem — barely two inches — looks like a seedling. Three to four inches looks like a planted flower. Six inches suddenly looks like a cut flower in a vase, even though it is in a pot. Decide which reading you want before you start wrapping.
Colourways
- Classic Field. Golden yellow petals, dark brown centre, terracotta pot, grass green stem and leaves. The default and still the most photographed.
- Sunbaked. Burnt ochre or amber petals, near-black centre, a pale sand or buff pot. Reads as late summer rather than midsummer. Works well grouped with earth-toned ceramics.
- Lemon and Sage. Pale lemon yellow petals, warm chocolate centre, sage green pot, medium olive leaves. The most modern of the four, and the one that works in kitchens.
- Harvest. Deep rust or copper petals, dark chocolate centre, dark terracotta pot, forest green leaves. Autumn-adjacent in palette, still clearly a sunflower. A good version for end-of-summer and early-autumn party favours.
Display Ideas
- On a windowsill in a line of two or three in slightly different heights, which you control entirely by varying the stem length.
- As a party place setting, one at each seat with a name tag around the stem.
- As a wrapped gift topper, pot sitting on top of the gift with ribbon woven around the stem.
- On a classroom nature table, where a crochet plant holds up as well as a real one without needing water.
- Grouped on a tiered tray with small framed prints or real pebbles to ground the display.
- On a teacher’s desk at the end of term as a class thank-you gift.
Stuffing Guide
- Flower centre: a small amount of fibrefill between the two disc layers, added just before you close the final petal. Too much and the petals cannot sit evenly around the edge.
- Pot: fibrefill or small stones, with the purpose being weight and stability rather than shape. The yarn structure holds the pot shape without internal support.
- Leaves and stem: none. The wire provides all the structure.
- Do not over-stuff the flower centre. It needs to stay relatively flat so the petals sit in a single plane around it rather than spreading in all directions.
After the Season
The wire inside means storage in a rigid box rather than a bag or pillowcase. Lay it flat so the stem does not bend under other items. If the pot has fibrefill rather than stones, it is light enough to store upright in a small open box with the stem pointing up, which is actually the safest position. Check the wire coil at the base each time you bring it out. If the coil has shifted and a wire end is working toward the soil seam, re-coil it before letting a child handle the toy.
Quick Answers
- Can children play with this? It depends entirely on the child’s age and how the wire is handled. For under-fives, use the wire-free version described in the safety section above. For older children who will treat it as a display item rather than a pull toy, a properly finished wire stem is fine with regular checks.
- How do I wash it? Spot-clean only with a damp cloth and a tiny drop of gentle detergent on stubborn marks. The wire makes machine washing impossible. If you need a machine-washable version for a child, remove the wire entirely and replace the stem with a tightly stuffed yarn tube.
- What if my pot comes out floppy? The back-loop round 5 is what creates the rigid base. If you skipped it or worked it in both loops, the pot will not stand properly. Small stones or a tight pack of fibrefill inside the pot base also help enormously with stability.
- How many do I need to make per child for a party? One per child is the standard, and one per adult who helped organise the party, because those always get admired and then quietly claimed.