Crochet Cat Amigurumi Free Pattern Keychain In Hot Pink Yarn
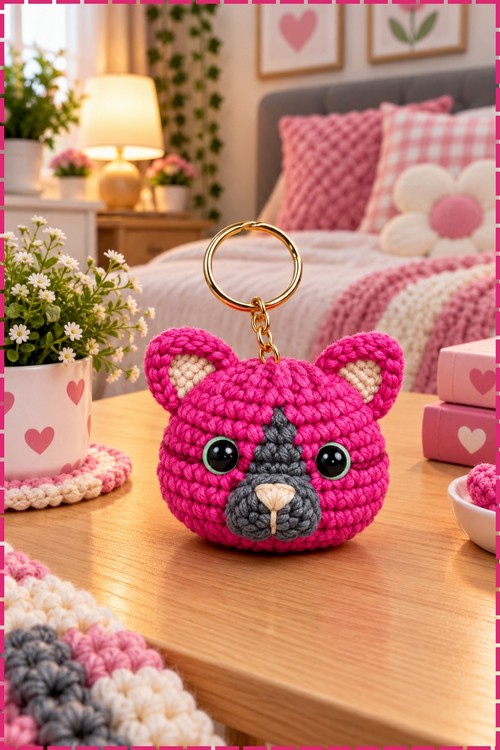
Hot pink and impossible to lose in a busy bag, the crochet cat keychain dangles from a gold split ring with a grey snout stripe, cream inner ears and green ringed eyes. Clip it to school bags, car keys or pencil cases for a bright pop of colour.
Keys and backpack zips are where the Crochet Cat Amigurumi Keychain ends up, which makes it the gift for a niece starting school or a friend who loses everything. Teen stocking fillers, teacher thank yous, craft fair tables. The Crochet Cat Amigurumi Keychain suits anyone who wants something handmade in daily use.
Crochet Cat Amigurumi Keychain
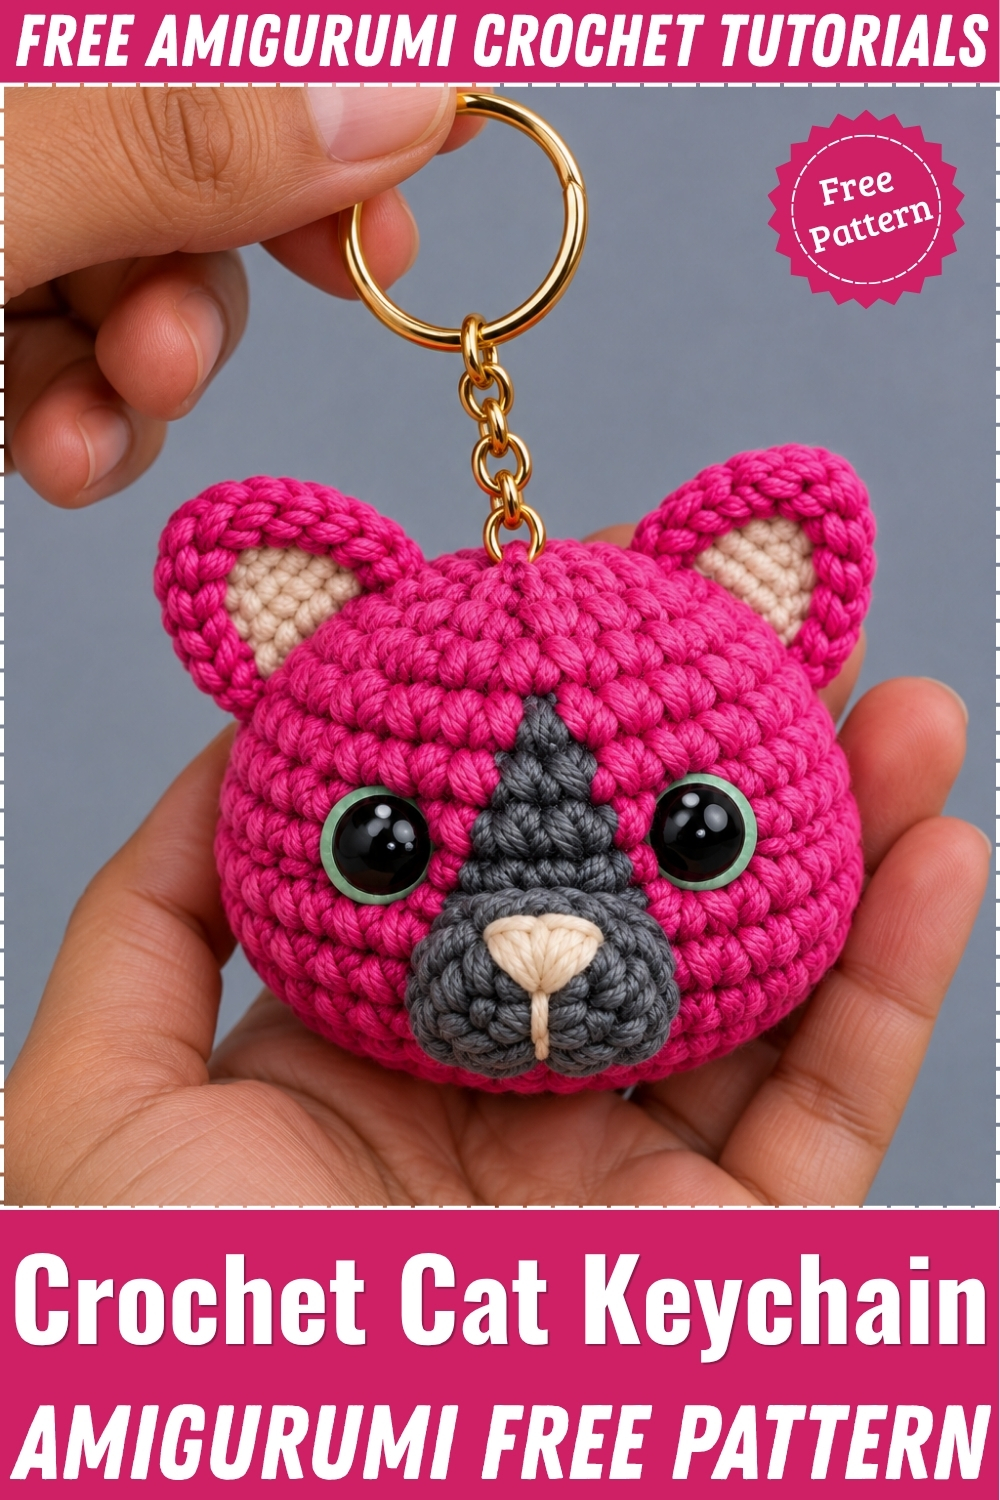
Six single crochet into a magic ring start this crochet cat keychain, and the head builds outward to 48 stitches before decreasing back down to a closed sphere. Ears come from tiny flat circles worked with triple increases, then pinched into triangles and sewn along the sides. My version skips the fabric paint completely and uses colour changes instead, so the grey snout, the grey forehead stripe, and the cream inner ears are all crocheted or sewn rather than painted. Green thread rings the black eyes. Small enough to finish in one sitting, it clips straight onto a gold split ring.
Materials and Tools
- Cotton and polyester blend yarn at a light fingering weight in hot pink for the head and ears
- Small amounts of the same yarn in medium grey for the snout and forehead stripe
- Small amounts in cream for the inner ear patches and the nose
- 2.0 mm crochet hook
- Two 6 mm black half pearl or safety eyes
- Pale green embroidery thread or fine acrylic yarn for the eye rings
- Cream embroidery yarn for the nose
- Silicone glue if you are using half pearls rather than safety eyes
- Stitch marker, scissors, tapestry needle, fiberfill stuffing
- Gold split ring with a short chain
- Fabric paint in white, yellow, orange and brown plus a fine brush, optional only if you want the painted ginger tabby finish from the original rather than the colour blocked version I made
Difficulty and Time
This is an easy make that only gets fiddly because of scale. The 2.0 mm hook and thin cotton make the stitches small, so expect the tension to matter more than the technique. In my experience the head takes about an hour, the ears and snout maybe twenty minutes, and assembly with the eye rings another twenty. Treat those as rough figures from my own making rather than a guide.
Technique Notes
Work every round in a continuous spiral with a marker moved at the start of each round. The head has no joins, so counting by marker is the only reliable method once you pass round 8.
Increase, written as INC, means two single crochet into the same stitch. INC3 means three single crochet into the same stitch, which is what gives the ears their sharp fanned corners. Decrease, written as DEC, should be an invisible decrease, worked through the front loops only of the next two stitches. Regular decreases leave visible bumps on a piece this small and you will see every one of them across rounds 13 to 18.
Tension needs to be tight. At this yarn weight, loose stitches let the stuffing show through, and white fiberfill against hot pink is very obvious. If you can see through the fabric when you hold the head to a light, go down to a 1.75 mm hook and start again.
Stuff in small pinches rather than one lump. The head is a sphere and any hard core inside it will push the shape out of round. Stuff firmly, but stop adding once the fabric stops giving.
For the colour blocked version I made, carry the pink yarn behind the grey forehead stripe rather than cutting it each round. Cut ends at this scale are hard to hide and they work loose over time on something that lives in a pocket.
Block nothing. Cotton at this gauge holds its shape from the stuffing alone.
The Pattern
Head
- Round 1: work 6 single crochet into a magic ring [6]. Pull the ring closed tightly before moving on, since a loose magic ring leaves a hole at the back of the head that only gets bigger as you stuff.
- Round 2: 6 INC [12].
- Round 3: (1 SC, 1 INC) x 6 [18].
- Round 4: 1 SC, 1 INC, (2 SC, 1 INC) x 5, 1 SC [24]. At the end of this round the piece should still lie flat like a coaster.
- Round 5: (3 SC, 1 INC) x 6 [30].
- Round 6: 30 SC around [30]. This straight round is what starts curving the disc into a dome, so do not skip it.
- Round 7: 2 SC, 1 INC, (4 SC, 1 INC) x 5, 2 SC [36].
- Rounds 8 to 10: 36 SC around for three rounds [36]. At the end of these rounds the piece should look like a shallow open bowl.
- Round 11: (5 SC, 1 INC) x 6 [42].
- Round 12: 3 SC, 1 INC, (6 SC, 1 INC) x 5, 3 SC [48]. At the end of this round you are at the widest point of the head, and everything from here shapes back inward.
- Round 13: (6 SC, 1 DEC) x 6 [42].
- Round 14: (5 SC, 1 DEC) x 6 [36].
- Round 15: (2 SC, 1 DEC) x 9 [27]. At the end of this round the opening has narrowed sharply, which is your cue that stuffing is coming up soon.
- Round 16: (1 SC, 1 DEC) x 9 [18].
- Stuff the head firmly with fiberfill now, while the opening is still wide enough to work through. Shape it round with your fingers from the outside as you go, and add a little more than feels right since cotton relaxes after a day or two.
- Round 17: (1 SC, 1 DEC) x 6 [12].
- Round 18: 6 DEC [6].
- Cut the yarn leaving a short tail, thread it through the front loops of the remaining 6 stitches, pull tight to close the hole, then pass the needle back through the head and out the other side before trimming so the end stays buried.

Ears, Make 2
- Round 1: work 6 SC into a magic ring [6].
- Round 2: (1 SC, 1 INC3) x 3 [12]. The three INC3 points are what fan the circle into a triangle later, so keep them evenly spaced.
- Cut and pull out the leftover inner tail from the magic ring before you go any further, since it is almost impossible to reach once the slip stitch round is on.
- Round 3: work 7 SL ST [7 slip stitches].
- Cut the yarn leaving a long tail for sewing, then pinch the sides together so the ear sits as a flat triangle. For the cream inner patches shown in my photo, work a matching small piece in cream or simply embroider a filled triangle onto the front of each ear with cream yarn, sizing it by eye against your finished ear rather than to a count.

Snout
- Work into a magic ring as follows: CH 2, then 6 DC, then CH 2, then SL ST into the ring to close.
- Make the closing slip stitch from back to front, which keeps the join from sitting proud on the front of the snout.
- Pull the magic ring tight and knot it off at the back.
- Leave a long tail for sewing and cut.
- My snout is worked in medium grey rather than the head colour, which is what makes the muzzle read as a separate feature in the photo.
- Nose: embroider a small triangular nose near the top centre of the snout, then bring one straight stitch down from the point toward the lower edge. Mine is cream rather than pink, and the vertical line under the triangle is what turns it into a proper cat muzzle.

Assembly
- Look at the bottom of the head and notice the hexagon shape the closing rounds leave. Pick one of the hexagon points as the centre front of the face so everything sits symmetrically.
- Sew the snout onto the face between rounds 10 and 12, keeping the nose triangle at the top.
- Sew the ears to the sides of the head between rounds 4 and 7, passing the yarn tail through the middle of the stitch first and sewing along the bottom edge where you did not work slip stitches. In my photo the ears sit fairly far apart and angle slightly outward, which suits the wide head shape.
- Place the 6 mm eyes on round 9, just outside each side of the snout. Glue half pearls with silicone glue, or push safety eyes through and wash the backs on before stuffing if you prefer.
- Embroider small accent stitches around the outer edge of each eye so they stand out against the head colour. Mine are pale green and ring the eye almost fully rather than sitting only on the outer side.
- For the grey forehead stripe in my photo, embroider a narrow tapered line in grey running up from the top of the snout toward the crown, working it in straight stitches over the finished fabric and judging the length by eye against your own head shape.
- Painting is optional. Skip it entirely for the colour blocked look I made, or use fabric paint and a fine brush to add a white blaze between the eyes, yellow, orange and brown shading across the crown and sides for a ginger tabby, and pink inner ears.
- Attach the split ring at the top centre of the head, threading it through a stitch between the ears and closing it so the head hangs level.
Yarn Substitution
- Any smooth fingering weight cotton or cotton blend works here. Mercerised cotton gives the crisp stitch definition visible in my photo and holds up to being handled daily, which matters for a keychain.
- Skip fuzzy or plied acrylic. The stitches blur at this gauge and you lose the muzzle shape entirely.
- If you use a heavier yarn, match the hook to it and expect a proportionally larger head. Every count stays identical.
Customization Ideas
- Change the head colour and keep the grey muzzle for a different cat with the same face. Black with a cream muzzle reads especially well.
- Leave off the forehead stripe for a plain faced cat, or run two short grey stripes either side of it instead.
- Swap the split ring for a lobster clasp if you want it to clip onto a bag rather than sit on keys.
- Add a small bell or a bow at the base of one ear.
- Make it without the ring at all and it becomes a small ornament or a bag charm on a longer cord, chaining until the cord reaches your preferred length.
FAQ
Can I use safety eyes instead of half pearls? Yes, but insert them before you stuff the head, since you cannot reach the backs afterwards. Half pearls glued on afterwards give you more freedom to adjust placement, which is what I did.
Why does my head look lumpy rather than round? Usually the decrease rounds. Make sure you are using an invisible decrease rather than a standard one, and stuff in small pieces instead of pushing in one ball of fiberfill.
Do I have to paint it? No. My version uses colour changes and embroidery for the muzzle, stripe, and inner ears instead, and the painting steps stay in the pattern as an option for anyone who wants the tabby effect.