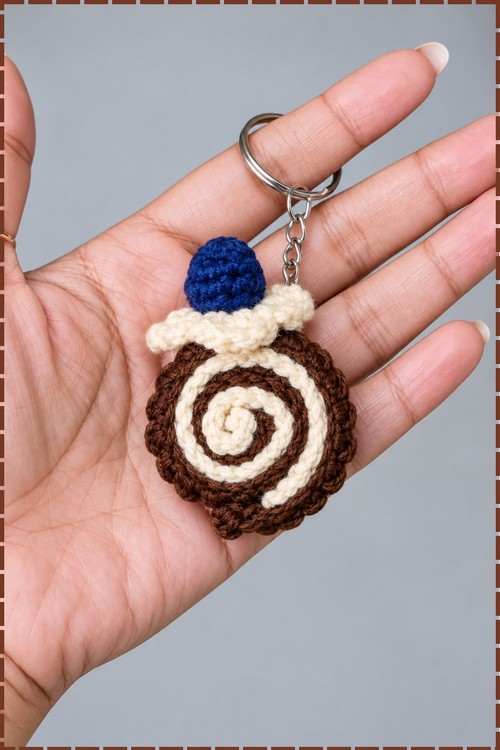
Crochet Cactus Keychain Amigurumi Pattern Free
Your keys get a tiny desert friend with the crochet cactus keychain, a ribbed dark green cactus tucked into a round terracotta brown pot. Cream blossoms brighten the top of the cactus keychain amigurumi, which clips neatly onto a backpack, pencil case or car mirror.
Ridged sides and a flower at the crown keep the Crochet Cactus Keychain Amigurumi in constant demand at craft fairs. Plant people buy it without asking questions. Makers keep coming back because the cactus keychain amigurumi works up in one sitting and sells in pairs, flowered and plain together.
Crochet Cactus Keychain Amigurumi

Back loop only stitches worked in rows are what give the cactus body its ribbed texture, and that detail is worth understanding before you start. Every row except the first goes into only the back strand of each stitch, which leaves the front strands as raised ridges across the fabric. Once you join the rectangle into a tube and turn it inside out, those ridges run vertically around the body just like the grooves on a real cactus. My version uses rich brown for the cactus body and charcoal grey for the pot, with a cream rim detail. A small pink flower sits on top.
Materials and Tools
- Brown yarn for the cactus body, 3 ply weight
- Charcoal grey yarn for the flower pot
- Cream or off white yarn for the pot rim detail
- Pink yarn for the flower
- 2.5 mm crochet hook
- Cotton fiberfill stuffing
- Yarn needle and scissors
- Keychain ring
The original pattern uses green for the cactus and cream for the pot. My version uses brown for the body and charcoal for the pot, which gives a darker, moodier look while the cream rim still pops as a contrast detail.
Difficulty and Time
This is a great beginner project. The cactus body is just rows of single crochet, which means no counting in the round and no shaping until the very end when you cinch the top and bottom. The pot rounds are straightforward too, with one increase pattern repeated each round. From my own experience, the whole piece takes roughly one and a half to two hours.
Beginner Technique Notes
- Understanding back loop only stitches is the most important skill for this project, and it is simpler than it sounds. Every stitch has two strands at the top when you look down at it: the one closer to you is the front loop, and the one further away is the back loop. When a row says back loop only, you push your hook under only that back strand and leave the front one free. Those free front strands stack up row by row into the raised ridges that give the cactus its texture.
- Here is how to check you are doing it right: hold the piece up to the light after row 3 or 4 and you should see horizontal lines of free loops running across the front of the fabric. If the surface looks smooth, you are working into both loops by mistake.
- Joining the rectangle into a tube can feel awkward the first time. Line the two short ends up carefully before you slip stitch them together so the rows match up evenly across the join. A lopsided join shows clearly on the finished body.
- Turning inside out after stuffing is what flips the ridges to the outside. Do it before you stuff, not after, since it is much harder to turn once the fiberfill is in.
- The magic ring used for the pot base is just a loop you make with your yarn tail before working into it. Pull the tail firmly once you have worked all the stitches in and the centre hole closes completely.
THE PATTERN
Cactus Body (Brown Yarn)
- Foundation: With brown yarn, make a slip knot and chain (ch) 15.
- Row 1: Starting in the 2nd chain from the hook, work 14 single crochet (sc) across, then ch 1 and turn [14 sts].
- Row 2: Work 14 sc into the back loop only (BLO) of each stitch across, then ch 1 and turn [14 sts]. Working BLO here is what builds the ribbed texture on the outside of the finished body.
- Rows 3 to 20: Repeat row 2 for a total of 20 rows, working 14 BLO sc per row and chaining 1 to turn at the end of each [14 sts per row]. By row 20 you have a ribbed rectangle roughly twice as long as it is wide.
- Joining into a tube: Fold the short ends of the rectangle together so the ridges face inward, then work 14 slip stitches (sl st) along the edges to join them into a hollow cylinder. Fasten off leaving a long brown tail. Keep the join firm and even, since a gap here is hard to hide later.
- Closing the top and stuffing: Thread the yarn needle with the long tail and weave it through all the stitches along the top edge of the tube, then pull tightly to cinch the top closed and secure with a knot. Turn the tube inside out so the ribbed ridges face outward, stuff firmly with fiberfill, then weave through the bottom edge stitches and cinch the bottom closed the same way. Turning inside out before stuffing is far easier than trying to do it after.
Flower Pot (Charcoal Grey Yarn)
- Round 1: Make a magic ring (mr), ch 1, work 6 sc into the ring, then join to the first sc with a sl st [6 sts].
- Round 2: Ch 1, work 2 sc in every stitch around, join with a sl st [12 sts].
- Round 3: Ch 1, work (1 sc in the next stitch, 2 sc in the following stitch) and repeat that sequence around, join with a sl st [18 sts].
- Round 4: Ch 1, work (1 sc in the next 2 stitches, 2 sc in the following stitch) and repeat that sequence around, join with a sl st [24 sts].
- Round 5: Ch 1, work (1 sc in the next 3 stitches, 2 sc in the following stitch) and repeat that sequence around, join with a sl st [30 sts]. The base should now lie flat without any curling or cupping at the edges.
- Round 6: Ch 1, work 30 BLO sc around to create the bottom edge ridge, join with a sl st [30 sts]. Those unworked front loops will be picked up later to form the rim detail, so do not skip this round.
- Rounds 7 to 11: Ch 1, work 30 sc in each stitch around for 5 continuous rounds, joining each with a sl st [30 sts each round]. These five rounds build the walls of the pot.
- Round 12: Ch 1, work (1 sc in the next 2 stitches, 1 decrease) and repeat around, join with a sl st. A decrease is 2 sc worked together into one stitch.
- Round 13: Ch 1, work (1 sc in the next stitch, 1 decrease) and repeat around, join with a sl st.
- Stuff the pot firmly with fiberfill before working the final closing round. Getting the stuffing in at this point is much easier than trying to push it through a smaller opening.
- Round 14: Work decreases continuously around to close the top opening, fasten off and weave in the loose ends.
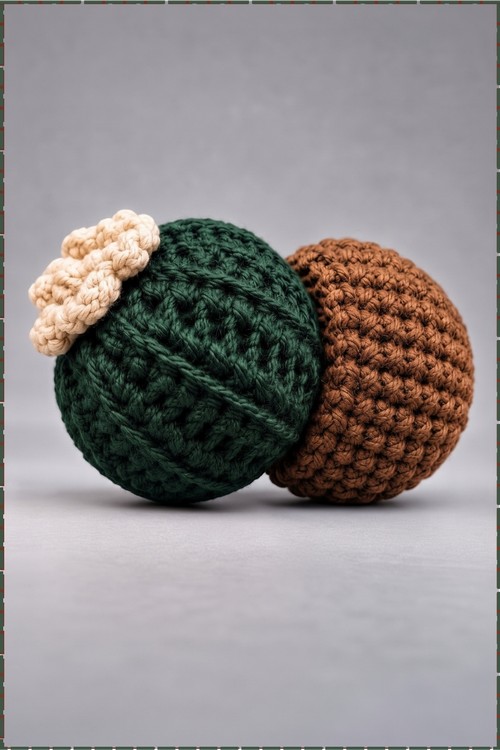
- Round 15 (Pot Rim Detail): Reattach cream yarn to the unworked front loops left behind from round 6. Work (ch 1, sl st) in every loop around the outer edge to form the decorative rim, then fasten off. My photo shows this cream ridge sitting cleanly around the widest point of the brown cactus body where it meets the grey pot.
Rounds 6 to 15

Pink Flower
- Flower: With pink yarn, form a magic ring.
- Petal pattern (repeat 5 times): Into the ring, work ch 2, 1 double crochet (dc), ch 2, then sl st.
- Pull the ring tail tightly to close the centre hole, fasten off leaving a tail for sewing. The five petals fan outward from the centre and the flower sits flat on the top of the cactus body.

Assembly
- Using brown yarn and a tapestry needle, sew the bottom of the brown cactus body securely onto the top centre of the charcoal pot. Work all the way around the join so the cactus does not tilt.
- Sew the pink flower onto the top centre of the cactus using its yarn tail.
- Attach the keychain ring to the top of the cactus or through the flower centre.
Tips and Troubleshooting
- Count your rows on the cactus body as you go, not at the end. Twenty rows looks like a lot, but each one is fast, and losing count means unravelling to find where you went wrong.
- Do not pull the cinch too hard at the bottom of the cactus body. A tight cinch can pucker the base and stop the body from sitting flat on the pot.
- Press the joined edge of the tube flat with your fingers before slip stitching it shut. A misaligned join means the ridges spiral instead of running straight up the body.
- If the pot walls flare outward, the tension on rounds 7 to 11 is too loose. Tighten your grip on the yarn and try again from round 7.
Yarn Substitution
Any smooth 3 ply or light fingering weight works here. Cotton is a good choice because it holds the back loop ridges crisply and the pot walls stay upright without blocking. A wool blend also works well. Avoid fluffy or brushed yarns, since the BLO ribbing disappears into the halo completely.

Customisation Ideas
- Use green for the cactus and cream or terracotta for the pot to make the classic colourway
- Try a dusty sage green body and a pink pot for a softer look
- Swap the pink flower for a yellow or white version
- Make a set of three in different body and pot colour combinations for a gift
- Add tiny white stitches to the cactus body to suggest spines
FAQ
What does back loop only mean and how do I find the back loop? Every stitch has two strands across the top. The back loop is the strand sitting furthest from you. Push your hook under that strand only and leave the front one free. After a few rows you will see the free front strands lining up as neat ridges across the fabric.
Why do I turn inside out after joining the tube? The BLO rows leave the free front loops as ridges on the inside of the tube. Turning inside out flips those ridges to the outer surface so they become the cactus texture. If you skip this step the body looks smooth instead of ribbed.
My cactus body looks lumpy after stuffing. What went wrong? Usually means the fiberfill was added in one large clump. Remove it, break the stuffing into small pieces, and push them in gradually, pressing toward the sides as you go. Small handfuls give an even, round shape.
Can I make the pot without a magic ring? Yes. Start with a chain 2, then work 6 sc into the second chain from the hook and pull the tail to close. It leaves a slightly larger centre hole than a magic ring, but it works for this size piece.
How do I stop the flower from drooping to one side? Sew through at least two petals and two stitches of the cactus top rather than anchoring only the centre knot. A wider sewing footprint keeps the flower upright and flat.
You now have everything to make a complete crochet cactus amigurumi keychain from start to finish.