Crochet Octopus Amigurumi Free Pattern For Beginners – Plush Stuffed Octopus
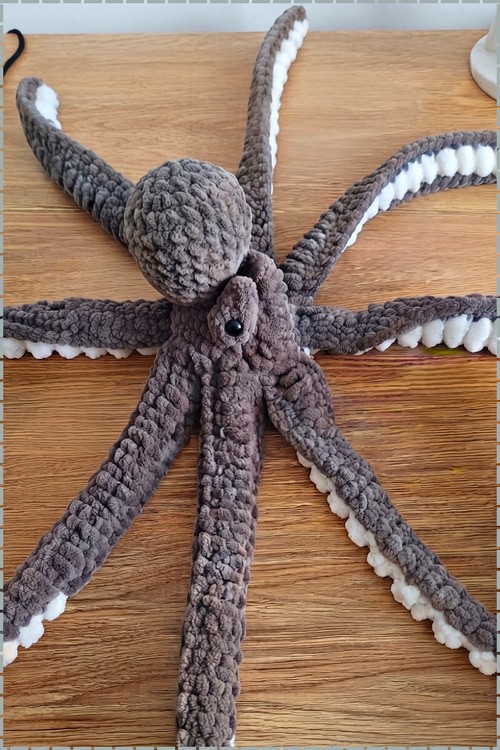
Anyone who has seen this crochet octopus amigurumi across a room asks to hold it. Bobble suckers run down all eight arms, and variegated chenille does the shading without a single colour change.
White bobbles run down the underside of each arm on this crochet octopus amigurumi free pattern for beginners plush stuffed octopus, worked in as you go so the suckers are part of the fabric rather than sewn on. Eight arms attach around a domed grey-brown head in variegated chenille. Each arm tapers from a thick base to a point. Stuff the arm bases firmly and leave the tips soft, since evenly stuffed arms stand out stiffly instead of curling.
Crochet Octopus Amigurumi
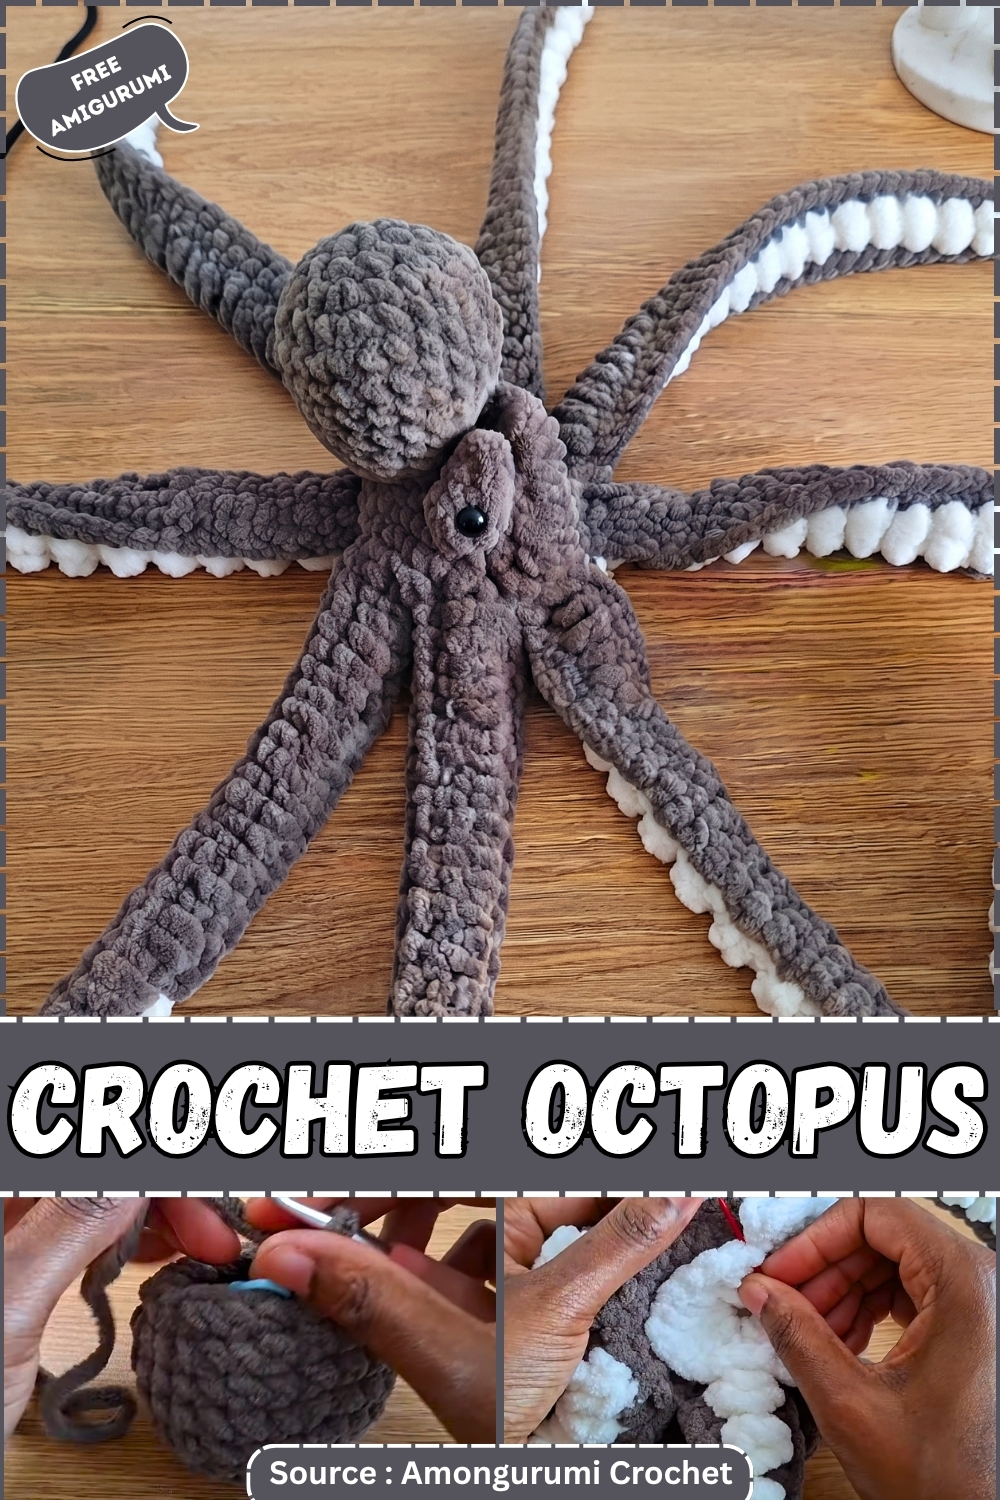
If this is your first amigurumi, the octopus is a genuinely good starting point. The head is a single sphere, the most fundamental amigurumi shape — and the tentacles are made by chaining and then working back down the chain, which teaches you how crochet fabric builds up before you have to think about shaping. There are no separate limbs to sew on in the traditional sense, no colour changes mid-round, and no flat pieces to block. The curling happens automatically from the stitch count. Most beginners finish a first octopus in one long session and want to make another immediately.
Before You Start: Key Techniques Explained
The Magic Ring
The magic ring is how almost every amigurumi piece begins. It sounds complicated and is not. Make a loop with your yarn, cross the tail end over the working yarn, insert your hook through the loop from front to back, pull up a loop of working yarn, chain 1 to secure, and then work your round 1 stitches into the centre of the ring. When round 1 is done, pull the tail end to close the ring tight. If it comes out loose, pull the tail again. Once the ring is tight, you can never un-pull it, so do it gradually.
Continuous Rounds
This pattern is worked in a spiral — no joining slip stitches, no chains at the start of each round. The rounds just keep going. This is why a stitch marker is not optional. Place it in the first stitch of every new round and move it up every time you complete a round. Without it, you will lose your place by round 4 and not realise until round 8, which is exactly as frustrating as it sounds.
Single Crochet, Increase and Decrease
A single crochet is one stitch: insert hook, pull up a loop, pull through both loops. An increase is two single crochets worked into the same stitch — that is all it is. A decrease (sometimes called sc2tog) is working two stitches together as one: insert hook into the first stitch, pull up a loop, insert hook into the next stitch, pull up a second loop, then pull the working yarn through all three loops on the hook. Practice this on a small swatch before you start the head. It saves confusion mid-pattern.
Closing a Sphere
When the final round is done, cut the yarn leaving a tail of about 15cm. Thread the tail through a tapestry needle. Insert the needle through the front loop only of each remaining stitch all the way around, then pull the tail to cinch the hole closed. Knot it, then use the needle to bury the tail inside the stuffed body before trimming.
Countdown Before You Start
- One octopus, start to finish: two to three hours as a first make. One to one and a half hours once the pattern is in memory.
- If you are making several as gifts: budget two hours each and give yourself at least a week per batch of four.
- Latest start for one: three days out if you can give it two hours a session.
- The tentacles go faster than expected. The head takes the most time.
Pieces You Will Make
- Head and body: one, worked as a continuous sphere
- Tentacles: eight, worked directly onto the base of the head without sewing
There are no separate pieces to seam together on this design. Both the head and the tentacles are part of one connected make.
What You Will Need
- Chenille or velvet yarn, or any yarn you are comfortable with. Plush yarn is forgiving on tension and covers stitch irregularities, which is why it is recommended for beginners. A 4-ply or DK weight smooth yarn also works and makes it easier to see and count individual stitches.
- Crochet hook in 4.0mm to 5.0mm for plush yarn, or the size recommended on your yarn label.
- A pair of safety eyes in 10mm to 12mm. Larger yarn calls for larger eyes.
- Polyester fibrefill.
- One stitch marker. This is required, not optional.
- Tapestry needle.
- Scissors.
Abbreviations
- mr — magic ring
- sc — single crochet
- inc — increase: 2 sc in the same stitch
- dec — decrease: 2 sc worked together as one
- sl st — slip stitch
- ch — chain
- st / sts — stitch / stitches
Safety Eyes: When and How
Eyes go in between rounds 9 and 10 of the head, while the opening is still wide enough to reach in and seat the backing washer properly. This is the only window. After round 13 the opening is narrowing and after round 15 it is too small.
- Before inserting, mark both eye positions with pins. Space them six to seven stitches apart on what will be the front of the face. Step back and look at the whole piece before pushing the posts through.
- Push each safety eye post through from outside to inside. Reach inside with your fingers and press the washer onto the post until it clicks into place. If the washer moves when you push it, it has not clicked. Press again.
- For a gift going to a child under three, or for a party favour or classroom toy: do not use safety eyes. Embroider instead. Thread black yarn through a tapestry needle and work a tight satin stitch or a wrapped French knot in the same position. Embroidered eyes cannot be pulled out.
The Pattern
Head and Body (Make 1)

Work in continuous rounds. Move your stitch marker at the start of every round.
- Magic ring. Work 6 sc into the ring, then pull the tail to close it tight. (6)
- Round 2: 2 sc in every st around. (12)
- Round 3: [1 sc, inc] repeat around. (18)
- Round 4: [2 sc, inc] repeat around. (24)
- Round 5: [3 sc, inc] repeat around. (30)
- Round 6: [4 sc, inc] repeat around. (36) Checkpoint: a flat disc, about the width of a large biscuit. It should lie completely flat with no rippling at the edges. If the edge is curling up, your tension may be slightly tight — this often corrects itself as the sides begin to rise in the next rounds.
- Rounds 7 to 12: 1 sc in each st around. (36) Work all six of these rounds straight with no increases or decreases. Checkpoint: by round 12 the piece should look like a deep round bowl — clearly three-dimensional, sides standing up, with a wide opening at the top. The front of the face, where the eyes will go, is the side that faces you.
- Place safety eyes now, between rounds 9 and 10 of the fabric, six to seven stitches apart. The stitch rows are visible as horizontal ridges — count up from the base to find the right position. See the safety eyes section above.
- Round 13: [4 sc, dec] repeat around. (30) Checkpoint: the opening is noticeably smaller after this round. The sphere shape is beginning to appear.

- Round 14: [3 sc, dec] repeat around. (24)
- Round 15: [2 sc, dec] repeat around. (18)
- Round 16: [1 sc, dec] repeat around. (12)
- Stuff the head firmly with fibrefill now, before the next round closes the opening further. Push stuffing in gradually and fill right to the top so the head holds a fully round shape. A head that is under-stuffed will dent when the tentacles pull on the base.
- Round 17: 6 dec. (6) Checkpoint: the head is almost closed. The remaining hole should be just large enough to fit your needle through.
- Fasten off leaving a tail of about 15cm. Thread through a tapestry needle, weave through the front loops of the remaining 6 stitches, pull tight to close the hole, knot, and bury the tail inside the body.
Tentacles (Make 8, worked directly onto the body)

Do not cut the yarn after the head if you plan to work the first tentacle immediately. The tentacles attach at the base edge of the body — the lowest round.
For each tentacle:
- Join yarn to a stitch on the base edge of the body with a sl st (or continue from the body yarn if not cut).
- Ch 20 to 25.
- Starting in the 2nd ch from the hook, work 2 sc in each ch all the way back to the body. The extra stitches per chain force the yarn to twist and spiral into a curl. Checkpoint: as you work back along the chain, the tentacle should be curling visibly. If it is lying flat, check that you are working 2 sc into every chain and not just 1.
- Anchor the tentacle to the next stitch on the body base with a sl st.
- Repeat from the chain step for each of the remaining seven tentacles, working evenly around the base.

Space the eight tentacles evenly around the base edge. On a 36-stitch body base, aim for roughly four to five stitches between each tentacle anchor point. [
The Character Dial
The octopus has enough personality in its shape that even small changes to colour and face read as a completely different toy.
- Toward sweet and friendly. Work the head in a pastel — soft lilac, mint, blush — and embroider two small oval cheeks in a slightly deeper shade of the same colour, or in pale pink, placed just below and outside the eyes. Set the eyes close together and slightly low on the face, which gives the octopus a wide-eyed expression. Work the tentacles in the same colour as the head. The curl of the tentacles is what reads as playful, so go for the longer chain length (ch25) so they bounce.
- Toward graphic and bold. A single saturated colour throughout — cobalt, coral, deep teal — with no cheek embroidery and no face details beyond the eyes. Eyes wide apart and centred rather than low. Tentacles in the same colour, worked to a medium length. This version sits on a shelf and reads as a designed object rather than a toy. Three in a single colourway at different sizes, if you adjust the starting round count, look intentional as a grouping.
Colourways
- Soft Lilac. A single pastel purple throughout. The most requested colourway for this design, by a significant margin.
- Deep Teal and Ivory. Teal body and head, ivory tentacles in a contrasting yarn. The contrast makes the curl visible from a distance.
- Coral and Peach. Warm coral head, slightly lighter peach tentacles. Summer-adjacent and works in coastal or kitchen display settings.
- Charcoal. All charcoal throughout, eyes in white. The most grown-up version. Sits on a desk or bookshelf without reading as a children’s toy.
Display Ideas
- On a desk beside a monitor, tentacles hanging over the edge of the surface.
- In a shallow bowl alongside smooth river stones and dried botanicals.
- Hanging from a ceiling hook by a length of yarn threaded through the head top, tentacles dangling — which is the most common display and takes about thirty seconds to set up.
- Grouped in a clear jar with several others in different colourways.
Stuffing Guide
- Head: firm. This is the piece that determines the whole silhouette. Under-stuffed heads sag at the base where the tentacles attach, and the body develops a pinched waist shape that was not in the design.
- Stuff before round 17. The opening at six stitches is too small to push fibrefill through cleanly.
- Do not stuff the tentacles. They are meant to be soft and move freely.
After the Season
The tentacles are the most vulnerable part in storage. They curl and tangle around each other and around anything else in the storage container. Keep the octopus in a cotton bag or a shoebox on its own rather than in a bin with other toys. If the tentacles have compressed and lost their curl after storage, hold them over gentle steam for a few seconds — this works especially well on chenille yarn — then let them dry in the curled position.
Quick Answers
- I have never made a magic ring. Is there an easier way to start? Yes. Chain 2, then work your round 1 stitches into the first chain. Pull the tail to tighten. It is slightly less neat than a magic ring but produces a perfectly usable result for a first project.
- My tentacles are not curling — they are just lying flat. What am I doing wrong? You are probably working one stitch per chain rather than two. Go back and check: every single chain on the return should get 2 sc. It feels like a lot of stitches and it is supposed to. That density is what forces the curl.
- Can I use a different yarn weight? Any weight works. Heavier yarn produces a bigger, squishier octopus. Lighter yarn produces a firmer, smaller one. Keep the hook matched to the yarn rather than to the pattern’s suggested size.
- How do I know when I have stuffed it enough? Press the head firmly between your palms. If it gives more than a centimetre, it needs more stuffing. The finished head should feel like a tennis ball — uniformly firm with no soft spots. The base, where the tentacles attach, is where under-stuffing shows up first.
- What if my stitch count is slightly off on one round? A stitch or two off in the straight rounds will not noticeably affect the finished shape. In the decrease rounds, being off by one stitch will mean the decrease pattern does not divide evenly — add or remove a single plain sc at the start of the round to correct it, then continue the decrease sequence as written. Do not panic.