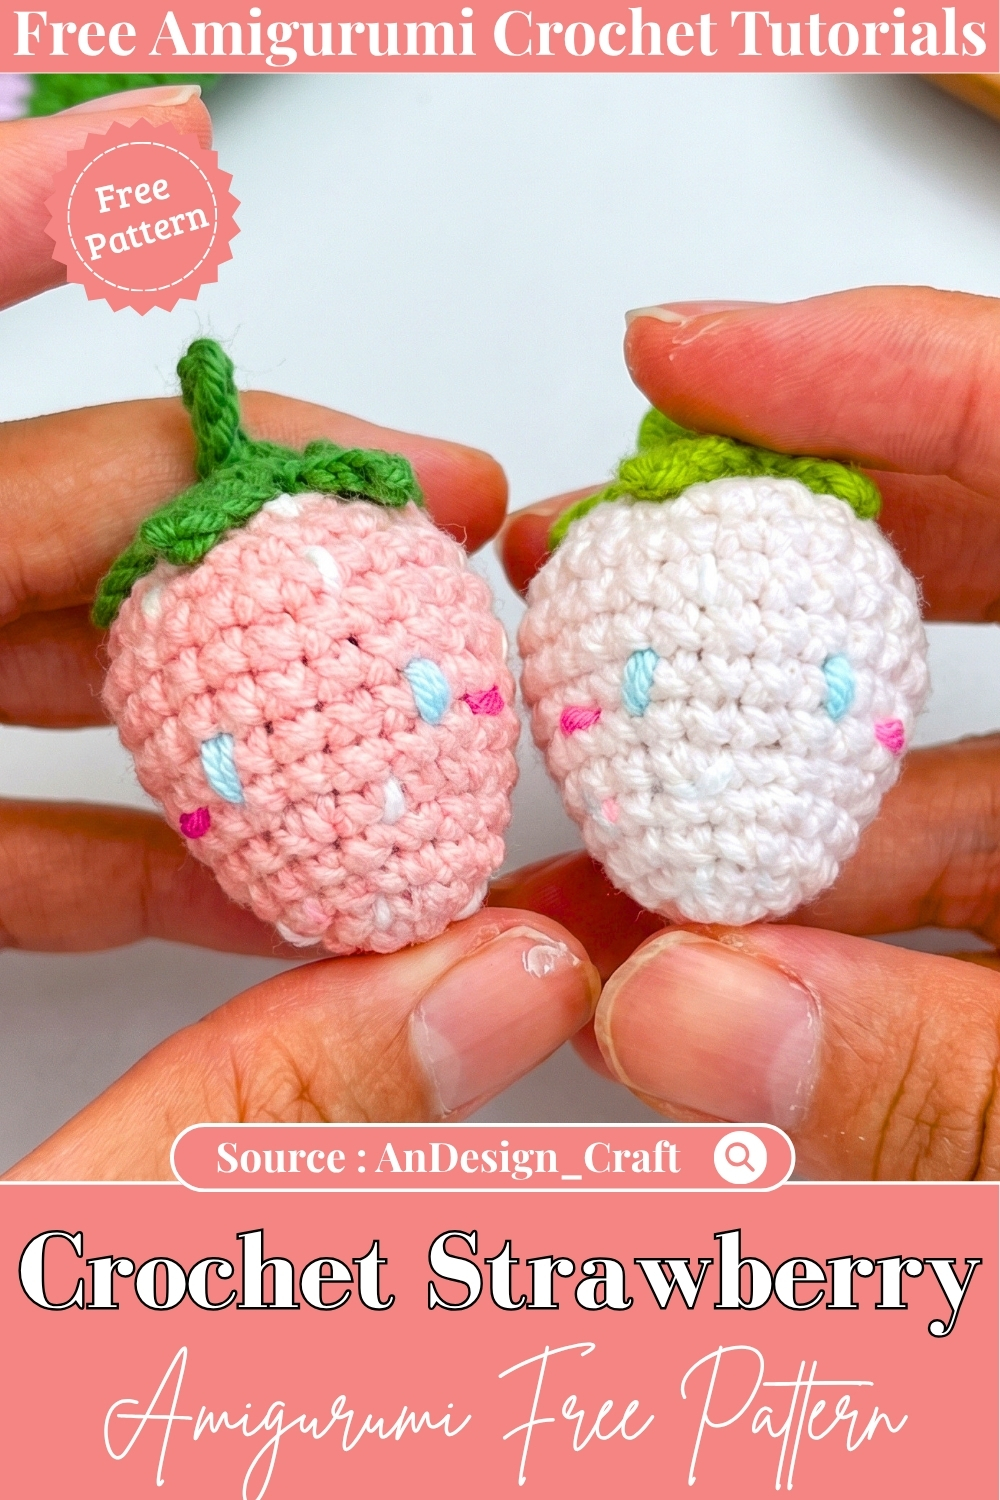
Crochet Strawberry Amigurumi Pattern Free – Mini Stuffed Strawberry
Pop a crochet strawberry amigurumi into a lunchbox and it comes home in a pocket. Seeds go on as scattered single stitches, so no two berries in the bowl come out matching.
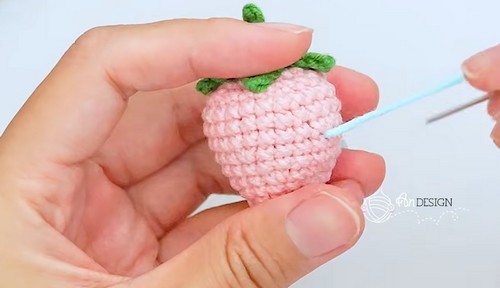
Seeds are single stitches scattered across the body on this crochet strawberry amigurumi pattern free mini stuffed strawberry, worked in white or pale blue against pink or cream so they sit flat rather than raised. The body is a rounded cone narrowing at the base with a green five-point calyx and a short stem on top. Two tiny pink cheeks stitch on at the front. Scatter the seeds unevenly, since a regular grid turns them into a pattern rather than markings.
Crochet Strawberry Amigurumi
Someone needs a dozen of these by the weekend. That is the most common way this pattern gets requested, and it is a reasonable ask because the strawberry is genuinely fast once the shape is in muscle memory. A single body is twelve rounds plus closing. The leaves take about ten minutes. Seeds are surface embroidery, which goes quickly across a batch once you settle into the stitch rhythm. The chocolate-dipped variation built into the pattern means you can alternate colourways across a set of twelve without learning a new shape. Four red, four chocolate-dipped, four in a lighter pink runs as a combination and looks intentional on a display.
Countdown Before You Start
- One strawberry, start to finish: sixty to ninety minutes, including leaves, stem and seed embroidery.
- A batch of twelve: roughly fifteen to eighteen hours of hooking. Budget three days of focused work or two weeks at an hour a night.
- Latest start for twelve: ten days out at two hours a day. Anything tighter and the embroidery stage becomes the bottleneck.
- The seeds are the slowest part per unit, not the body. Factor that in before committing to a large batch deadline.
Pieces Per Strawberry
- Strawberry body: one
- Leaf and stem assembly: one (five leaves worked from a central magic ring, plus a four-chain stem)
That is two pieces to make per strawberry. Twelve strawberries is twenty-four pieces total before assembly.
What You Will Need
- 4-ply cotton yarn in strawberry red or pink for the body.
- Light pink yarn for the tip section (rounds 11 onward).
- Green yarn for the leaves.
- White or yellow yarn for the embroidered seeds.
- Brown yarn for the chocolate-dipped variation, optional.
- 2.5mm crochet hook.
- Polyester fibrefill.
- Yarn needle.
- Stitch marker.
- Scissors.
The Pattern
Each round is closed with a sl st into the first stitch, then ch1 to begin the next round. The ch1 does not count as a stitch.
Strawberry Body (Make 1 per strawberry)
- Magic ring in main colour (red or pink). Work 5 sc into the ring, pull tight, sl st to close. (5)
- Round 1: ch1, 2 sc in every st around. (10)
- Round 2: ch1, [1 sc, inc] repeat 5 times. (15)
- Round 3: ch1, 1 sc in every st around. (15) Checkpoint: a small flat disc, about the size of a large button. Should lie completely flat. If it is cupping upward, tension is too tight.
- Round 4: ch1, [inc, 2 sc] repeat 5 times. (20)
- Round 5: ch1, 1 sc in every st around. (20)
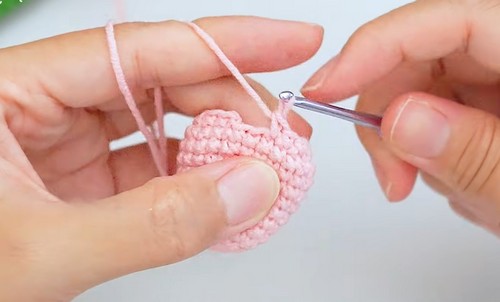
- Round 6: ch1, [4 sc, inc] repeat 4 times. (24) Checkpoint: a wider flat disc, starting to show the rounded strawberry width. The face embroidery — eyes and cheeks — will sit around this round, so this is the point to note placement before the body closes up.
- Rounds 7 to 9: ch1, 1 sc in every st around. (24) Checkpoint: the sides are now rising and the piece should look like a shallow open bowl. If you turn it upside down, the point-end shape of the strawberry is already visible.
- Round 10: ch1, [2 sc, invisible dec] repeat 6 times. (18)
- Round 11: Switch to light pink yarn. ch1, [invisible dec, 1 sc] repeat 6 times. (12) Checkpoint: the tip is narrowing noticeably. The colour change here creates the lighter bottom of the strawberry. If the colour change line is uneven, it will show — work the switch stitch carefully.
- Stuff the body firmly with polyester fibrefill now.
- Round 12: ch1, 6 invisible dec. (6)
- Fasten off leaving a long tail. Thread the tail through the remaining front loops, pull tight to close, and secure.
Optional Chocolate-Dipped Variation
- Work the magic ring and rounds 1 to 4 in brown yarn.
- Switch to red or pink at round 5 and continue as above.
- This creates a brown base with a red body, reading as a chocolate-dipped strawberry. No other changes to the round sequence.
Leaves and Stem (Make 1 per strawberry)
Leaves
- Magic ring in green yarn. Work 5 sc into the ring, pull tight, sl st to close. (5)
- Make 5 leaves, one from each stitch of the ring. For each leaf:
- Ch4.
- Skip the first ch, insert hook into the back bump of the 2nd ch from hook, sl st.
- 1 sc in the next ch.
- 1 hdc in the last ch.
- Insert hook back into the corresponding stitch of the magic ring centre and sl st to anchor.
- Repeat from ch4 for each of the remaining 4 stitches until 5 leaves are complete.
- Shape each leaf gently with your fingers after completing all five.
- Fasten off with a long tail for sewing.
Stem
- Ch4.
- Skip the first ch from hook, then 3 sl st down the remaining chains.
- Fasten off with a long tail.
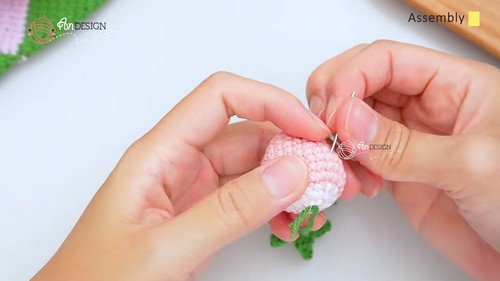
- Sew the stem to the centre top of the leaf assembly, then sew the entire leaf-and-stem unit to the top of the strawberry body.
Face and Seeds (Optional but standard for this design)
- Eyes: embroider around round 6, using a few stitches per eye and spacing them evenly across the widest part of the body. The source notes placement around round 6 but does not specify a stitch count for the eye itself — work to the size that suits your yarn weight.
- Cheeks: small pink blush stitches placed just below the eye positions.
- Seeds: using white or yellow yarn threaded through the needle, work small evenly spaced vertical stitches across the body surface to represent seeds. Space them by eye. On a 2.5mm hook with 4-ply cotton, four to six seeds per visible face of the strawberry looks proportionate.
Assembly-Line Running Order

For a batch of twelve, work through all bodies before touching a single leaf. Switching between piece types mid-batch costs more time than it saves.
- All twelve bodies. Work bodies only, round 1 through round 10, leaving each open at the top. Stack them as you go.
- Colour switch and close. Work round 11 (the pink tip switch) and round 12 (closing) on all twelve bodies in sequence. Stuff each one before closing.
- All twelve leaf assemblies. Make all twelve magic ring centres first, then work the five leaves on each. Stem each one.
- All twelve leaf-and-stem attachments. Sew every leaf assembly onto its body in a single session so your needle tension stays consistent.
- Face embroidery on all twelve. Eyes across all twelve, then cheeks, then seeds. Doing all seeds last means you settle into the stitch rhythm and the later ones look better than the first few, so start with the bodies that will be least visible in the final display.
- Time per unit once the pattern is learned: sixty minutes per complete strawberry including leaves and seeds, accounting for the pace drop that comes with scale. Fifteen units of sixty minutes is fifteen hours — budget sixteen to account for thread management and tail weaving.
- Yarn for twelve. With 4-ply cotton at 2.5mm, expect approximately eight to ten grams of red yarn per body and two grams of green per leaf set. For twelve strawberries: roughly 130g of red, 25g of green, a small amount of light pink and seed colour. Buy an extra 20g of each main colour for tension differences across a batch.
The Character Dial
The strawberry is summer-sweet by default, but it does not have to stay there.
- Toward maximally sweet. Bright candy-red body, the pink tip as light as your yarn goes, green leaves in a saturated grass green. Embroider the eyes large and close together, which reads as wide-eyed rather than alert. Add the cheeks as a solid filled oval rather than a few stitches. Lean the seed colour toward cream rather than white. Pile three of these in a small bowl and the effect is unmistakable.
- Toward something more considered. Muted berry-red body, omit the pink tip and close the whole body in the same colour, or switch to a deep wine for the last two rounds instead of pink. Skip the eyes entirely and let the seeds carry the face. Work seeds in a very dark brown or near-black rather than white. Green leaves in a forest or olive shade rather than grass green. A bowl of these without eyes reads as a botanical rather than a toy.
- The embroidered seeds are the detail that most people rush and then regret. On a 2.5mm hook they are genuinely small stitches, and spacing them evenly takes longer per unit than expected. On a batch of twelve, the first three will look spotty and the last three will look right. Plan for that.
Safety Eyes and Embroidery Timing
Eyes go on before the body is closed, placed around round 6 while there is still room to reach inside and see the placement clearly. After round 12 closes, you are embroidering by feel on a stuffed shape, which is harder.
- If using embroidered eyes rather than safety eyes, they can go on at any point after the body is closed, which is actually easier for embroidery.
- Skip all face embroidery for children under three, or for anything going into a party bag where you will not be supervising. A strawberry without a face is still a strawberry.
- Safety eyes are not recommended for a batch destined for young children. Embroider instead.
Stuffing Guide
- Body: firm. This piece needs to hold a rounded point-down teardrop shape under its own weight. An under-stuffed strawberry collapses at the sides within a week of sitting on a shelf.
- Stuff before round 12, not after. The opening at six stitches is too small to push fibrefill through cleanly.
- Do not over-stuff the tip area. The light pink rounds narrow the shape and too much stuffing there will resist the decreases and prevent a neat close.
Colourways
- Classic Red. Bright red body, pale pink tip, grass green leaves, white seeds. The standard, and still the most photographed.
- Chocolate Dipped. Brown base to round 4, red body above, green leaves. The built-in variation that requires no extra learning.
- Wild Strawberry. Deep berry or burgundy body, the same colour through all rounds with no tip switch. Dark green leaves, cream seeds. The grown-up version.
- Candy Pink. All-over bubblegum pink body, no colour switch, mint green leaves, yellow seeds. The version that photographs best on white surfaces and sells fastest at summer markets.
Display Ideas
- Piled in a white ceramic bowl as a fruit bowl filler that does not rot.
- Lined along a tiered tray with a few real candles or small jars.
- Used as gift toppers tied to a wrapped present with a ribbon through the stem.
After the Season
Cotton holds colour and shape better than acrylic in storage. Lay them flat in a cotton bag or a pillowcase, not loose in a bin where they will compress under other things. The seeds and face embroidery are the most vulnerable parts — a strawberry stored with something heavy on top will come out with flattened embroidery that is difficult to lift back. Store singly or in a shallow container where nothing stacks on top.
Quick Answers
- Can I use a larger hook to go faster? You can use a 3.0mm and the make time drops, but the fabric opens up and stuffing shows through. For a display piece that is not for children, a slightly open fabric is fine. For anything that will be handled, stick to 2.5mm.
- Do the seeds have to be embroidered or can I use a variegated yarn? A speckled or variegated red yarn skips the embroidery step and reads as seeds at a distance. Up close it does not look the same, but for a batch of twelve where time is tight, a speckled yarn is a legitimate shortcut.
- How do I keep the leaves from curling? The five-leaf magic ring piece curls naturally until it is sewn down onto the body, at which point the body tension holds it flat. If leaves curl before assembly, dampen them and pin them flat to dry. Once sewn, they stay flat.