Captain America Amigurumi Free Crochet Pattern
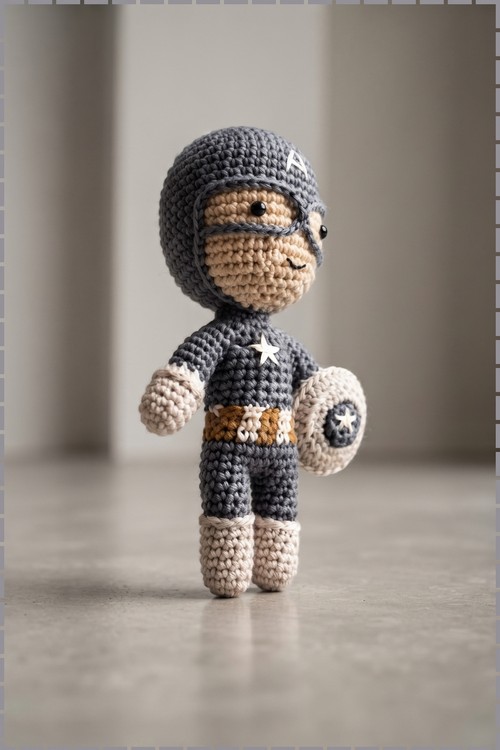
Once round twelve splits into front loops only, the grey helmet and beige face of this Captain America amigurumi grow together with no seam. Worsted yarn on a hook one size below the label keeps the fabric tight, and white stars mark the chest and the clip-in shield.
Shield in hand and chin up, the Crochet Captain America Amigurumi carries himself like he is guarding the whole shelf. Stubborn little posture. The embroidered smile keeps him friendly instead of serious, which is what makes this Captain America amigurumi read as brave rather than stiff.
Crochet Captain America Amigurumi
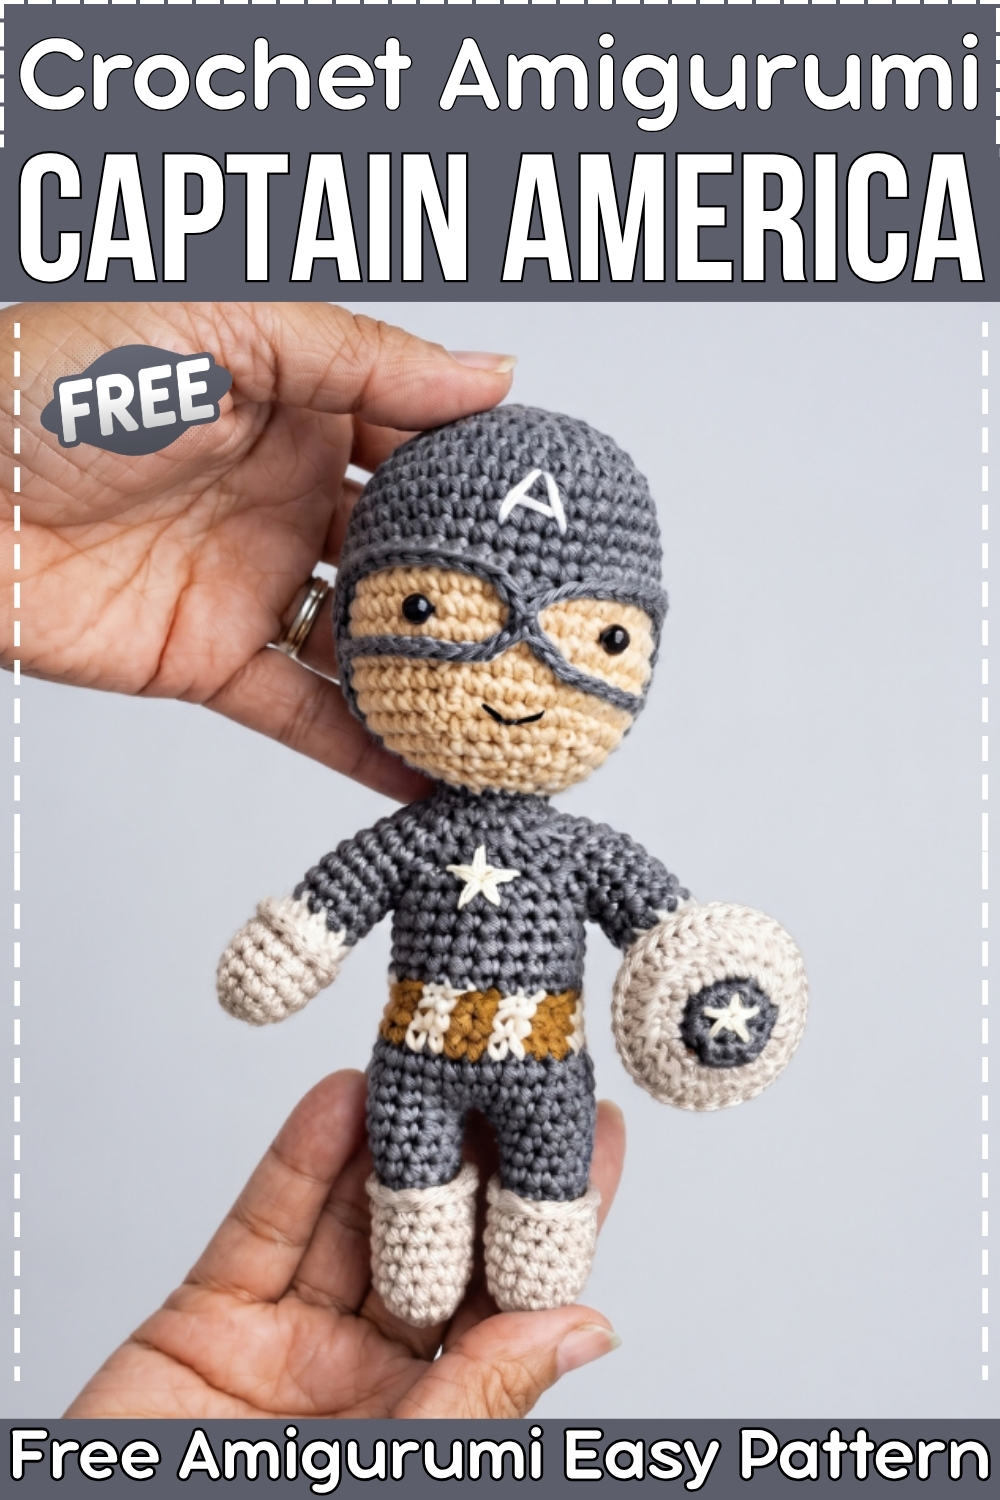
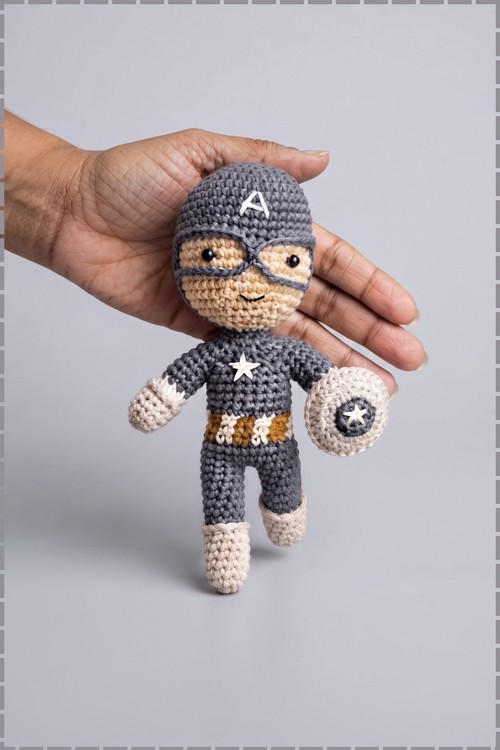
Working the helmet and face in one piece is what makes this little hero come together so cleanly. My crochet Captain America amigurumi uses a front loop only split on round twelve, so the grey helmet and the skin coloured face grow side by side in the same rounds with no sewn seam anywhere. Grey replaced the usual blue across my whole doll, and cream gloves, cream boots and a mustard belt keep it looking softer than the comic version. Safety eyes sit under a chained mask, and a tiny shield clips into one hand. Everything here matches the doll in my photo.
Materials and Tools
- Grey worsted weight yarn for the helmet, body, legs and mask details
- Skin or beige yarn for the face
- Cream or off white yarn for the gloves, boots and the outer shield ring
- Mustard or golden yarn for the belt
- White yarn for the chest star, the helmet letter and the shield star
- Crochet hook to suit your yarn, one size smaller than the label suggests
- Two safety eyes
- Fiberfill stuffing
- Yarn needle and scissors
- Stitch marker
- Optional keychain clip and small split ring if you want to hang the doll, as I did at the top of the helmet
Difficulty and Time
From my own making, this sits at a confident beginner level. The only part that needs patience is the front loop only colour split on round twelve, since it looks wrong until you work the second colour back into the leftover loops. My doll took me roughly an evening and a half in total, which is around four to five hours spread over two sittings, including the shield and all the embroidery.
Beginner Technique Notes
- Work in continuous rounds unless a round tells you to join, and move your stitch marker up every single round so the count never drifts
- Front loop only means you work under the front strand of the stitch only, leaving the back strand free for the second colour to use later
- Back loop only means the opposite, and on the shield it is what creates those crisp ridged rings between colours
- Carry the unused colour loosely behind the work on the two colour rounds, because pulling it tight will pucker the face and drag the helmet edge down over the eyes
THE PATTERN
Head and Helmet
- Round 1: With grey yarn, make a magic ring, work 6 single crochet (sc) into the ring, slip stitch (sl st) to the first stitch, chain (ch) 1 [6 sts]. Pull the ring closed tightly now, since a loose centre shows through the stuffing later.
- Round 2: 2 sc in each stitch around [12 sts].
- Round 3: (1 sc, increase) x 6 [18 sts]. An increase is 2 sc worked into the same stitch.
- Round 4: (2 sc, increase) x 6 [24 sts].
- Round 5: (3 sc, increase) x 6 [30 sts].
- Round 6: (4 sc, increase) x 6 [36 sts].
- Round 7: (5 sc, increase) x 6 [42 sts]. The piece should now sit flat like a small disc before the sides begin to rise.
- Rounds 8 to 11: 42 sc around [42 sts]. These four plain rounds form the dome of the helmet, and mine measured a little wider than tall at this point.
- Round 12: Work 11 sc in both loops with grey, then 20 sc in front loop only (FLO) with grey, then 11 sc in both loops with grey [42 sts]. Attach the skin coloured yarn to the 20 unworked back loops left behind and work 20 sc across them. Those 20 free back loops become the face, and the grey front loops fold forward into the helmet brim that sits across the forehead on my doll.
- Rounds 13 to 17: Work 11 sc in grey, 20 sc in skin colour, 11 sc in grey [42 sts each round]. Keep the grey strand travelling loosely behind the face panel, and the colour change line will stay straight down both sides of the head.
- Round 18: With grey work (5 sc, decrease), 4 sc, then switch to skin and work 1 sc to complete the fifth stitch, decrease, then (5 sc, decrease) x 2, then continue the (5 sc, decrease) pattern around using the matching colour for each section [36 sts]. A decrease is 2 sc worked together.
- Round 19: (4 sc, decrease) around, matching the colours of the round below [30 sts].
- Round 20: (3 sc, decrease) around, matching the colours of the round below [24 sts].
- Round 21: (2 sc, decrease) around, matching the colours of the round below [18 sts]. Fasten off the skin coloured yarn here and weave the end inside.
- Stuff the head firmly with fiberfill before closing any further, pushing small pieces into the crown first so the helmet keeps its round shape. Insert the safety eyes now if you want them low on the face like mine, roughly six stitches apart on the skin panel.
- Round 22: With grey yarn only, (1 sc, decrease) x 6 [12 sts].
- Round 23: 12 sc around [12 sts]. Fasten off leaving a long tail for sewing the head to the body.
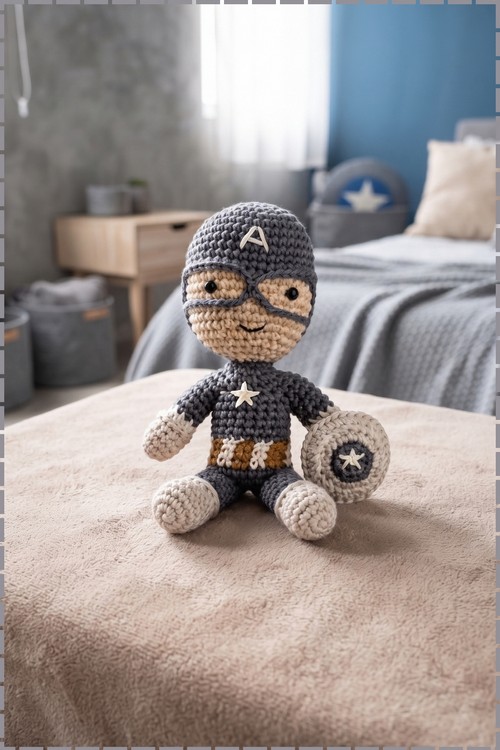
Helmet Mask Details
- Join grey yarn at the 9th stitch of the 20 skin coloured stitches to begin the centre forehead point.
- Slip stitch in the 9th stitch, 1 sc in the 10th stitch, 1 sc in the 11th stitch, slip stitch in the 12th stitch, then fasten off and weave in the ends. That short run creates the small downward point in the middle of the brow, and on my doll it sits directly under the embroidered letter.
- Attach grey yarn 3 stitches to the side of the forehead point to start the eye opening outline.
- Chain 12, then slip stitch to the centre of the forehead point.
- Chain 12, then slip stitch to the opposite side of the mask, matching the first side.
- Fasten off and secure both ends inside the head. Those two chains form the curved goggle shaped mask line that frames the eyes on my version, and they should lie flat rather than standing away from the fabric, so tug the chain gently until it hugs the face.
- Using white yarn and a yarn needle, embroider a small letter A on the grey helmet directly above the forehead point. Mine is a simple open A stitched over four rounds of the helmet, with two straight legs and one short bar.
Shield
- Round 1: With grey yarn, make a magic ring, work 6 sc into the ring, slip stitch to join, chain 1 [6 sts].
- Round 2: With grey, 2 sc in each stitch around [12 sts].
- Round 3: Switch to cream yarn and work (1 sc, increase) x 6 in back loop only (BLO) [18 sts]. My shield uses cream where the original pattern calls for red, which keeps it matching the gloves and boots.
- Round 4: Continue in cream and work (2 sc, increase) x 6 in BLO [24 sts]. Worked in one colour, rounds 3 and 4 give the wide plain outer band you can see in my photo.
- Round 5: Still in cream, work (3 half double crochet (hdc), hdc increase) x 6 in BLO [30 hdc]. Fasten off and weave the end into the back so the edge stays smooth.
- Using white yarn and a yarn needle, embroider a five point star in the centre of the grey circle, then weave the white yarn once around the star points to define the shape. Keep the stitches slightly loose, because pulling them tight cups the middle of the shield.
Assembly and Final Touches
- Position the head over the neck opening of the body and sew it on securely with the long grey tail, working all the way around twice so the head cannot tilt. Mine sits straight with the mask line level across both eyes.
- Using white yarn, embroider a five point star on the centre of the chest, a little above the belt. My star sits slightly left of centre on the doll as you look at it, which reads as the correct side once the doll faces you.
- Attach the shield to one hand by stitching through the back of the shield into the cream glove. I stitched mine to the doll’s left hand so it rests against the hip, and a few stitches through the middle of the shield keep it from spinning.
- If you want a keychain, thread a split ring through a stitch at the very top of the helmet and add your clip. Chain until any hanging cord reaches your preferred length if you would rather hang it than clip it.
- Any red and white striped shield details from other versions stay optional here, since my doll skips them entirely.
Tips and Troubleshooting
- Check your colour split before you commit to round 13. If the skin panel looks off centre, undo round 12 and count again, because every following round locks that placement in.
- Place the safety eyes just below the chained mask line rather than inside it. Mine sit right at the lower edge of the chains, which is what gives the face its friendly look.
- Stuff in small handfuls and press the stuffing outward toward the sides. One big lump makes the helmet crown pointed instead of round.
- Work the mask chains in the same yarn weight as the helmet. Anything thicker stands away from the face and hides the eyes.
- Embroider the chest star before you attach the arms if you are making the body from scratch, since flat access makes the points far easier to keep even.
- Keep your hook on the small side. My fabric is dense enough that no stuffing shows through, which matters most on the light coloured gloves and boots.
- Pin the shield to the hand and look at the doll from the front before you sew. A shield that sits half a centimetre too high reads as floating.

Yarn Substitution
Any smooth worsted weight cotton or acrylic works here. I used a matte cotton, which is why the stitch definition on the helmet stays so sharp and the embroidered star sits crisply on the surface. Fluffy or brushed yarns will bury the mask chains and the letter A, so save those for a different project. If you want the classic comic colours, swap my grey for a mid blue, the cream for white, and the mustard belt for a deeper red, keeping every stitch count exactly as written.
Customization Ideas
- Swap the grey for navy or charcoal for a stealth version, keeping the cream gloves and boots for contrast
- Embroider a star on the helmet instead of the letter A if you prefer the movie look
- Use a slightly darker mustard for the belt so it separates more from a cream body
- Add a second chained line under the mask for a heavier goggle effect
- Make the shield in three colours by changing yarn at rounds 3 and 5, since the back loop only rounds already create clean colour lines
- Leave the keychain clip off and add a small loop of chain at the crown to hang the doll from a tree or a shelf hook
FAQ
Why did my face panel come out crooked? The usual cause is miscounting the 11 stitches before the front loop only section on round 12. Count twice before working the skin colour into the back loops, since the panel position cannot be corrected later without undoing that round.
Can I use embroidered eyes instead of safety eyes? Yes. Stitch two small ovals in black yarn in the same spots, just under the chained mask line. Add a tiny white highlight stitch if you want the same glint my safety eyes give.
My mask chains keep standing away from the head. What went wrong? The chains are probably too tight or too loose relative to the head. Work them at a relaxed tension and pull the anchoring slip stitches firmly so the chain settles flat against the fabric.
Do I need a body pattern to make this? The rounds here cover the head, the helmet details and the shield. My body, arms and legs came from a separate basic amigurumi body, so plan for one if you want the full doll rather than the head alone.
How do I keep the white star from disappearing into the chest? Use a doubled strand of white yarn for the embroidery and keep each point as one long straight stitch. Short overlapping stitches blur the shape from a distance.