Crochet Bakery Items Keychain Free Pattern
A miniature bakery counter comes to life with three bright red treats: a sprinkled cookie, a crescent croissant, and a looped pretzel, each finished with tiny embroidery and its own silver clasp. For another playful clip-on make, try this red crochet ball keychain.
Bag charm swappers and food craft collectors both take to the Crochet Bakery Items Keychain, since three shapes come out of one pattern. Beginners get the round bun. Anyone confident with rings goes for the doughnut. Give a Crochet Bakery Items Keychain set to a friend who bakes and watch her attach all three.
Crochet Bakery Items Keychain
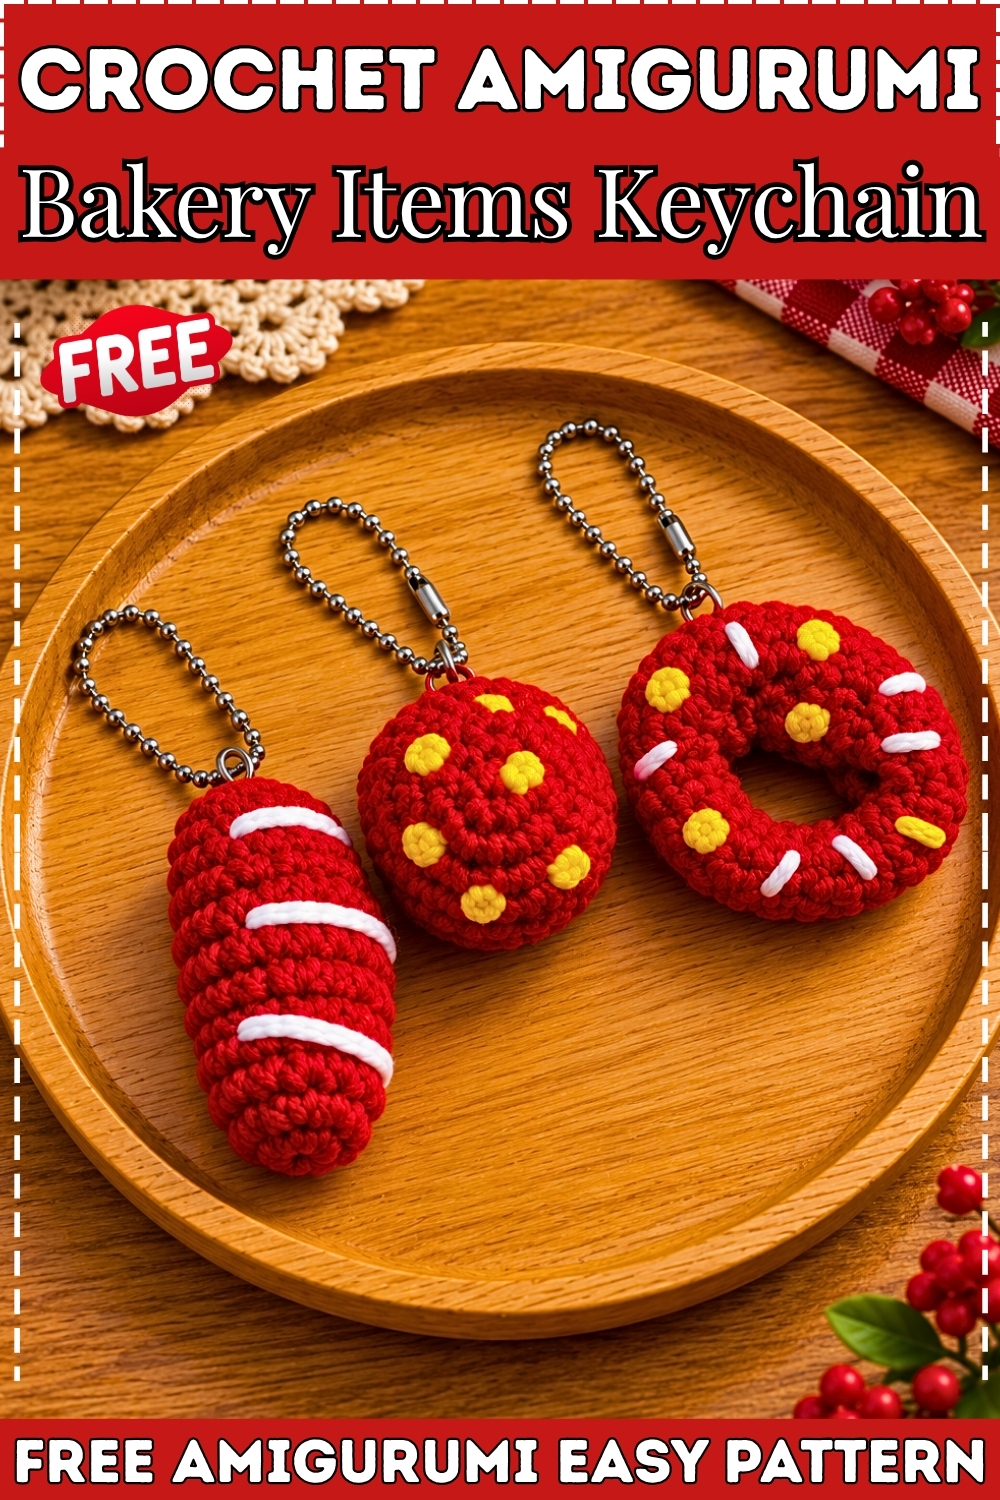
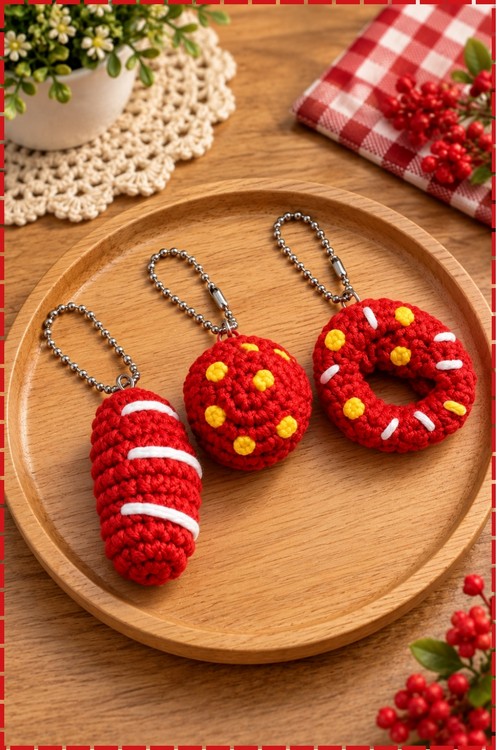
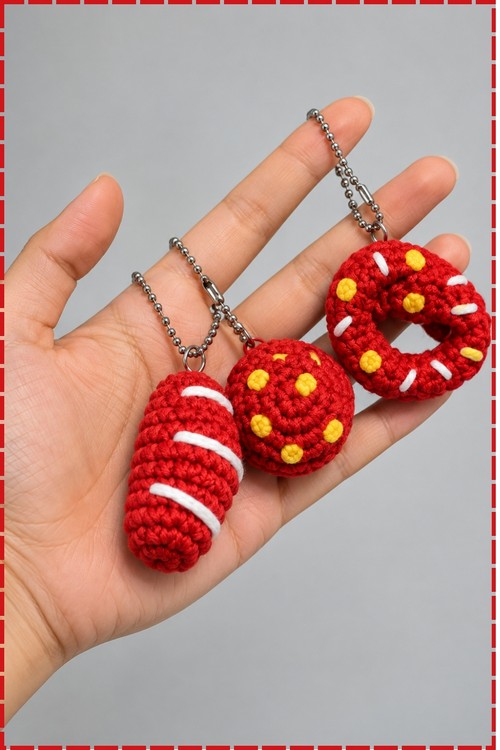
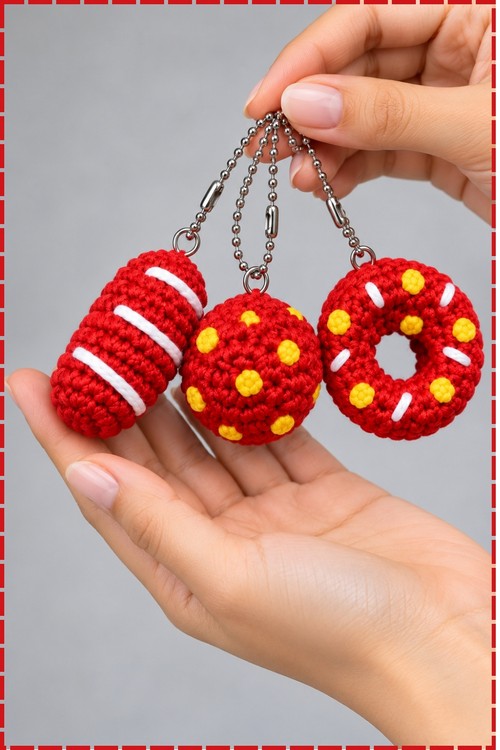
Three miniature bakery pieces sit together on a wooden tray in this crochet bakery items keychain set, each one attached to a ball chain with a silver clasp. My versions all come out in solid red with yellow and white embroidered details rather than the natural tan and brown tones the original pattern suggests. The cookie reads as a round stuffed disc with yellow dot sprinkles and a white smile line. The croissant becomes a crescent shaped piece with white stripe accents. The pretzel forms a looped tube with white salt detail stitches. Each piece clips to a bag or keys on its own.
Materials and Tools
- DK or sport weight yarn in red for all three pieces. My photo shows a consistent solid red used across the cookie, croissant and pretzel.
- Small amounts of yellow yarn for embroidering the dot details on the cookie and the pretzel.
- Small amounts of white yarn for embroidering the stripe and smile accents on all three pieces.
- A small crochet hook suited to your yarn weight. The pattern uses a hook that keeps stitches tight enough to hold stuffing without gaps.
- Polyester fiberfill for stuffing the cookie and the croissant.
- Ball chain keychains with silver clasps, one per piece. My photo shows ball chain rather than the PVC pouch assembly described in the original pattern.
- A tapestry needle and scissors.
Abbreviations
- MR means magic ring.
- sc means single crochet.
- inc means increase, which is 2 sc into the same stitch.
- dec means decrease, which is sc2tog worked across 2 stitches.
- BLO means back loop only.
- FLO means front loop only.
- A number in parentheses is the total stitch count at the end of that round.
Difficulty and Time
Each piece is small and quick. The cookie is the most straightforward of the three, using only increases and then decreases with one BLO ridge round. The croissant has a slightly more complex shaping sequence but nothing technically hard. The pretzel is 33 rounds of 6 sc in a tube, which is repetitive rather than difficult, and the final shaping is done by hand. In my experience each piece takes 30 to 45 minutes, so the full set of three sits comfortably inside an afternoon. The embroidery on all three pieces adds around another 20 minutes total.
The Pattern
Chocolate Chip Cookie
- Round 1: Work a MR and make 6 sc into the ring. (6)
- Round 2: [inc] x 6. (12)
- Round 3: [1 sc, inc] x 6. (18)
- Round 4: [2 sc, inc] x 6. (24)
- Round 5: [3 sc, inc] x 6. (30)
- Round 6: Working in back loop only, repeat [3 sc, BLO dec] x 6. (24) Working BLO in this round creates the ridge that defines the edge of the cookie and separates the top surface from the side wall.
- Round 7: Working in both loops, repeat [2 sc, dec] x 6. (18)
- Round 8: [dec] x 9. (9)
- Stuff the cookie firmly with fiberfill before closing. Pack more stuffing than looks necessary, because the final closure round will compress it.
- Fasten off, cut the yarn, and thread the tail through the front loops only of the remaining 9 stitches to pull the hole closed.
- Embroider yellow dot details across the top surface using yellow yarn to represent the sprinkles visible in my photo. My version has roughly 6 to 8 dots spread across the face.
- Embroider a short curved white line across the center of the top surface for the smile detail visible in my photo.
Croissant
- Round 1: Work a MR and make 6 sc into the ring. (6)
- Round 2: [inc] x 6. (12)
- Rounds 3 to 4: 1 sc in each stitch around for both rounds. (12)
- Round 5: 4 sc, [inc] x 3, 5 sc. (15) The increases all land on the same section of the round, which is what starts the curved crescent shaping.
- Round 6: 4 sc, [1 sc, inc] x 3, 5 sc. (18)
- Rounds 7 to 8: 1 sc in each stitch around for both rounds. (18)
- Round 9: 4 sc, [1 sc, dec] x 3, 5 sc. (15)
- Round 10: 4 sc, [dec] x 3, 5 sc. (12)
- Add fiberfill stuffing inside the body at this point. Getting stuffing in now is easier than waiting until the piece narrows further.
- Rounds 11 to 12: 1 sc in each stitch around for both rounds. (12)
- Round 13: [dec] x 6. (6)
- Add extra stuffing if needed, cut the yarn, and weave through the front loops only to close the end.
- Curve the piece gently into a crescent shape and hold it in place for a moment to encourage the stuffed body to set in that position.
- Embroider two or three white horizontal stripe accents across the surface using white yarn, as visible in my photo.
Pretzel
- Round 1: Work a MR and make 6 sc into the ring. (6)
- Rounds 2 to 34: 1 sc in each stitch around for all 33 rounds. (6) Keep your tension slightly looser than usual so working into a narrow 6-stitch tube stays comfortable across all 33 rounds. A tight gauge here makes the tube stiff and hard to shape later.
- Fasten off leaving a long tail for sewing.
- Weave the tail through the front loops only to close the open end of the tube.
- Fold the long tube into a pretzel loop shape, crossing the two ends over each other and tucking them down to form the classic pretzel silhouette. Secure the overlapping points using the yarn tail and a tapestry needle, taking several stitches through the joins to hold the shape.
- Embroider small yellow dot details across the surface using yellow yarn for the salt speck effect visible in my photo. My version uses yellow rather than the white suggested in the original.
Keychain Assembly
- Attach a ball chain clasp to the top of each finished piece. My photo shows each piece connected to its own individual ball chain rather than the PVC pouch assembly described in the original pattern.
- The cookie, croissant and pretzel each hang independently as separate keychains, and together they form a matching set as displayed on the tray.
- The PVC zipper pouch assembly described in the original pattern is an alternative option if you prefer all three pieces together in a single bag keychain.
Tips and Technique Notes
The BLO round on the cookie is the step most likely to be worked incorrectly by feel. Insert your hook under the back loop only, which is the loop sitting furthest away from you as you work. If the ridge does not appear clearly on the outside of the cookie after the round, check that you did not accidentally work both loops on some stitches.
Keep a stitch count every single round on the pretzel tube. Thirty-three rounds of 6 sc is meditative and easy to lose track of inside. Use a row counter app on your phone or make a physical tally mark for each completed round.
Shaping the pretzel takes patience more than skill. The tube needs to be flexible enough to bend without cracking open. If it feels too stiff to shape, your tension was too tight across the tube rounds. Lightly blocking the tube with water before shaping can help.
Use a fine needle for the embroidery on all three pieces. A tapestry needle with too large an eye will drag through the tight single crochet fabric and distort the surface. If your needle is pulling the stitches, try going down a needle size.

Customization Ideas
- Work each piece in natural tan, brown and cream for a realistic bakery look instead of the all-red version.
- Add a tiny face to the cookie by embroidering two small black French knot eyes and a curved mouth.
- Make the pretzel in a warm golden yellow with white salt dots for a sunflower-adjacent colourway.
- Use the pieces as bag charms rather than keychains by attaching a lobster clasp instead of a ball chain.
- Make a fourth piece such as a small cinnamon roll or a macaron to extend the set.
Frequently Asked Questions
- Can I skip the stuffing on the pretzel? Yes. The pretzel tube in this pattern stays at 6 stitches throughout and does not need stuffing to hold its shape once it is folded and sewn. Leaving it unstuffed actually makes it easier to fold into the pretzel shape, since an unstuffed tube is more flexible.
- My cookie is coming out more like a dome than a flat disc. What went wrong? The BLO round 6 is what creates the flat bottom edge of the cookie. If that round was worked through both loops instead of back loops only, the shaping ridge will not appear and the cookie will stay dome shaped. The fix is to undo back to round 6 and rework it correctly.
- How do I stop the pretzel from coming undone after shaping? Take at least 4 to 5 stitches through each join point where the tube crosses itself, not just 1 or 2. Going through both layers of the tube rather than just the surface makes the join hold under regular handling.