
Free Crochet Voodoo Doll Amigurumi Pattern
The Crochet Voodoo Doll Amigurumi is a small Halloween make with button eyes and embroidered details – endlessly recolor-able and quick enough to become a seasonal staple. Free pattern below.
The Crochet Voodoo Doll Amigurumi keeps appearing in Halloween roundups because it reads as spooky without needing much to get there. Button eyes, a few embroidered cross stitches, a pin through the body, the detail list is short and the effect lands anyway.
Crochet Voodoo Doll Amigurumi

It also makes well in any color, which means makers come back to it repeatedly just to see what a different yarn does to the same pattern. Small enough to finish in a sitting. That helps too.
Before You Cast On: Date Math
Time to make one: 2–3 hours for an experienced crocheter; 4–5 hours if you’re going slowly and doing embroidery detail. Batch of six: Plan a full weekend — roughly 12–18 hours total, less if you do assembly-line style. Last safe start date: You can begin three days before Halloween and still finish a single doll. For a set of six to decorate a shelf or fill a bowl, give yourself at least ten days.
Where This One Lives
- A voodoo doll amigurumi earns its place exactly where Halloween décor tends to go flat. Drop three into a shallow black bowl on an entryway table — different colourways, one with pins sticking out of it — and the effect is genuinely unsettling in the best way. They work pinned to a wreath alongside dried oranges and cinnamon sticks. They cluster well on a tiered tray between battery candles. Because they’re compact and keychain-sized, you can also loop one off a cabinet knob, a gift bag handle, or a lantern hook without it looking forced.
- The stitched cross-eyes are what people clock first. Make those clean and slightly uneven — one higher than the other — and the whole doll reads creepier without any extra effort.
What You’ll Make
- Legs × 2
- Body × 1 (joined from legs)
- Head × 1
- Arms × 2
Finished size: Small — keychain or pincushion scale. Exact dimensions depend on your yarn weight and hook size.
Materials:
- Worsted or DK weight yarn in your chosen colourway
- Matching hook size (typically 3.5–4.0 mm for worsted)
- Polyester fiberfill stuffing
- Safety eyes OR embroidery floss for eyes (see Safety Eye Timing below)
- Embroidery floss in 2–3 colours for face details (cross-eyes, mouth, heart patches)
- Buttons (optional, for decorative detail)
- Stitch marker
- Tapestry needle
- Scissors
- Keychain ring (optional, if finishing as keychain)
Abbreviations:
- sc — single crochet
- inc — increase (2 sc in one stitch)
- dec — invisible decrease (or standard decrease joining 2 stitches)
- MR — magic ring
- ch — chain
All pieces worked in continuous rounds. Use a stitch marker to track round beginnings. Work in both loops unless noted.
Safety Eye Timing
- Safety eyes on this doll go in during Head Round 10, before the decreasing rounds close the sphere too much to reach inside comfortably. Insert and secure them at that point, then continue decreasing and stuff before closing.
- For any doll going into a treat bag, party favour, classroom, or the hands of a child under three, skip safety eyes entirely. Embroider the cross-eyes instead using three strands of embroidery floss — they’re actually more characterful anyway, and impossible to pull loose.
The Pattern
Head
- Round 1: MR, 6 sc into ring. Pull tight. (6)
- Round 2: Inc in every stitch around. (12)
- Round 3: [1 sc, 1 inc] repeat around. (18)
- Round 4: [2 sc, 1 inc] repeat around. (24)
- Round 5: [3 sc, 1 inc] repeat around. (30)
Shape checkpoint — after Round 5: You have a flat disc with a gentle curve at the edges. It should lie almost fully flat on a table. If it’s cupping deeply upward, your tension is tight; if it’s completely flat with no bowl at all, loosen slightly.
- Rounds 6–10: Sc in each stitch around. (30 per round)
Shape checkpoint — after Round 10: The piece should now look like a shallow dome — a rounded cap. This is the point to insert safety eyes if using them. Place them roughly centred, spaced a few stitches apart, and secure the backs firmly before continuing.
- Round 11: [3 sc, 1 dec] repeat around. (24)
- Round 12: [2 sc, 1 dec] repeat around. (18)
- Round 13: [1 sc, 1 dec] repeat around. (12)
- Round 14: [1 dec] around. (6) [CHECK — source implies 9 stitches prior to this round closing to 6; verify your count before this round]
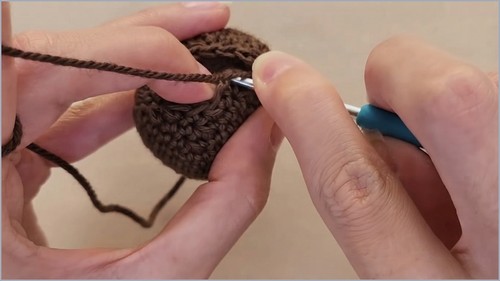
Fasten off and weave in end. Stuff the head firmly before the opening closes fully. You do not need a long tail here — the body’s tail does the joining.
Legs (Make 2)
- Round 1: MR, 6 sc into ring. Pull tight. (6)
- Round 2: [1 sc in each of the first 2 stitches, 1 inc in the 3rd stitch] repeat around. (8)
- Rounds 3–6: Sc in each stitch around. (8 per round)
Shape checkpoint — after Round 6: Each leg should look like a small, stubby tube — barely an inch tall if using worsted. They’ll feel floppy and unstuffed at this stage. That’s correct; they get stuffed after joining.
For Leg 1: Fasten off completely and set aside. For Leg 2: Do not fasten off. Continue directly into body joining.
Body (Joined from Legs)
Round 7 — Joining round (worked from Leg 2):
- 4 sc across Leg 2
- ch 1
- 8 sc all the way around Leg 1
- 1 sc into the back of the ch just made
- 4 sc to complete Leg 2 (18)

Shape checkpoint — after joining: The two legs should dangle below a flat oval base. Before moving on, reach into the leg openings and pack stuffing firmly into the tiny spaces at the base. This is easier now than later.
- Rounds 8–11: Sc in each stitch around. (18 per round)
Shape checkpoint — after Round 11: The body tube should be standing up on its joined legs and looking like a rounded, slightly lumpy barrel. Stuff the legs firmly through the body opening now if you haven’t already.
- Round 12: [4 sc, 1 dec] repeat around. (15)
- Round 13: [3 sc, 1 dec] repeat around. (12)
- Round 14: [2 sc, 1 dec] repeat around. (9)
Fasten off, leaving a long tail for sewing the head on. Add stuffing to the body before the opening closes too far to reach.
Arms (Make 2)
- Round 1: MR, 6 sc into ring. Pull tight. (6)
- Rounds 2–7: Sc in each stitch around. (6 per round)
- Fasten off, leaving a long tail for sewing. Lightly stuff the arms — these stay soft, not firm. Fold the opening flat and sew straight across the top edge to close before attaching.
Assembly
Work in this order to avoid running out of good anchoring points:
Head to body
- Align the 9 remaining stitches of the body opening against the base of the head. Using the long tail left from the body, sew around the join securely. Pin first, rotate to check the angle, then sew. The head should sit upright without flopping.

Arms
- Attach the flattened, closed tops of the arms to the sides of the upper body, roughly level with the neck join. Pin both in place before sewing either — getting them symmetrical is much harder to fix after the first one is secured.
Face embroidery
- Use three strands separated from a six-strand length of embroidery floss. Cross-eyes, a simple stitched mouth, and any heart patch or “voodoo pin” marks all go in now, while the doll is assembled and you can see proportions clearly.
Stuffing Notes
- Head: Firm. It needs to hold its round shape under the embroidery without denting.
- Body: Medium-firm. You want it to stand, but the slightly squishy feel is part of what makes these satisfying to handle.
- Legs: Pack firmly during assembly — the small tubes collapse without it.
- Arms: Light only. Overstuffed arms stick out awkwardly and don’t drape naturally.
The Character Dial
- This is the section that determines whether your voodoo doll reads as Halloween prop or cute companion — and there’s a lot of ground between those two poles.
- Push it creepier: Work the body in a desaturated, almost-grey green or a dirty mustard. Use mismatched safety eyes if you’re going for adult décor — one slightly larger than the other, placed unevenly. Embroider the mouth with loose, uneven stitches that look like they were made in a hurry. Add small X marks across the body in a rust-red floss to suggest pin wounds. A single strand of thin black yarn for “stitches” running across the forehead lands hard. Keep buttons small and dull, not shiny.
- Pull it sweeter: Go for a warm sage or dusty rose body. Embroider a tiny heart on the chest in a bright contrast. Make the cross-eyes perfectly even and centred, and add small round cheeks with a blush of pink embroidery. Use a pastel button on the body instead of an X mark. This version reads more folk art than horror — it works in a farmhouse Halloween spread without committing to the scary.
- The uncanny middle ground — where most people end up and where this doll is most interesting — is keeping the construction clean and precise but leaning into one uncomfortable detail: that stitched mouth that’s just a little too wide, or a pin placed exactly where you’d expect. Restraint in most places makes one strange detail land much harder.
Colourways
- Classic burlap: Natural oatmeal body, rust-red embroidery, dark brown eyes, cream arms and legs. Reads like something you’d find in an antique shop.
- Poison garden: Deep forest green body, yellow-gold stitching, black button eyes, one arm slightly longer than the other for full unease. Pair with dried florals on a shelf.
- Night market: Charcoal grey body, bright teal cross-eyes embroidered, cobalt blue heart patch, silver button. More graphic than spooky — works in a modern Halloween display.
- Candy corn accident: Warm orange body, yellow top of head, white legs. Not frightening at all, which is its own kind of strange for a voodoo doll.

Display Ideas
- Three different colourways dropped loosely into a small cast-iron cauldron on a mantel.
- Pinned to a wreath of dried wheat and dark ribbon, face forward.
- Lined up along a windowsill with battery tea lights behind them at night.
- Tied to gift wrap instead of a bow — especially effective on kraft paper.
- On a tiered tray between small pumpkins and a black taper candle.
- Looped as a keychain on a bag or hung from a car mirror if you lean into the spooky-cute read.
After Halloween
These pack well. The main vulnerability is the embroidery floss detail — if you’re storing dolls together, wrap each one loosely in tissue before putting them in a box, so the stitching doesn’t snag. A small cedar block in the box keeps moths off the yarn. Store away from direct light to prevent colour fade, especially on the brighter colourways. Pull them out the following September and they’ll look exactly as they did the year before.
Quick Answers
Can I use this as an actual pincushion? Yes — the firmly stuffed head and body both work well for holding pins. Use the body version rather than the keychain version if this is your goal, and stuff the body a little more firmly than the pattern suggests so pins don’t push all the way through.
What yarn weight makes the cutest one? DK gives a slightly more refined finish with finer embroidery detail. Worsted makes a chunkier, more rustic doll that works better in a group display. Both read well.
How do I make the stitched mouth look good? Use three strands of floss, not six — the thinner line looks more deliberate. Make the centre stitch first, then extend outward, keeping the corners turned very slightly downward. Practice on a scrap of felt first if you haven’t done embroidery on curved surfaces before.


