Christmas Tree Garland Crochet Pattern Free
Small flat trees string onto one long chain, so this crochet christmas tree garland pattern grows to whatever length your mantel needs. Scraps of green cover the whole run, and a few metres finishes in an evening.
Length is what you decide first on a garland, and this christmas tree garland crochet pattern free is built as repeating motifs joined along a chain so you stop wherever your tree or mantel runs out. Each small tree works flat as a triangle, then the finished pieces string onto a long foundation chain with even spacing between them. Cotton holds the shape better than acrylic here. Count the gaps rather than measuring, since even spacing reads as neat even when the total length is guesswork.
Crochet Christmas Tree Garland
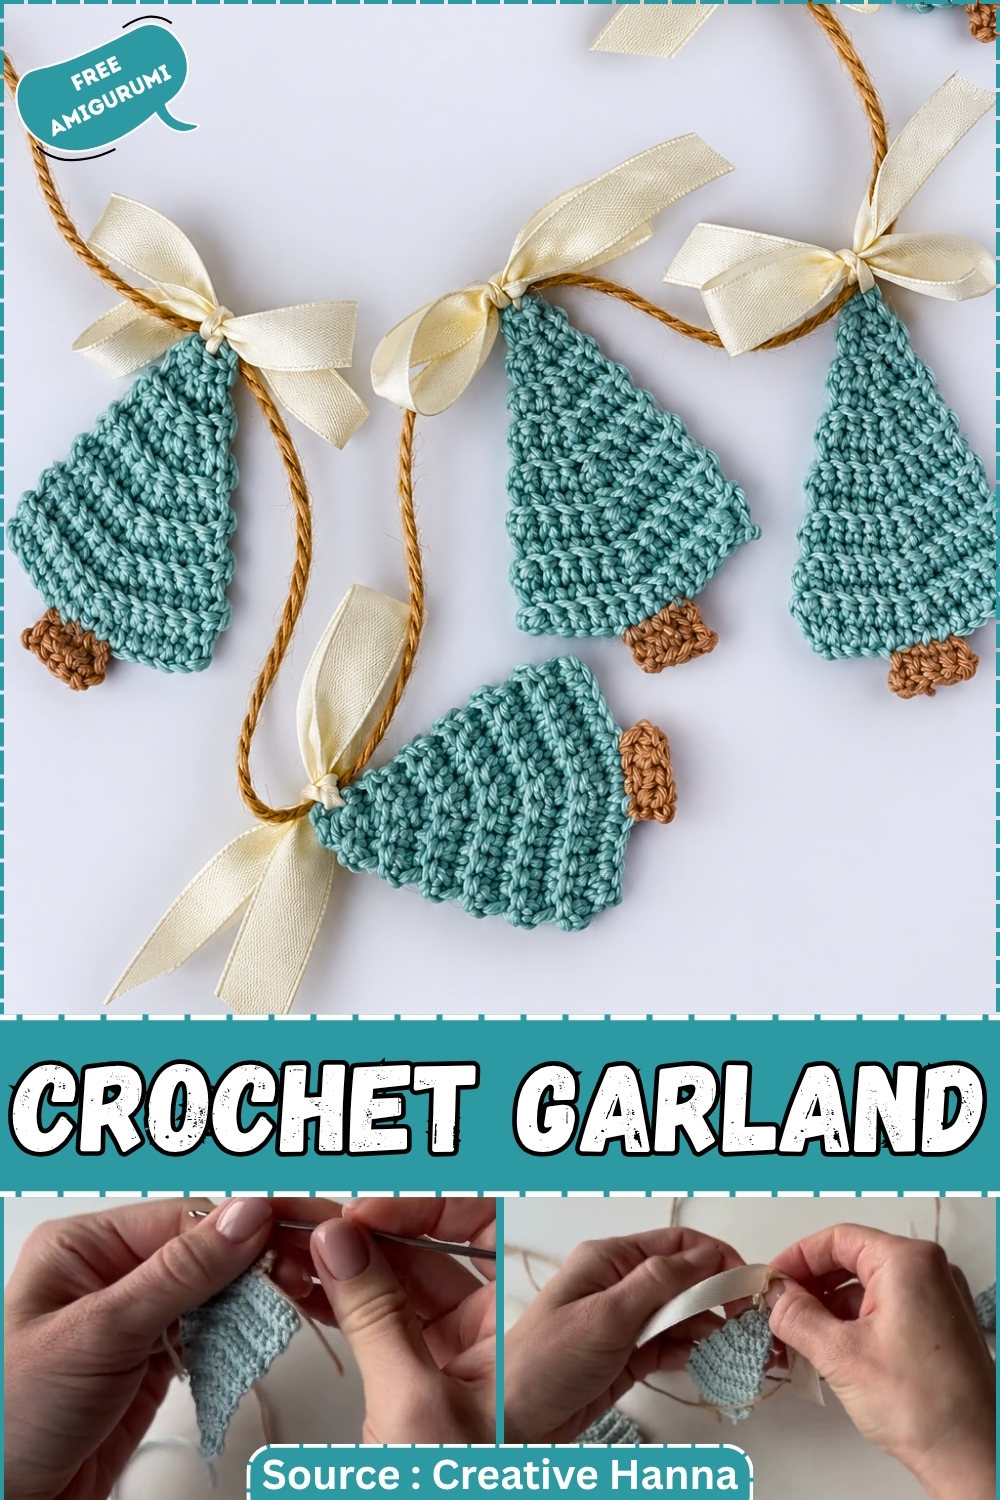
Twelve trees by Friday is a smaller problem than it sounds. Each tree is a flat panel worked in rows, seven or eight of them, with a trunk that takes about ninety seconds and a taper that does most of the shaping for you. The real time sink is not the crochet. It is blocking, and blocking runs unattended while you crochet the next handful. Work them in a line instead of one at a time and a mantel-length garland comes together over one evening and one morning. Nothing gets stuffed. Nothing gets sewn closed.
The Countdown
- One tree, start to finished and ends woven in: 15 to 20 minutes at a comfortable pace, a little under 12 once you have made five or six and stop rereading the rows.
- A batch of six: roughly 2 hours of hands-on time, plus overnight for blocking to dry, plus 15 minutes to string them.
- A batch of twelve: about 3 hours 30 minutes of hands-on time, realistically split across two sittings.
- Latest sensible start for a six-tree garland: three days out. Two of those days are just drying time and you can steal them.
- Latest sensible start for a twelve-tree garland: five days out. Push it closer than that and you will be stringing damp trees, which stretch and hang crooked.
- Gift deadline note: if this is going in the post, add four days on top for the trees to fully dry flat under weight before you fold them into a box.
What You Need
- Worsted weight yarn in green for the trees. Acrylic or an acrylic blend holds a blocked point better than pure wool here.
- Worsted weight yarn in brown for the trunks. A very small amount.
- Worsted or DK yarn for the garland string. DK hangs lighter and lets the trees sit forward instead of sinking into the chain.
- 5.00 mm (US H/8) hook, or whatever hook gives you a firm fabric with no gaps between rows.
- Tapestry needle.
- Scissors.
- Blocking mats and pins, plus a steamer or a steam iron you can hold above the work.
Abbreviations
- ch: chain
- sc: single crochet
- hdc: half double crochet
- puff st: puff stitch
- sc2tog: single crochet two stitches together
- st / sts: stitch / stitches
- RS: right side
Pieces List
- Tree body: 12 (one per tree on the garland)
- Trunk: 12, one worked directly onto the base of each tree body
- Garland string: 1, worked last, with the trees joined in as you go
- Optional star or bead topper: 1, if you want an end feature
The Pattern
The source video never speaks its stitch counts or its exact row sequence out loud, so the counts below are marked wherever the original was unclear. The taper is the part to trust: one decrease at each edge on the shaping rows until the top narrows to a blunt two or three stitches. Everything flagged is safe to adjust to your own yarn, and the trees will still match each other as long as you keep every tree in the batch on the same numbers.
Christmas Tree Body (make 12)
- Row 1: Ch 15, sc in the 2nd ch from the hook and in each ch across, turn. (14) [CHECK — foundation chain length not stated in source. Ch 15 gives a tree roughly 3 in wide in worsted weight. Adjust up or down in odd numbers so the puff rows stay centred.]
- Row 2: Ch 1, hdc in each st across, turn. (14) Checkpoint: the panel is still a plain rectangle at this stage, with straight sides and no visible taper. If it is already narrowing, you have picked up a decrease by accident.
- Row 3: Ch 1, sc in the first st, then work puff st, ch 1 across to the last st, sc in the last st, turn. [CHECK — puff spacing and count unclear in source]
- Row 4: Ch 1, sc2tog over the first 2 sts, sc in each st across to the last 2 sts, sc2tog, turn. (2 sts decreased)
- Row 5: Ch 1, sc2tog, hdc in each st across to the last 2 sts, sc2tog, turn. (2 sts decreased) Checkpoint: hold the panel up. Both edges should now sit clearly inside row 1, and the outline should read as a wide triangle rather than a rectangle with clipped corners.
- Row 6: Ch 1, sc in the first st, puff st, ch 1 across to the last st, sc in the last st, turn. [CHECK — count unclear in source]
- Row 7: Ch 1, sc2tog, sc in each st across to the last 2 sts, sc2tog, turn. (2 sts decreased)
- Row 8: Ch 1, sc2tog, work 2 puff sts, sc2tog, turn. [CHECK — the source ends with “a couple of puff stitches” without a number. Two is what the shaping supports.]
- Row 9: Ch 1, sc in each st across. Fasten off, leaving a 6 in tail at the top point for anchoring to the garland later. Checkpoint: the top should finish as a blunt tip 2 or 3 sts wide, not a single stitch. A single-stitch point collapses when the garland hangs and the tree twists sideways on the string.
- Note: work all 12 tree bodies to identical row counts before moving on. Mixed row counts are the one error that will not block out.
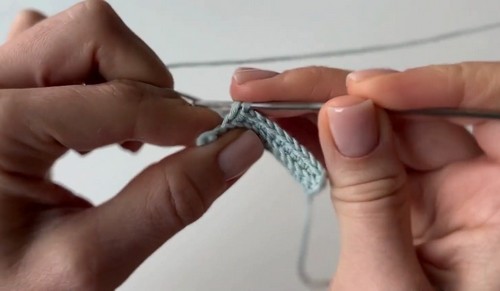
Tree Trunk (worked onto each tree body, make 12)
- Turn the tree body upside down so the foundation edge sits at the top of your work.
- Row 1: Join brown yarn with a sc into the centre of the bottom edge, then work 3 more sc across, centring the group on the tree base. (4)
- Row 2: Ch 1, turn, sc in each st across. (4)
- Row 3: Ch 1, turn, sc in each st across. (4) Fasten off and weave in both ends now, while the tree is loose in your hand. Checkpoint: the trunk should be a stubby square about as tall as it is wide. Any taller and the tree hangs nose-down on the string.
- Adjust the trunk width to your foundation row: 4 sc suits a 14 st base, 5 sc suits anything wider.
Reading crochet patterns can be tricky when you’re just starting out, feel free to follow the video tutorial below instead!
Garland String (make 1, trees joined as you work)
- Lay all 12 blocked trees in a row on a table, in the order you want them hanging. Do this before you pick up the hook.
- Ch 45. This is your hanging tail. [CHECK — the source gives 45 as the tail chain but does not give a finished length. Measure against your mantel before committing.]
- Sc into the top tip of tree 1, working the hook through both loops at the centre of the top row.
- Ch 20 for the gap between trees.
- Sc into the top tip of the next tree in the line.
- Repeat the ch 20 and sc into the next tree tip until all 12 trees are attached.
- Ch 45 to match the starting tail. Fasten off. Checkpoint: hold the finished string up by both tails before weaving anything in. Every tree should hang trunk-down with its base parallel to the floor. A tree that swings crooked was anchored off-centre and takes ten seconds to unpick now.
- Weave in the two tail ends along the chain rather than trimming them short, so the tails stay flexible for tying.
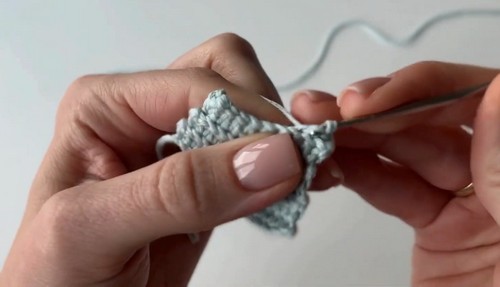
Assembly-Line Running Order
Do not work tree by tree. The setup cost of each stage is what eats the afternoon, so pay it once.
- Pass 1: chain and work row 1 on all 12 tree bodies. Leave them in a pile.
- Pass 2: work rows 2 to 9 on all 12, green yarn never leaving your hand. This is the long pass and it goes faster than you expect once row 4 stops needing a look.
- Pass 3: switch to brown and work all 12 trunks back to back, weaving in each pair of brown ends as you finish that trunk.
- Pass 4: weave in the remaining green ends on all 12. Boring, unskippable, and better done in front of something on television.
- Pass 5: block all 12 at once on the mats and walk away.
- Pass 6: lay out, then string. One continuous piece of work, about 15 minutes.
If you are making more than 12, run passes 1 and 2 in sub-batches of six. Puff stitches worked past about the ninetieth in one sitting start coming out tighter, and it shows in the finished line.
Time Per Unit and Yarn for Twelve
- Tree body: 10 to 14 minutes each, dropping to about 8 by tree number five.
- Trunk: 2 minutes each including weaving.
- Ends and tidying: 1 to 2 minutes per tree.
- Blocking: 10 minutes of setup for the whole batch, then 8 to 12 hours drying.
- Stringing: 15 minutes for a 12-tree garland.
- Green yarn: about 14 to 16 yards per tree, so roughly 180 yards for 12. One standard 200 yard skein covers a full garland with very little spare.
- Brown yarn: about 3 yards per trunk, so under 40 yards for 12. Scrap amounts are fine.
- String yarn: a 12-tree garland with ch 45 tails and ch 20 gaps runs to about 310 chains, which is roughly 45 to 55 yards depending on your chain tension.
- Buy one skein more green than the maths says if you are colour-matching. Dye lots on green are unforgiving and the mismatch only shows once all 12 hang side by side.
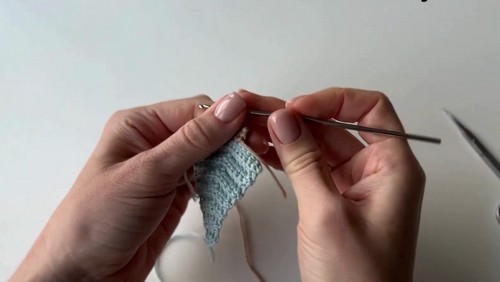
Blocking
This is the step that separates a garland from twelve curled green blobs on a string. Puff stitch rows pull the fabric in and the taper edges want to roll, and neither of those settles on its own. Pin all 12 trees flat on the mats with the points true and the trunks straight, then steam from a few inches above the work without letting metal touch acrylic. Leave them until completely dry. Trees strung damp will stretch under their own weight and hang longer at one end of the garland than the other, which you cannot fix afterwards.
Assembly
- Block first. Always. Trees strung before blocking cannot be pinned flat afterwards without crushing the string.
- Lay all trees out in hanging order on a table before you chain a single stitch. Sort by size while they are lying there, and put your two neatest trees at the ends where the eye lands.
- Anchor each sc through the centre two loops of the top row, not the corner. Corner anchoring is the reason trees swing sideways.
- Keep the ch 20 gaps consistent by counting out loud, not by eye. A gap of 18 next to a gap of 22 reads as a mistake from across the room, even though nobody can name what is wrong.
- If you are adding beads or a topper, thread them onto the string yarn before you start chaining. There is no way to add them afterwards without cutting.
- Pin the finished garland to where it will hang and live with it for an hour before weaving the tail ends in permanently. Drape changes everything about spacing.
Stuffing
Nothing here gets stuffed, which is half the reason a batch of twelve is achievable at all. The trees are flat panels and stay that way. What replaces stuffing is fabric density: if your hook is too large for your yarn the puff stitches will sag and the tree will look thin against a wall, so drop a hook size before you drop a colour. If you want a little body for a heavier garland, back each tree with a matching felt triangle cut slightly smaller and whipstitch around the edge. It doubles the make time per unit, so decide before pass 1, not after.
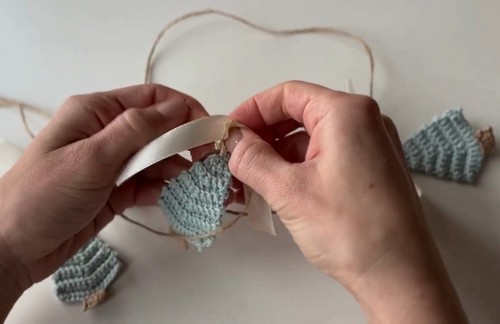
The Character Dial
Christmas trees swing between rustic and bright, and this pattern takes both without changing a single row.
- For rustic, work the trees in a heathered or tweed green, something with flecks of oatmeal or grey in it. Swap the trunk to a thick undyed cotton so it reads as bark rather than brown yarn. Use jute twine or natural cotton string for the garland instead of yarn, and let the ch 20 gaps vary slightly on purpose so the line looks hand-strung rather than measured. Wooden beads between trees do more work than any topper. Make your trees in two or three slightly different greens and alternate them along the string. Skip anything metallic entirely, and consider leaving the trees unblocked at the very tips so the points curl a little.
- For bright, go the other way and go all the way. Kelly green trees, a candy-cane string alternating red and white in short colour blocks, and a mini pompom at the top of every third tree. Hold a strand of fine metallic thread with your green for the puff rows only, so the sparkle sits on the branch tiers and not the whole panel. Tiny red beads sewn into the puff stitch centres read as baubles from a distance. A gold or white star worked as a small five-point motif on one end tree gives the line a top without making every tree fussy.
- The middle setting is a full garland in one flat green with only the trunk changing colour tree to tree. It sounds too plain and it is the version people ask about most.
Safety Eyes and Add-Ons
The base garland has no eyes, no buttons, and nothing that comes off, which makes it one of the safer decorations to hang in a house with small children. That changes the moment you add anything.
- If you turn the trees into faces or add safety eyes for a novelty version, the eye goes in before the piece is closed, and for a flat panel that means before you fasten off row 9. Backing washers cannot be seated properly through a finished blocked panel.
- For anyone under three, embroider the eyes in black yarn instead. No exceptions, and this applies even if the garland is hung high, because garlands come down and get dragged around.
- The same rule covers anything going into a treat bag, a party favour, or a classroom: embroidery only, no beads, no buttons, no pompoms glued on.
- Beads and wooden spacers on the string are a choking risk if the garland hangs anywhere a toddler can reach it. Hang high or leave them off.
- Check your anchoring stitches on a garland that will be handled. A sc into a single loop pulls out; a sc through both loops does not.
Colourways
- Forest Floor: moss green trees, oatmeal string, deep cocoa trunks. Reads as a woodland garland rather than a Christmas one, so it stays up through February without looking late.
- Nordic Frost: pale ice blue and soft white trees alternating, silver-grey string, driftwood-grey trunks. Very good against dark painted walls.
- Nutcracker: deep spruce trees, crimson string, gold beads between. The traditional palette pushed one shade darker than usual, which stops it looking like a school craft.
- Bakery Window: dusty pink and cream trees, cocoa trunks, warm caramel string. Unexpected, and the one that gets asked about in comments.
Display Ideas
- Along a mantel with the tails tied to either end and a slight dip in the centre, which needs one extra tree to look right.
- Across a bookshelf edge or the top of a doorframe, where the flat trees sit properly against the wall instead of spinning.
- Down a bannister or wrapped once around a wreath frame, using a shorter six-tree run rather than the full twelve.

After the Season
Store the garland flat, not coiled. Lay it out on a strip of tissue paper, fold the tissue over the trees, and roll the whole thing loosely around a cardboard tube from the middle of a wrapping paper roll. Blocked acrylic holds its shape for years if it is not creased, and a crease across a puff stitch row never quite steams out. Keep it out of the loft if you can, since heat cycling makes acrylic go limp. A pillowcase in a cupboard is better than a plastic box, which traps damp and leaves the brown trunks smelling of storage by next November.
Quick Answers
- How many trees do I actually need for a normal mantel? Measure the mantel and divide by seven inches, which is roughly one tree plus one gap at these numbers. Most standard mantels land somewhere between eight and eleven trees. Make twelve anyway so you have a spare, because there is always one tree you like less than the others.
- Can I skip the blocking? You can, and the garland will look like you skipped it. The puff rows curl inward and the trees hang as narrow wedges rather than triangles. If you genuinely have no mats, pin them to an ironing board covered with a towel and steam from above. It is the same job with worse equipment.
- My trees came out different sizes even though I followed the same rows. That is tension drift, and it happens to everyone across a batch of twelve. Blocking pulls most of it back into line. For the rest, hang the largest tree in the centre and work outward by size, which turns the inconsistency into something that looks deliberate.